Acumatica – Connection Guide
The latest enterprise resource planning solution release from Acumatica is designed to help customers like you innovate. Get the full story in this Mint Jutras report.

How to connect to Acumatica
Acumatica registers OAuth apps per instance rather than centrally — there is no single shared Apideck app you authorize against. To connect, you register your own Connected Application inside your Acumatica instance, then enter its Client ID, Client Secret, and your instance URL into Apideck Vault to complete the connection.
Prerequisites
- An Acumatica instance (cloud or self-hosted) with the Web Services API enabled.
- An Administrator role, or a custom role granted API/Web Services permissions.
Register a Connected Application in your instance
1. Open the Integration page
Log in to your Acumatica account and go to the Integration page from the navigation menu.
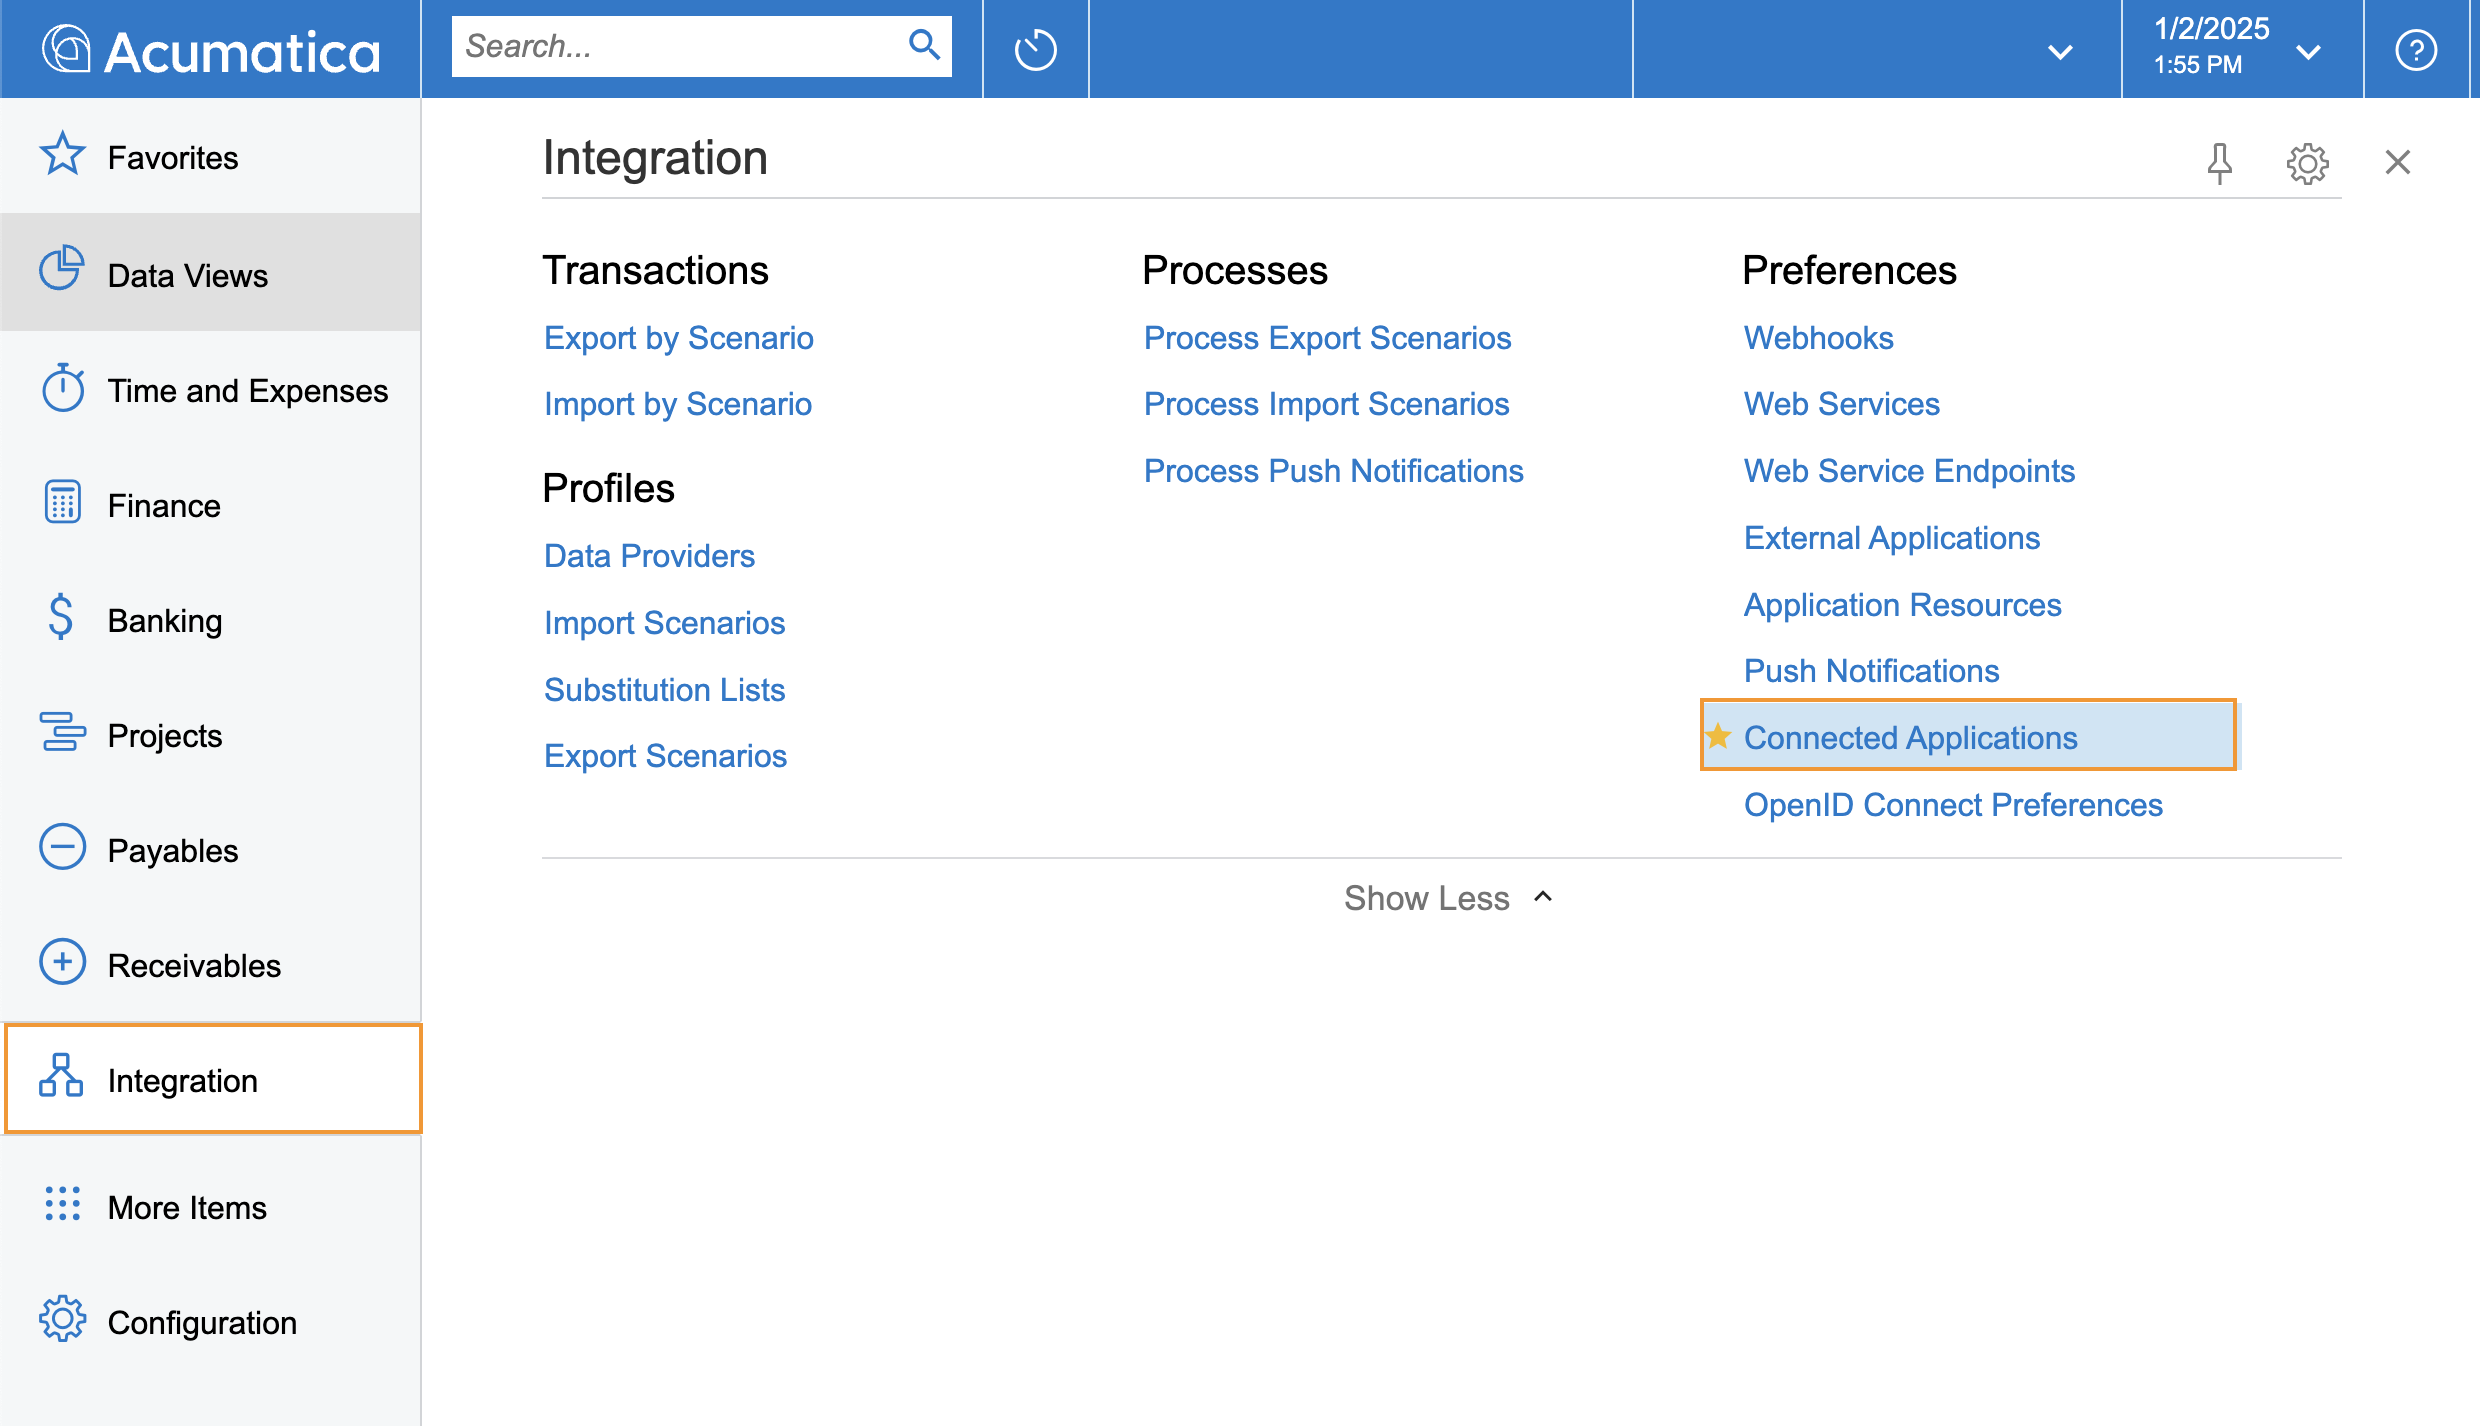
If you can't find the Integration page, click More Items, then Integration.
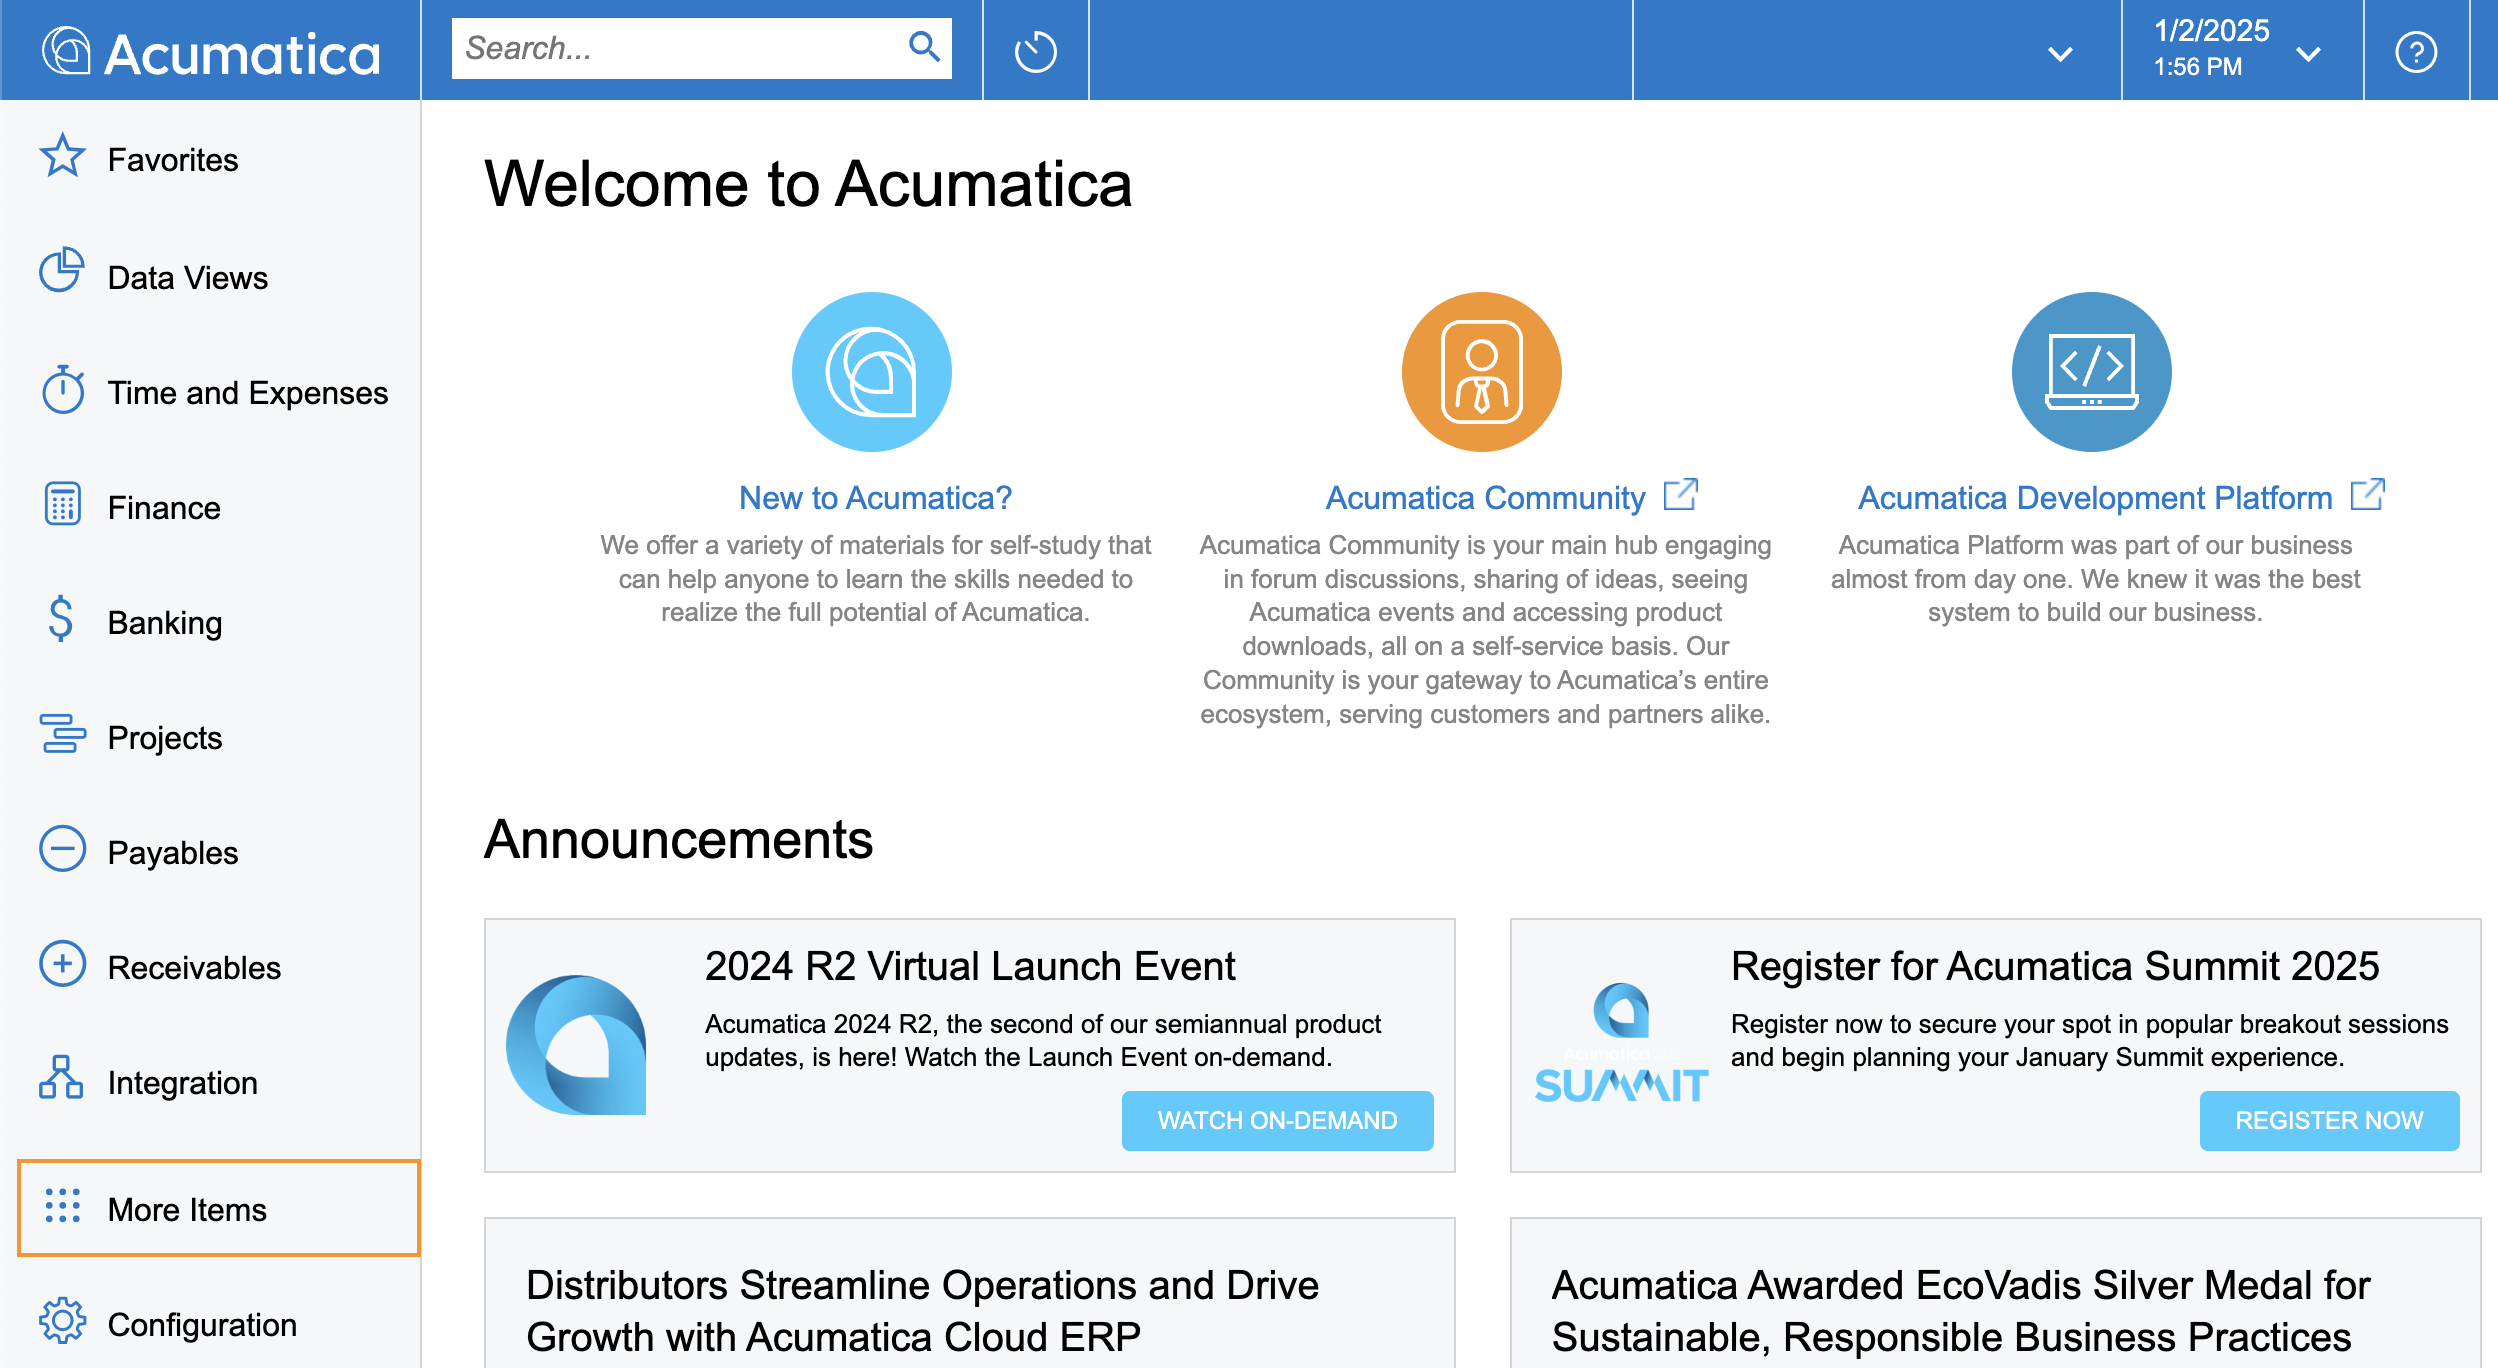
Click Connected Applications under Preferences.
2. Enter app details
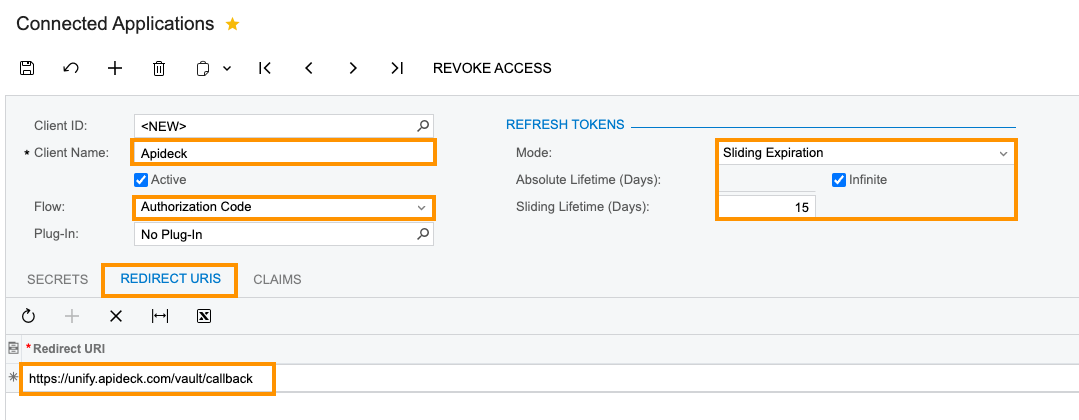
Create a new app and enter its registration information:
- Client Name - Enter a meaningful application name that will be displayed to your users. Most of the time, this should be your company's name.
- Flow - Select Authorization Code
- Refresh Tokens - Select Sliding Expiration (available on Acumatica ERP 2023 R2 and later). With sliding expiration, each time Apideck refreshes the connection the refresh token's validity is extended by the Sliding Lifetime you set, up to the Absolute Lifetime — or indefinitely if you set Absolute Lifetime to Infinite. Because Apideck refreshes the token automatically while the connection is in use, set Absolute Lifetime to Infinite and choose a Sliding Lifetime comfortably longer than the longest expected gap between syncs, so an actively used connection does not lapse. The exact Sliding Lifetime value is your choice — it is not a fixed Acumatica default. On instances earlier than 2023 R2, Sliding Expiration is unavailable and the refresh token has a fixed 30-day lifetime (per Acumatica's documentation); the connection then stops working after 30 days and you must re-authorize it in Apideck Vault.
- Redirect URI - Click on REDIRECT URIS and add
https://unify.apideck.com/vault/callbackas the redirect URI. This is the default redirect URI for Apideck. - Scopes - Leave the default scopes as offered (
openid,email,profile,phone,api,offline_access).offline_accessis required — it's what allows Apideck to refresh the connection automatically.
3. Generate Client Secret
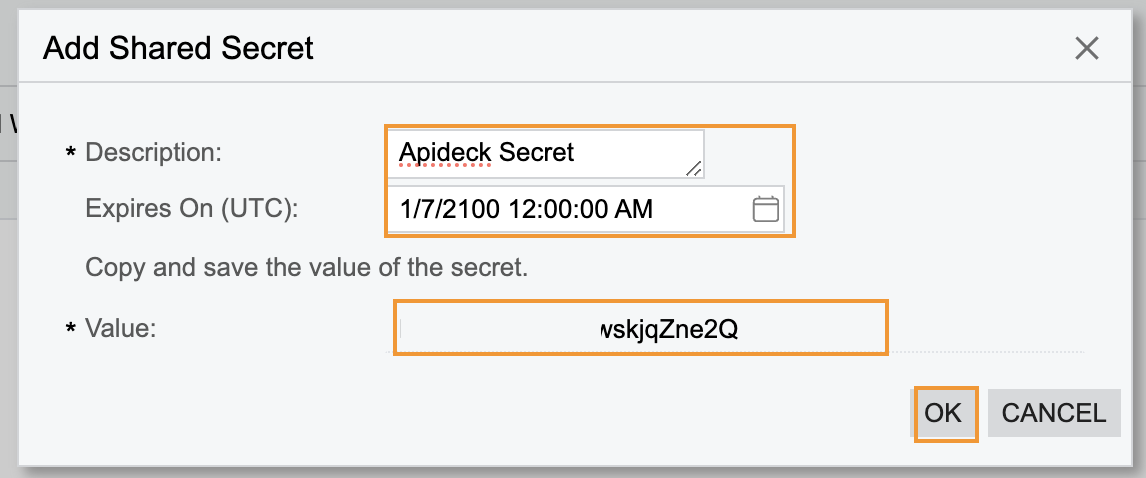
Navigate to the SECRETS section and click on Add shared secret
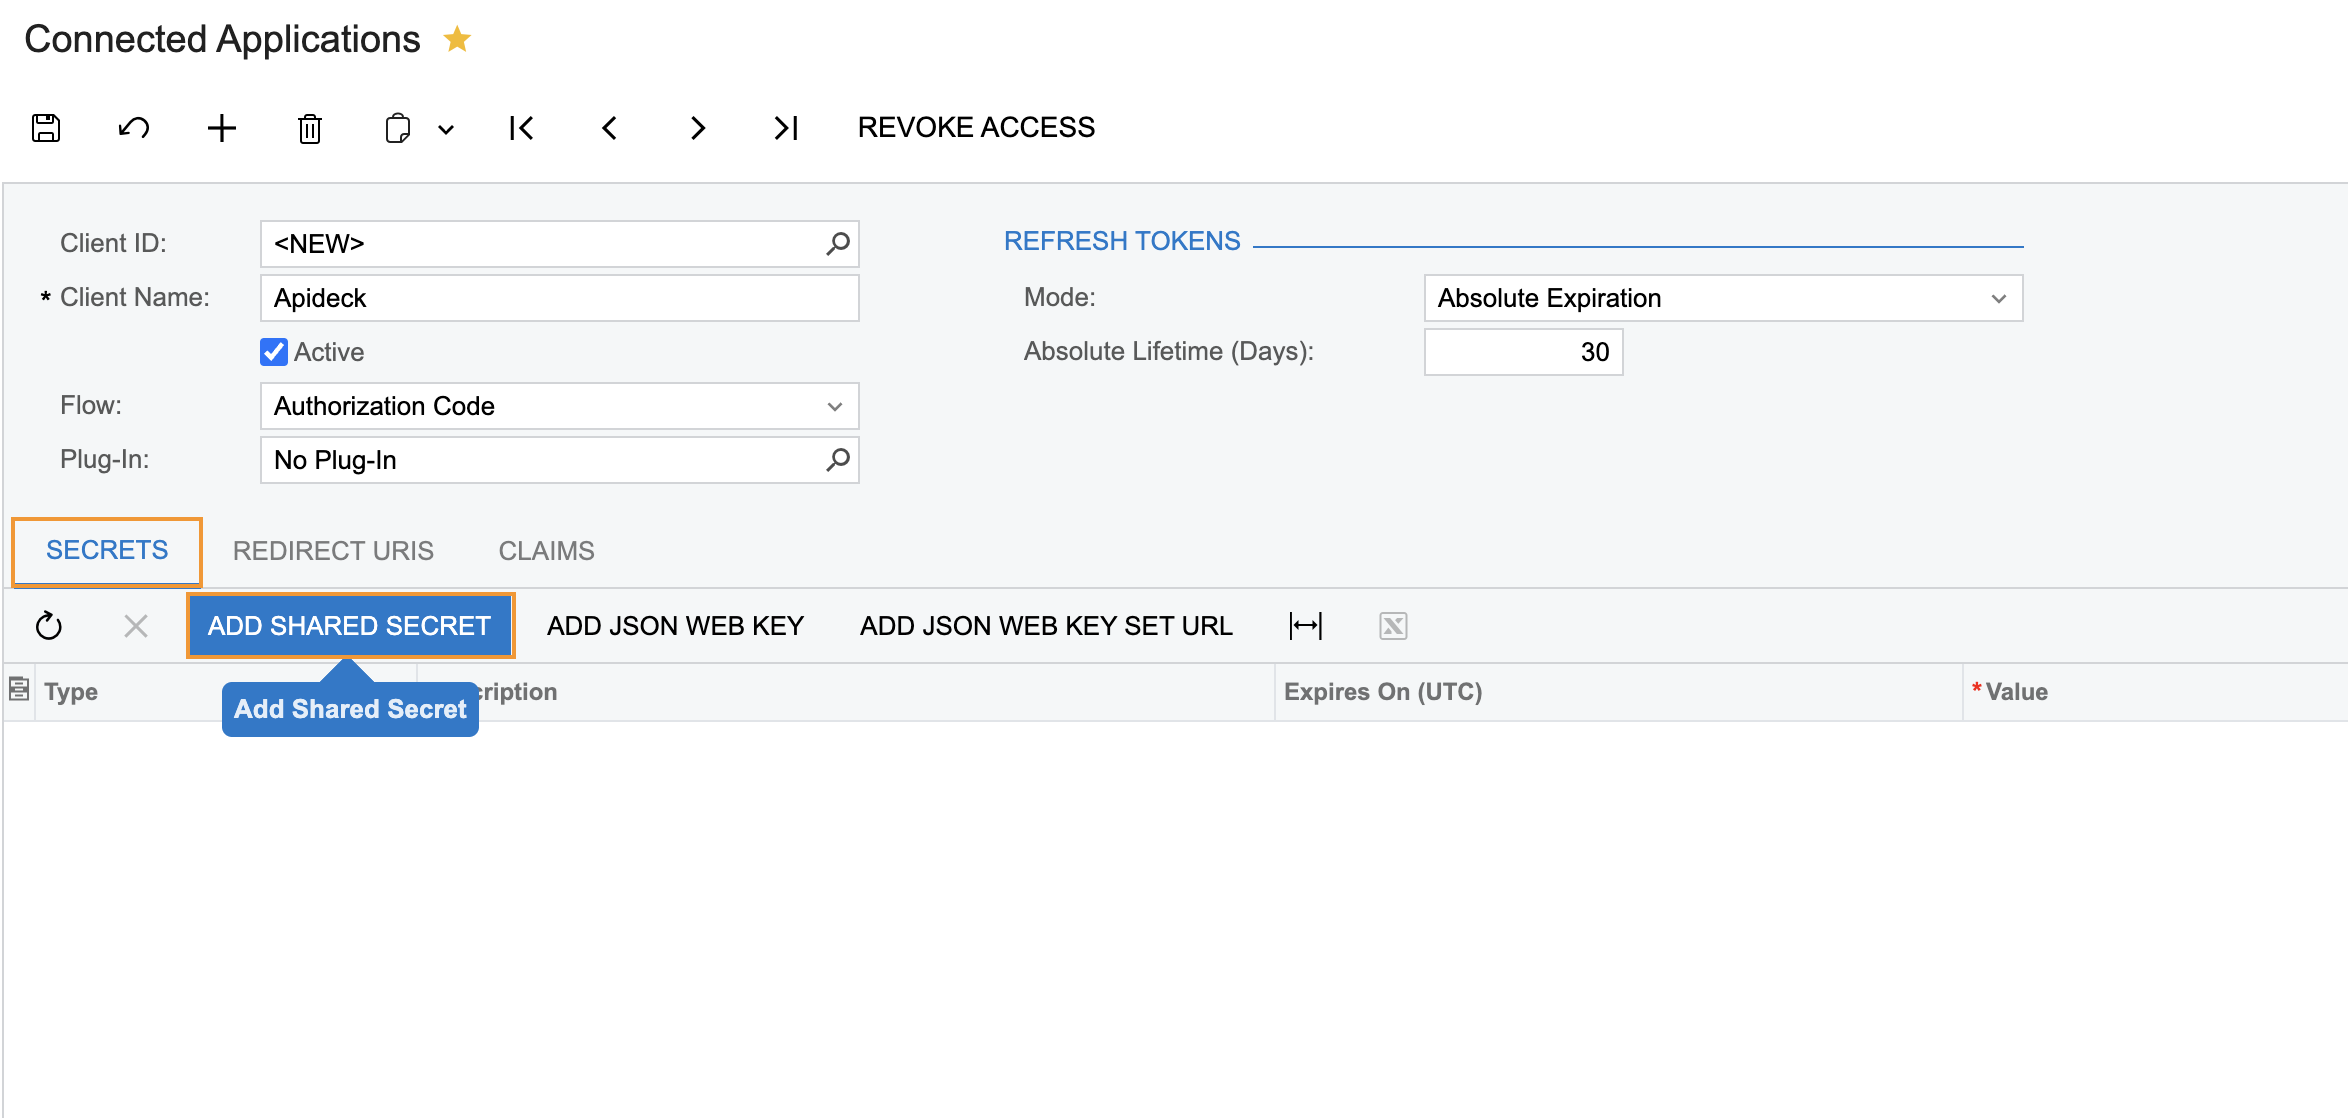
Add a description and select an expiry time.
Note: Select a long expiry time to avoid having to re-authorize the app with new credentials in short periods of time.
4. Generate Client ID
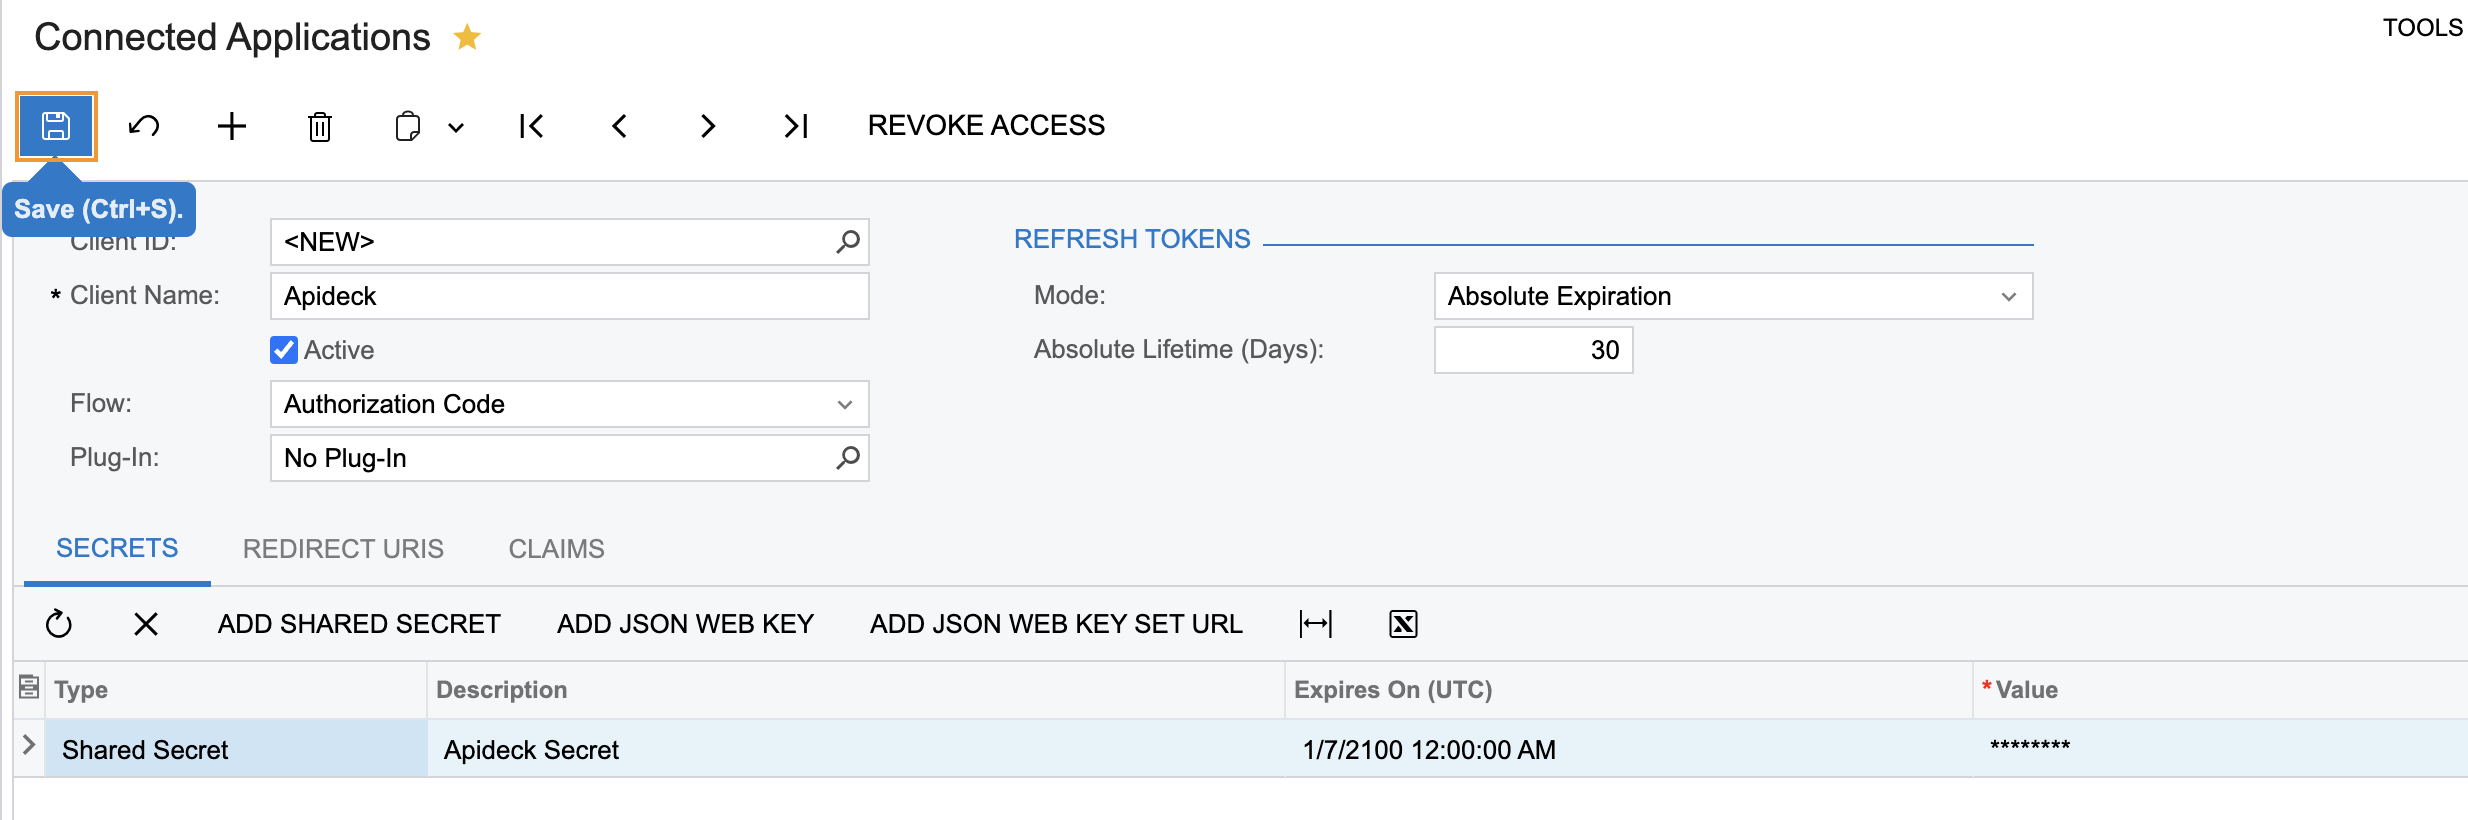
Click on the save icon to generate a new Client ID.
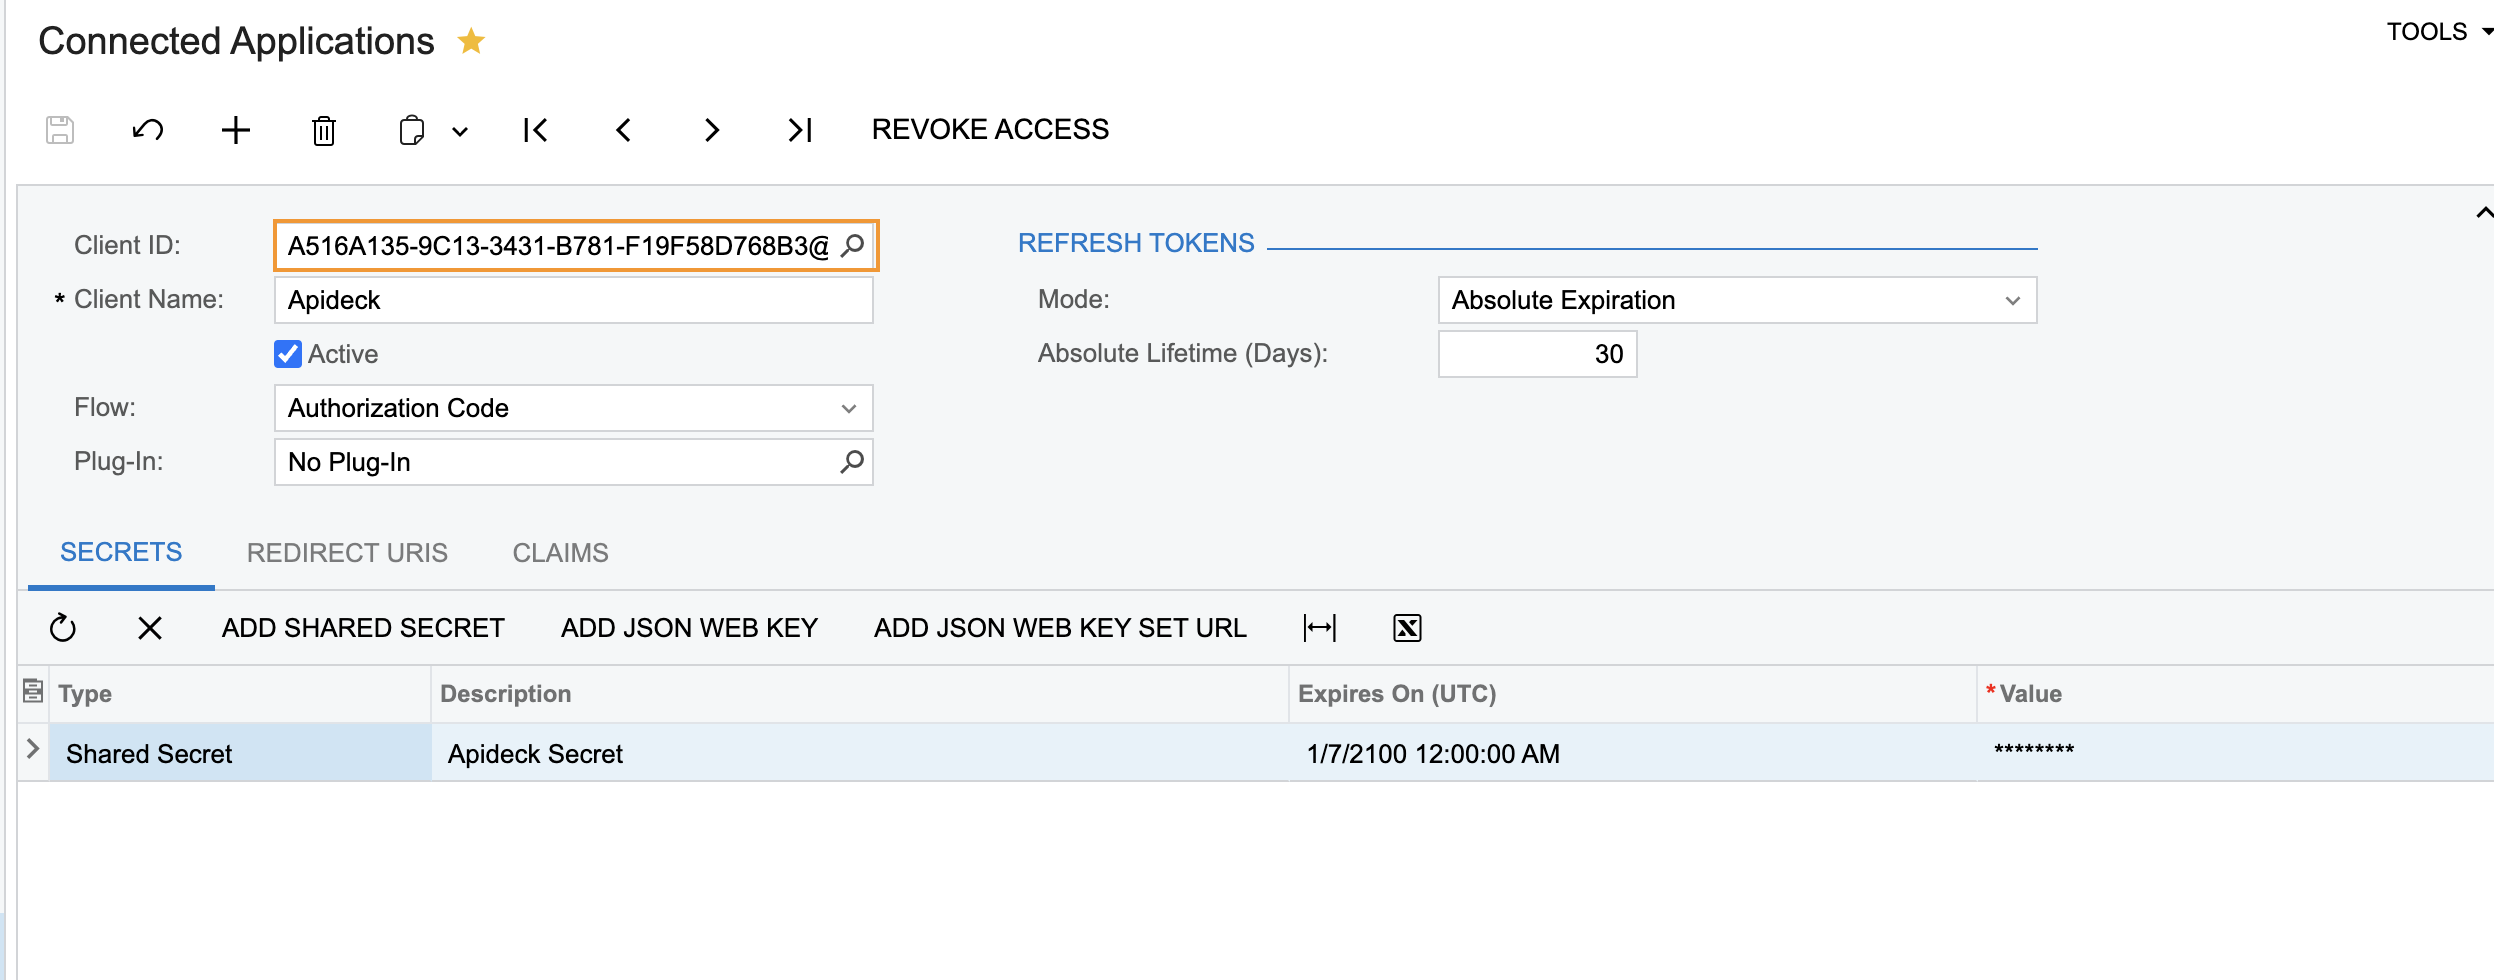
Copy the Client ID and save it for later use.
5. How to find your Instance URL
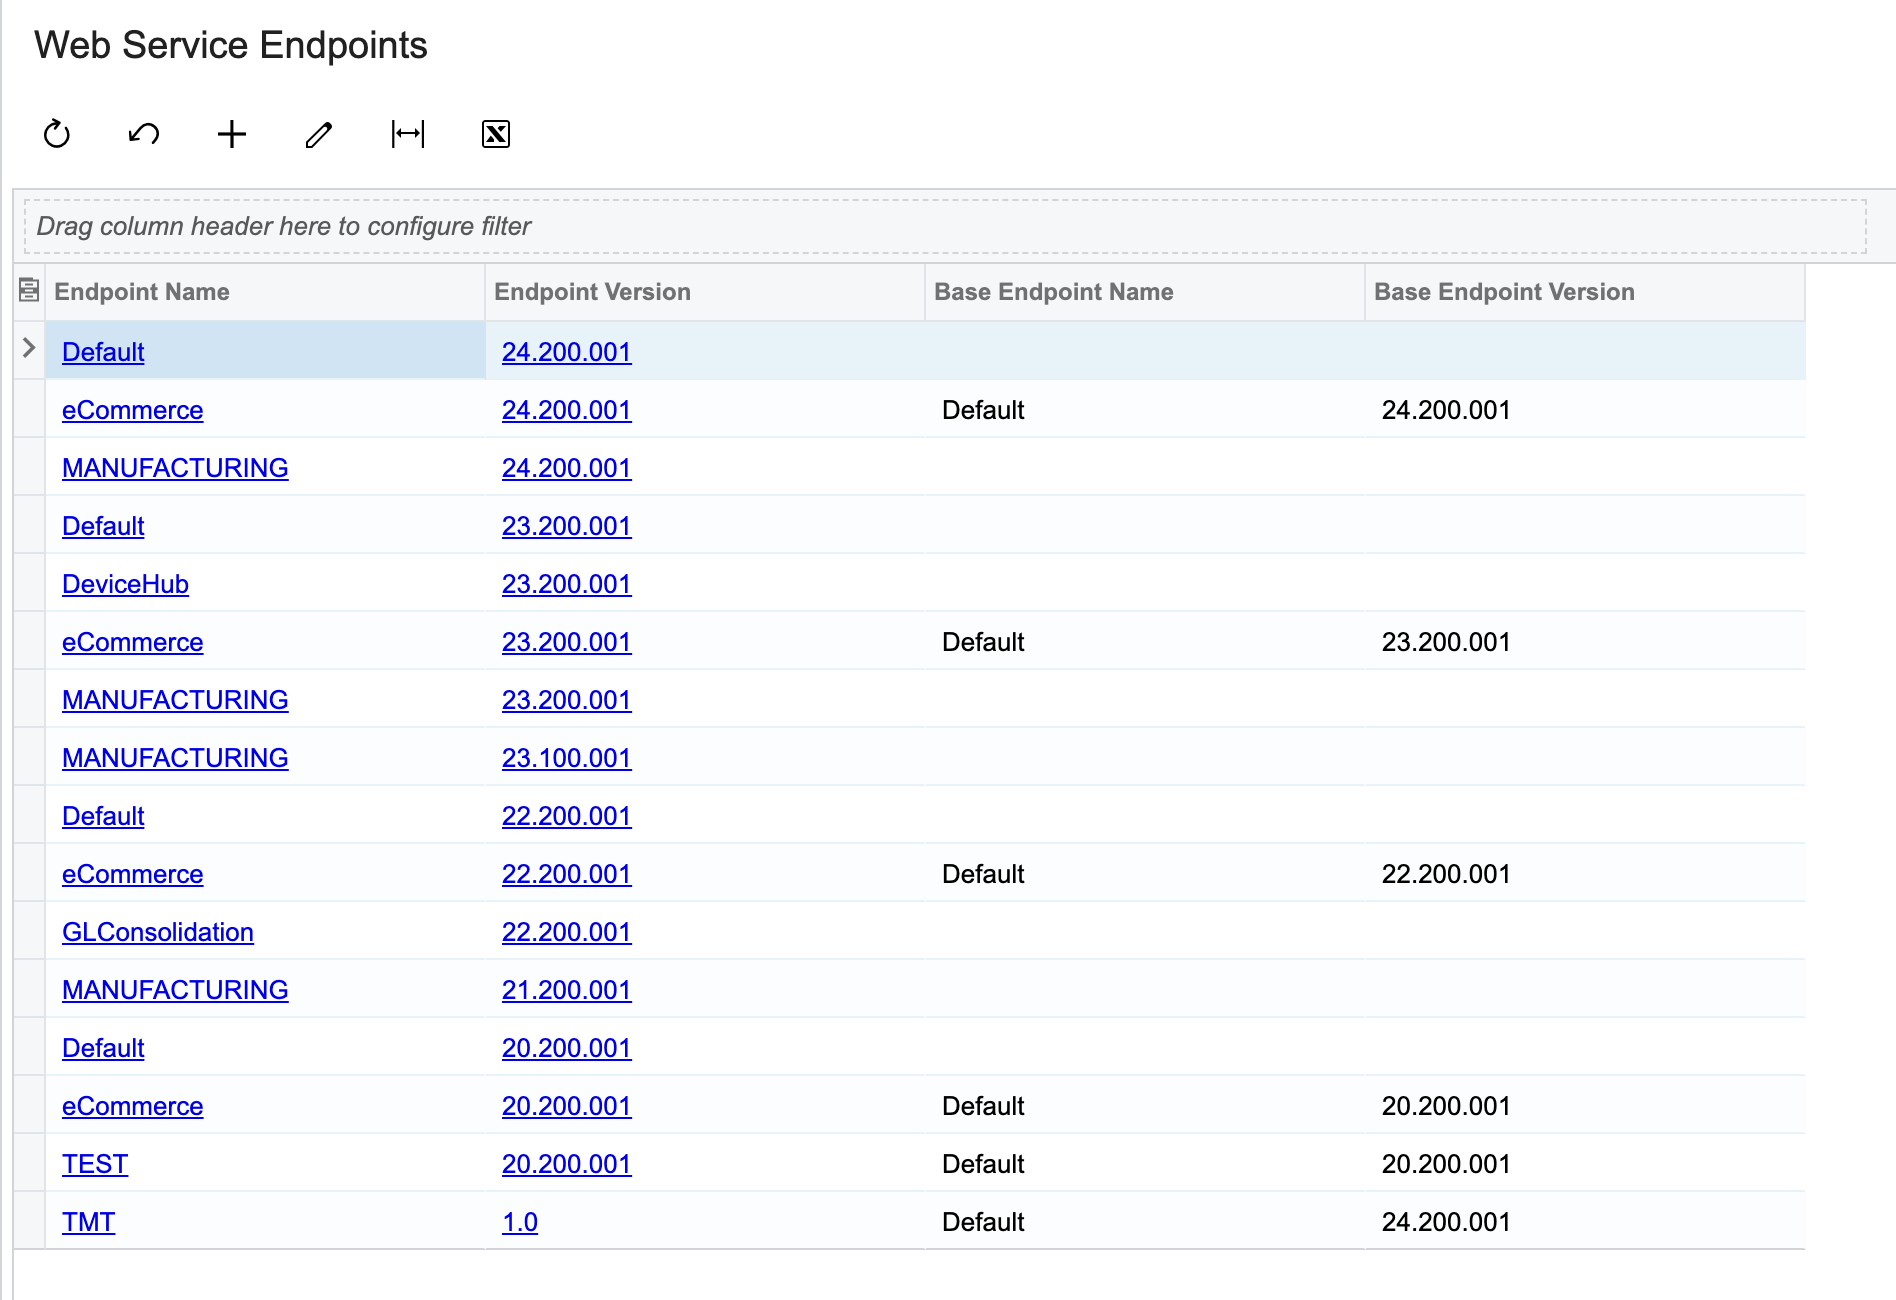
Your instance URL will be in the format: https://yourinstance.acumatica.com/entity/DEFAULT/20.200.001
Base URL of your Acumatica instance should look like below:

To find the correct version for your instance URL, navigate to Web Service Endpoints under the Integration page.
Connect in Apideck Vault
Open Apideck Vault and find Acumatica. Before the first connection the card shows the status badge Unauthorized.
-
Enter the credentials you generated above — Client ID, Client Secret, and Instance URL — and save them.
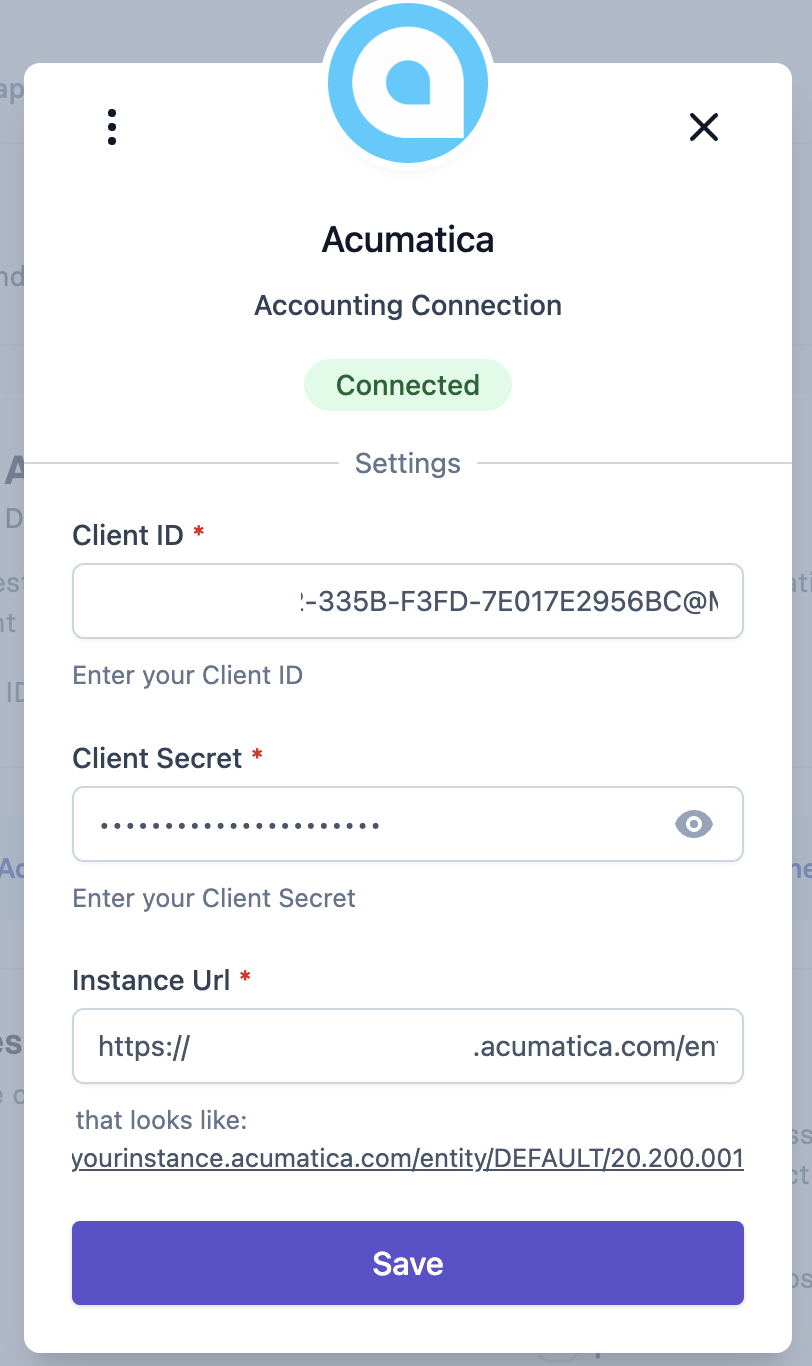
-
Click Authorize. You're redirected to your own Acumatica instance to sign in and grant access to the Connected Application you registered.
-
After you approve access, you're returned to Vault and the connection shows as Connected — you can now use it to retrieve data from Acumatica.
Notes
- Each Acumatica instance is a separate environment with its own Connected Application. If you connect more than one instance, repeat this guide for each and register a distinct Connected Application per instance — credentials are not interchangeable between instances.
Troubleshooting
The connection stopped working
Apideck refreshes the token automatically while the connection is in use. With Sliding Expiration, the refresh token stays valid as long as it is refreshed within its Sliding Lifetime window. If a connection sits idle longer than that window — or the Connected Application's secret was rotated or revoked in Acumatica — the refresh token lapses and the connection needs a fresh authorization: repeat the steps above and reconnect in Vault.
Authorization fails
Confirm the Web Services API is enabled on your instance and that your user has Administrator
access, or a custom role with API/Web Services permissions. Also confirm the Redirect URI on the
Connected Application is exactly https://unify.apideck.com/vault/callback and that the Instance
URL you entered in Vault matches the full versioned endpoint shown on the Web Service Endpoints
page (e.g. https://yourinstance.acumatica.com/entity/DEFAULT/20.200.001).
Need help? Contact Apideck Support.