How to Create OAuth Credentials for Pipedrive
This guide will help you set up your Pipedrive OAuth app to connect with Apideck and start using the CRM API.
Prerequisites
Before you begin, make sure you have:
- A Pipedrive Developer Sandbox account - You need to create a separate Developer Sandbox account to manage OAuth credentials. OAuth app management (Developer Hub) is only available in Sandbox accounts, not in production accounts.
- An Apideck account
1. Enable the Pipedrive connector in Apideck
- Navigate to the Apideck Dashboard
- Go to Configuration > CRM > Pipedrive
- The connector will be available for configuration
2. Create OAuth App in Pipedrive Developer Hub
Access Developer Hub
- Log in to your Developer Sandbox account at https://developers.pipedrive.com/
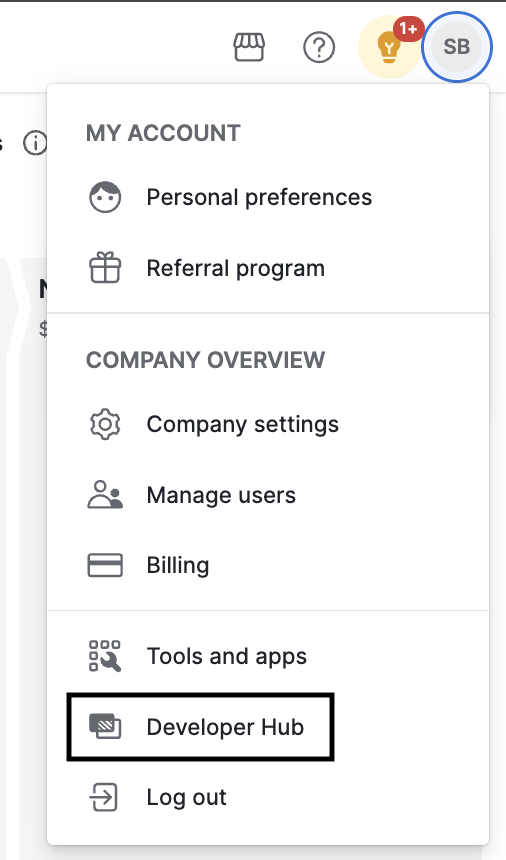
- Click your profile picture at the top right corner, then select Developer Hub
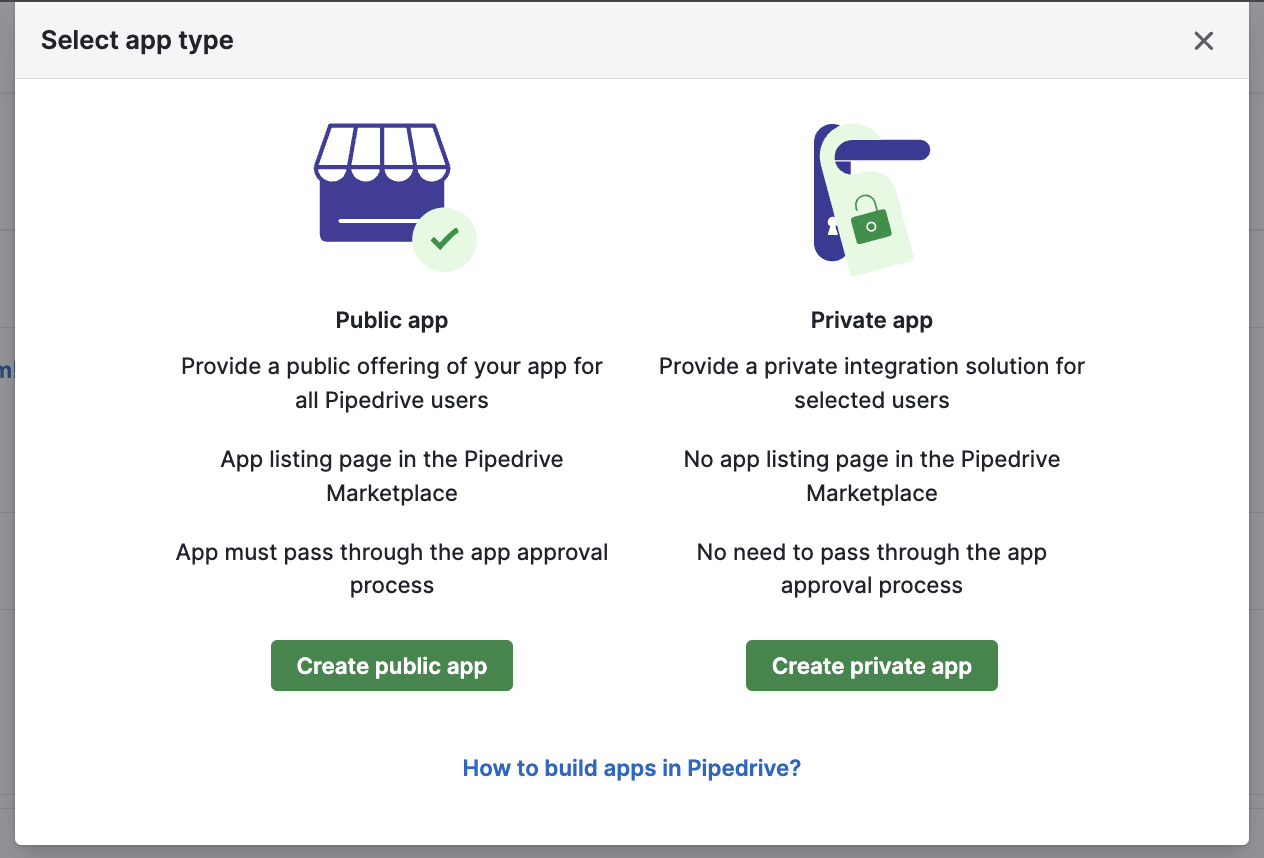
Select App Type
Select the type of app you want to create and click the Next button.
💡 TIP
- Private App: Private apps can be used in production and shared with selected users via an installation link. They do not require Pipedrive Marketplace listing or approval.
- Public App: Public apps are only needed if you want to list your integration in the Pipedrive Marketplace. These apps require Pipedrive review and approval before being publicly available.
Configure Basic Information
Fill out basic information about your OAuth app:
- App Name: Enter a descriptive name for your app
- Callback URL: Enter exactly
https://unify.apideck.com/vault/callback
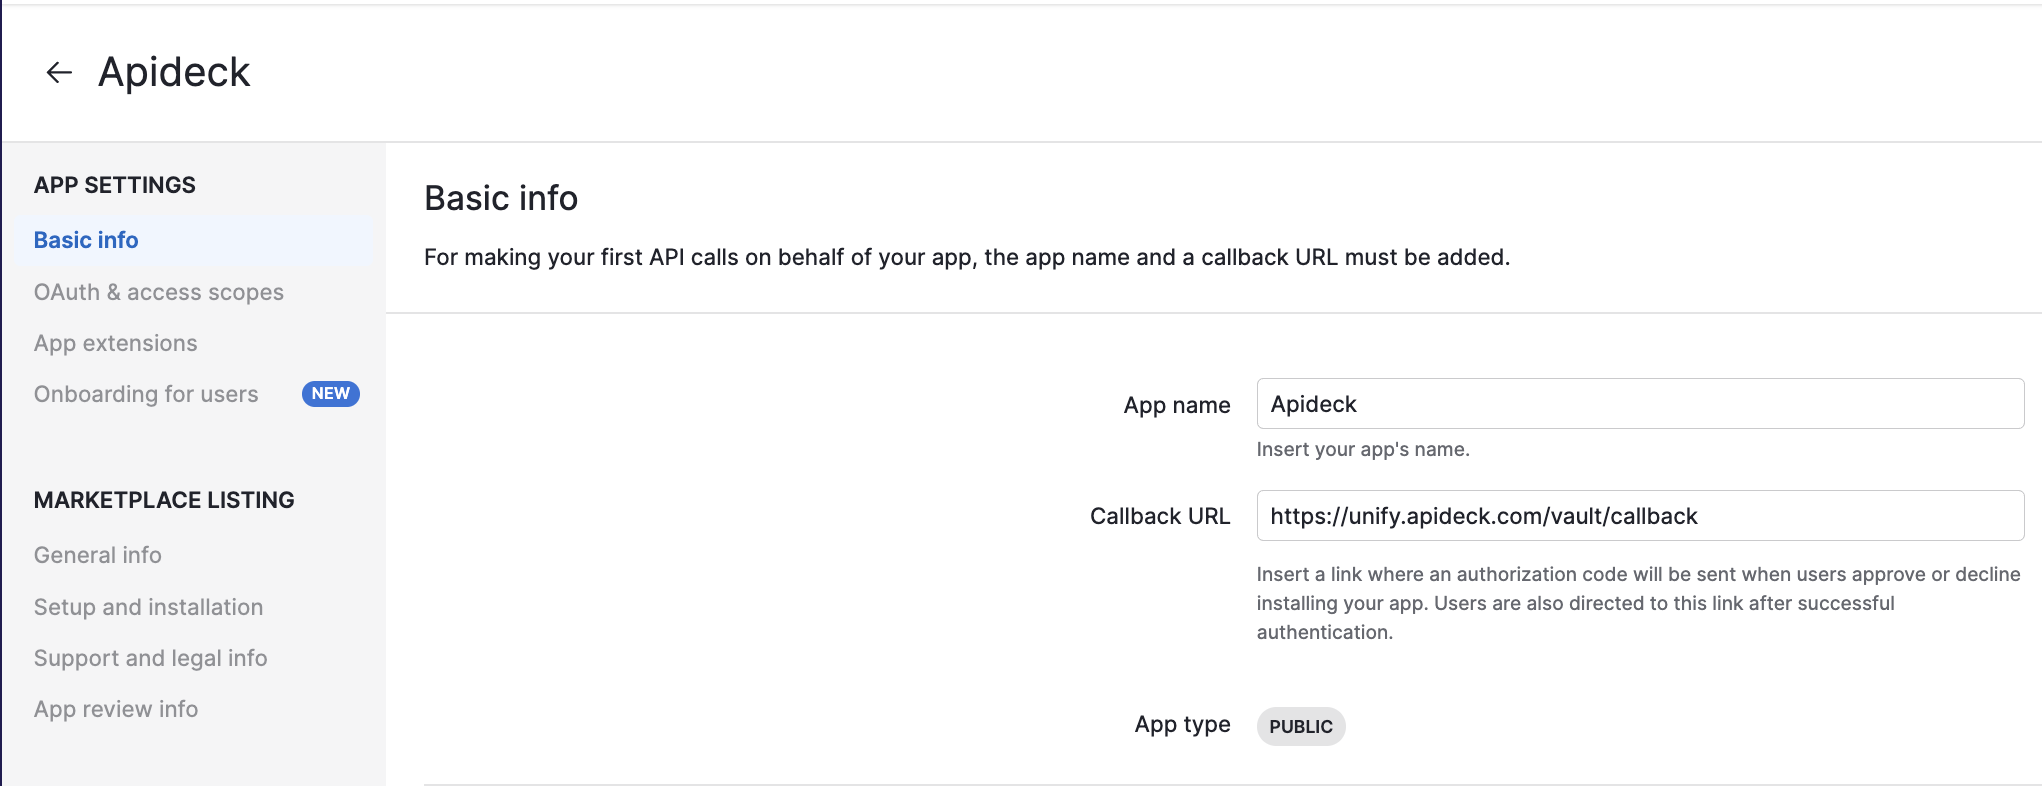
⚠️ IMPORTANT: The callback URL must match exactly - any variation will cause the OAuth flow to fail.
Configure OAuth & Access Scopes
- Navigate to the "OAuth & Access scopes" section
- Select OAuth scopes that match the scopes needed to access the Pipedrive API
- Click "Save" to store your preferences
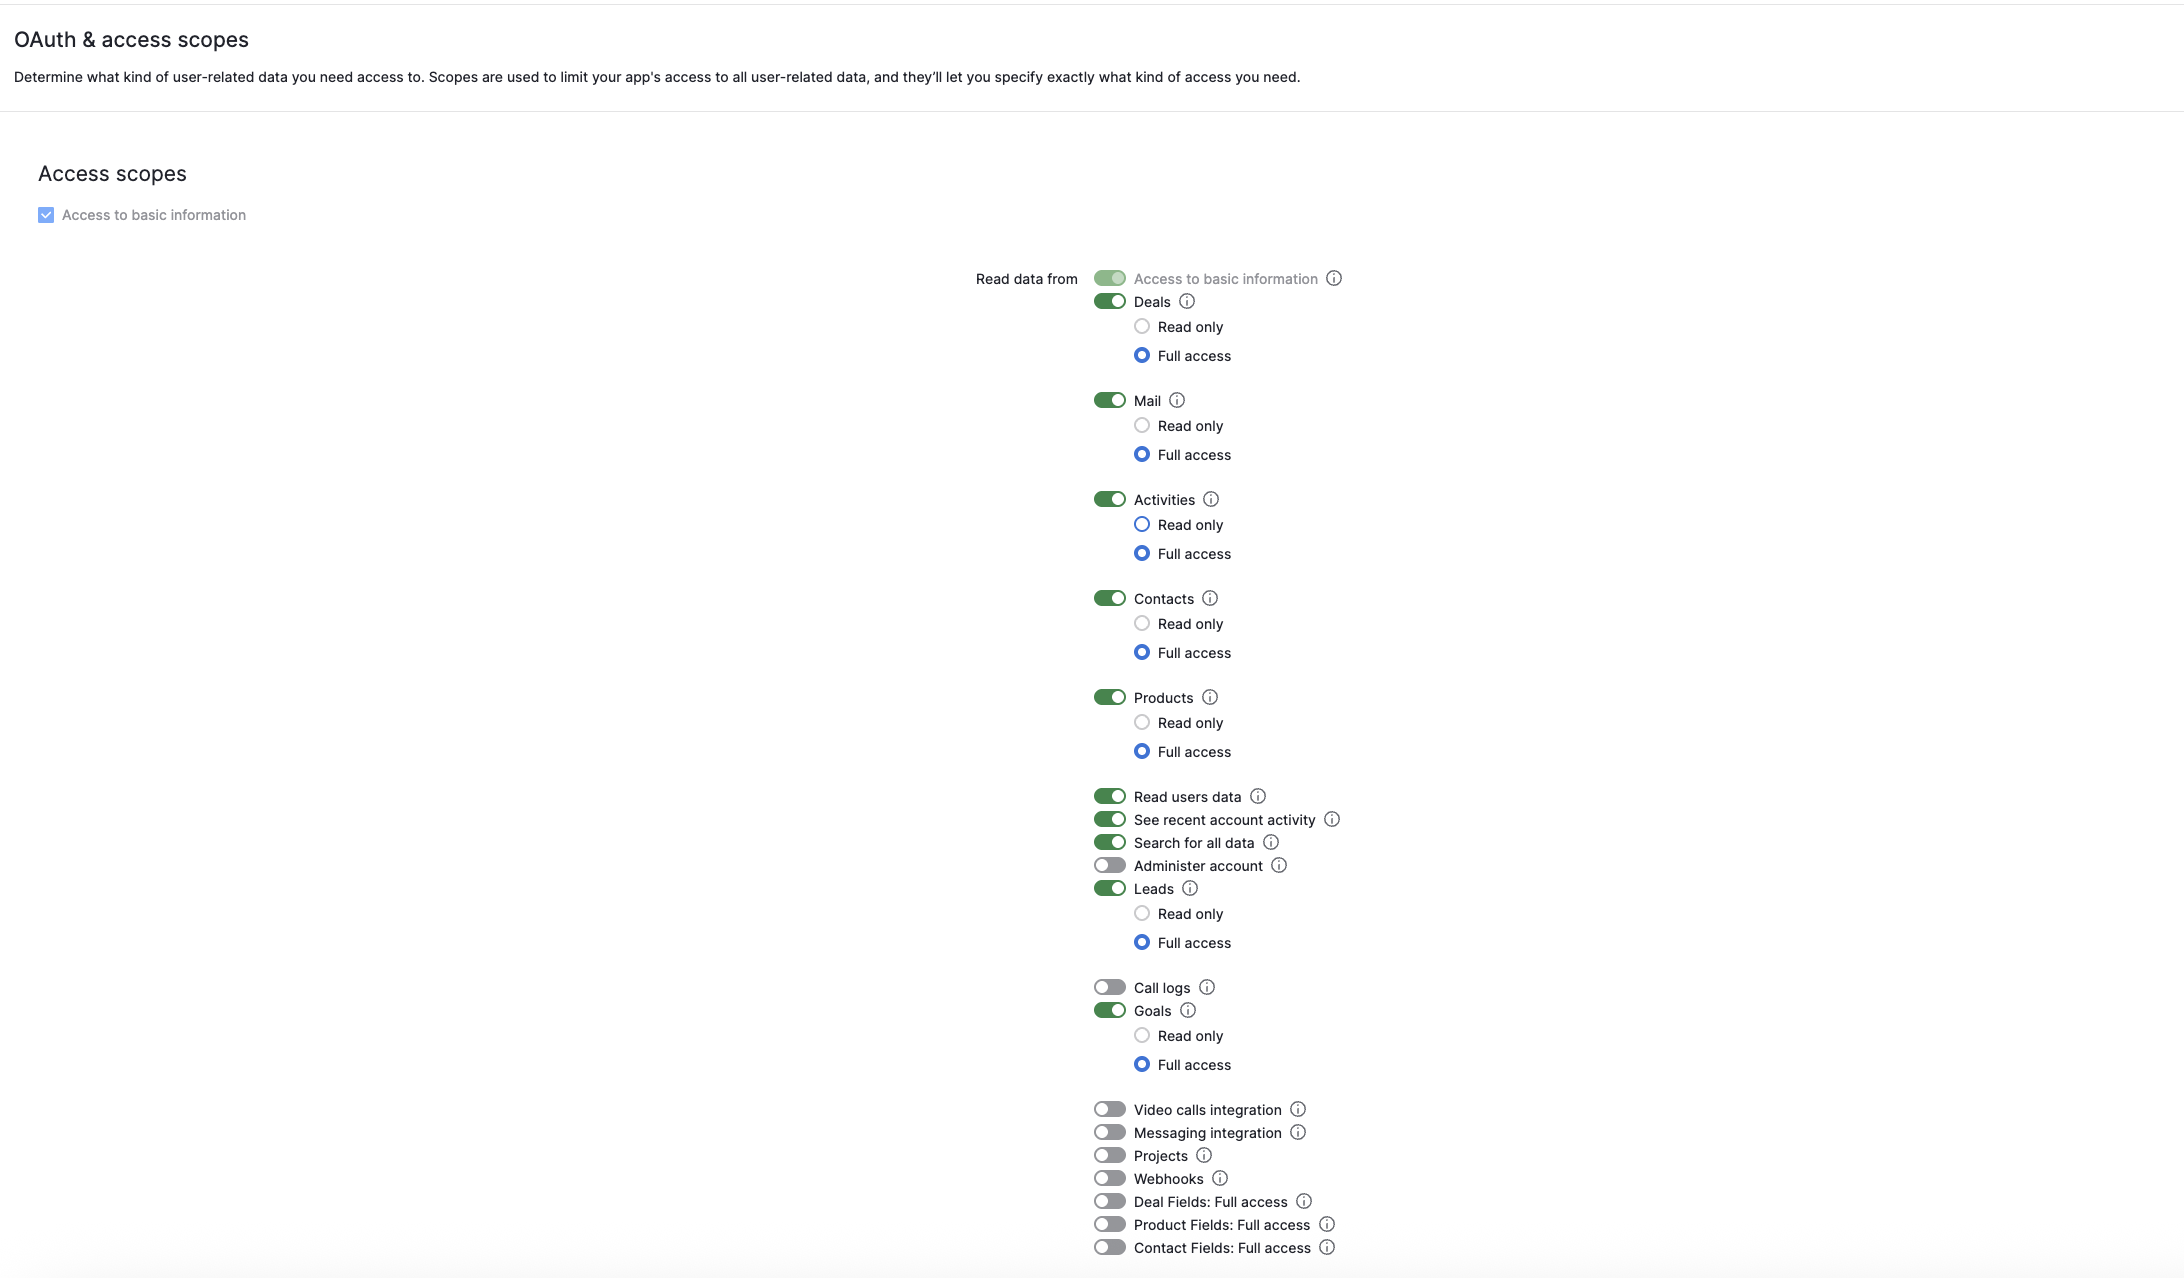
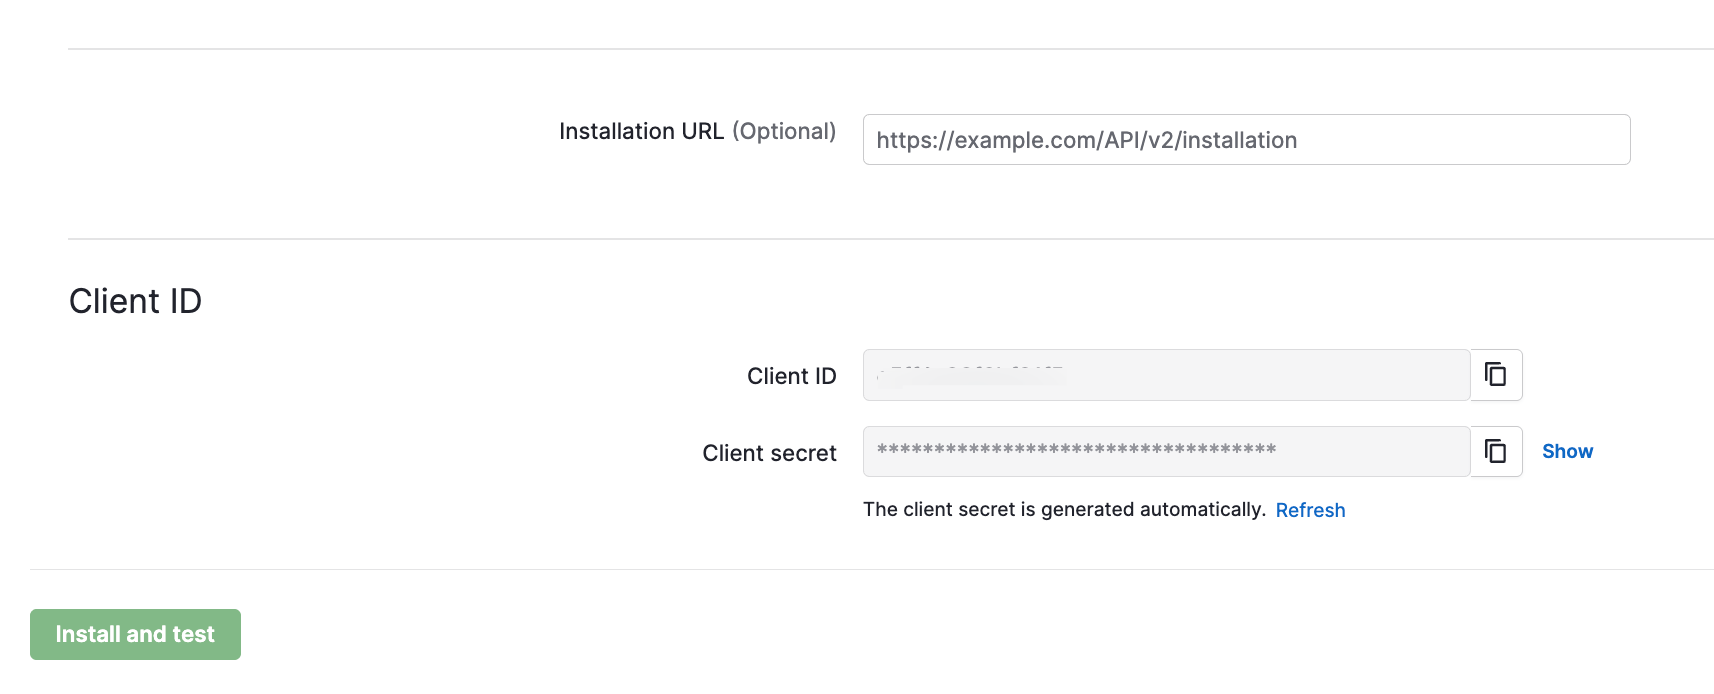
After saving, the Client ID and Client Secret will be generated. Copy these credentials - you will need them to connect your Pipedrive account to Apideck.
3. Make Your App Live
All Pipedrive apps are created in Draft status by default. While an app is in Draft, it can only be authorized by users in the same Pipedrive account where the app was created. External users (your customers with their own production Pipedrive accounts) cannot authorize the app until it is set to Live.
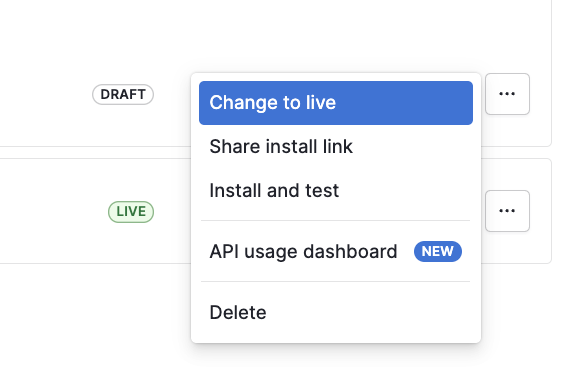
Private Apps
- Open the Pipedrive Developer Hub
- Select your app (status: Draft)
- Click "Change to Live"
Public Apps
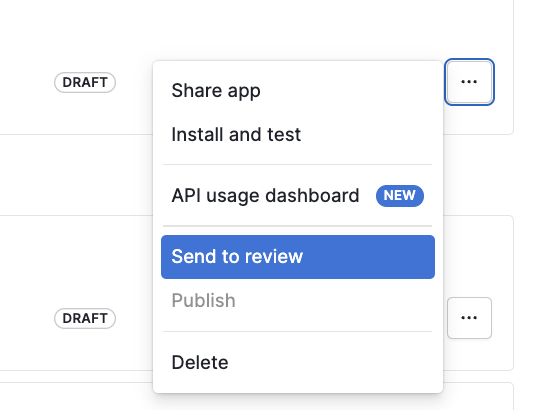
- Open the Pipedrive Developer Hub
- Select your app (status: Draft)
- Click "Send to review" button
- Complete the App review information form that appears
- Submit the app for review
- Once approved, your app status will change to Live
4. Configure the Pipedrive connector in Apideck
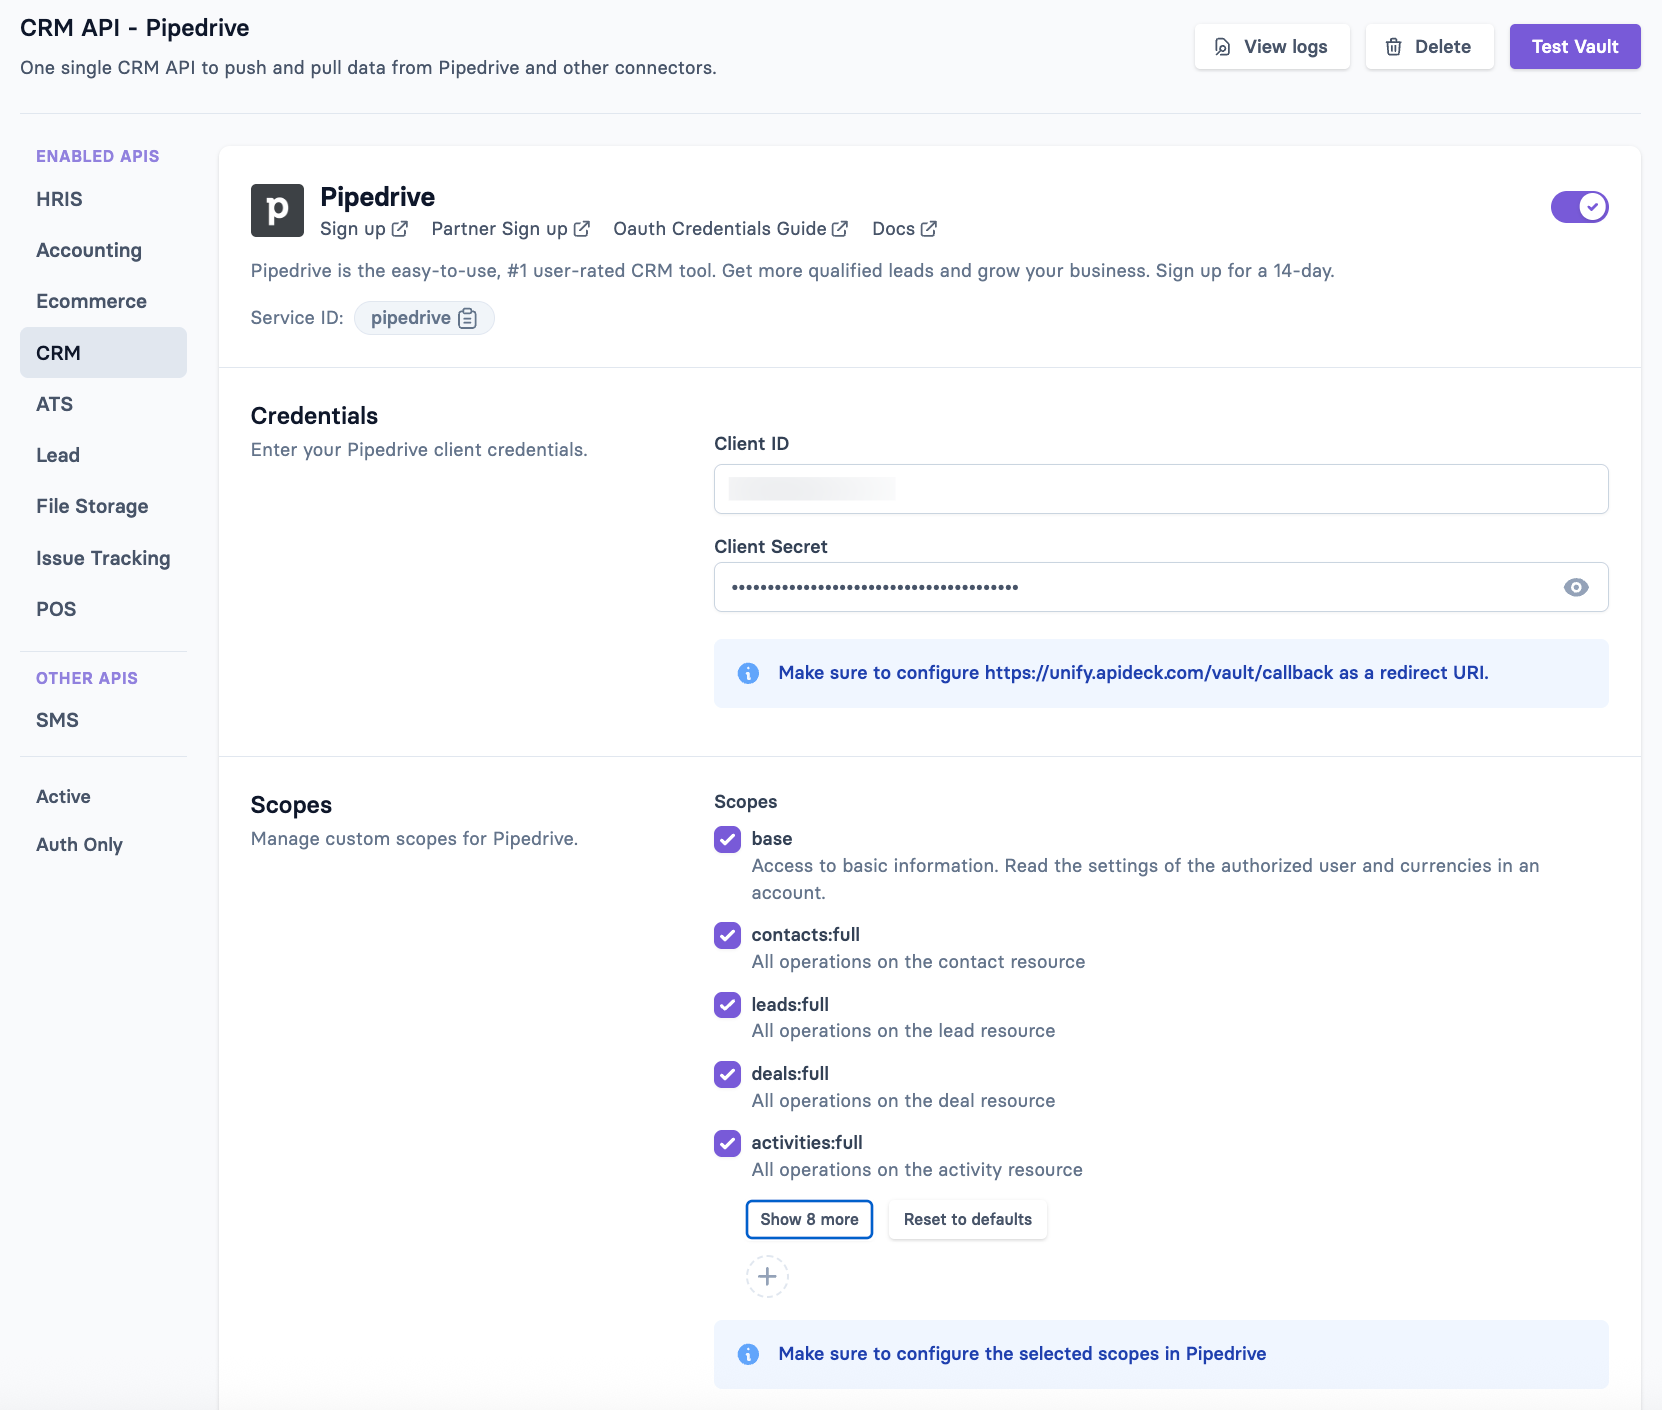
- Navigate to the Pipedrive connector configuration in the Apideck Dashboard
- Enter the following OAuth credentials:
- Client ID - Paste the Client ID from your Pipedrive Developer Hub app
- Client Secret - Paste the Client Secret from your Pipedrive Developer Hub app
- Review that the scopes granted in Pipedrive match with the scopes you are requesting in Apideck
- Click Save settings to save your credentials
5. Test Your Connection
You can test your Pipedrive connector by clicking Test Vault in the Apideck dashboard.
- Click Authorize to start the OAuth flow
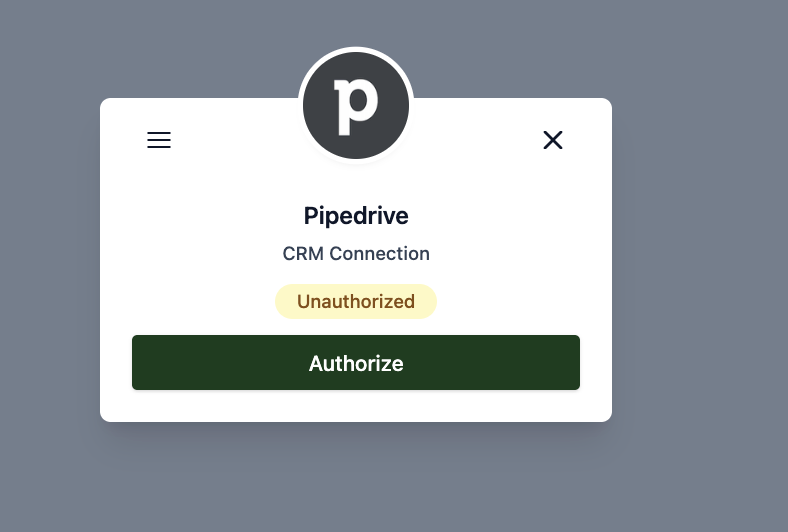
- Grant permissions to your app
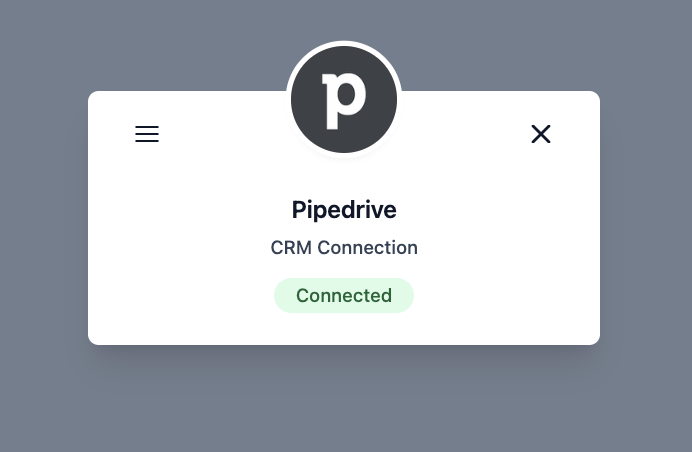
- After successful authorization, the connection will show as Connected
Marketplace Installation
If you want your app to be installed from the Pipedrive Marketplace, you'll need to use a custom callback URL instead of the standard Apideck callback URL.
Setup Custom Callback Endpoint
-
Create an endpoint in your application that will:
- Accept the OAuth callback from Pipedrive
- Generate a state parameter using Apideck's createCallbackState API
- Forward the request to
https://unify.apideck.com/vault/callbackwith:- The
codeparameter received from Pipedrive - The generated
stateparameter
- The
Example Node.js implementation:
-
Configure this endpoint URL in Pipedrive:
- In the Basic Information section, set the Callback URL to your custom endpoint (e.g.
https://your-domain.com/oauth/pipedrive/callback) - Make sure your domain is accessible via HTTPS
- Test the OAuth flow thoroughly before submitting to the marketplace
- In the Basic Information section, set the Callback URL to your custom endpoint (e.g.
Marketplace Listing
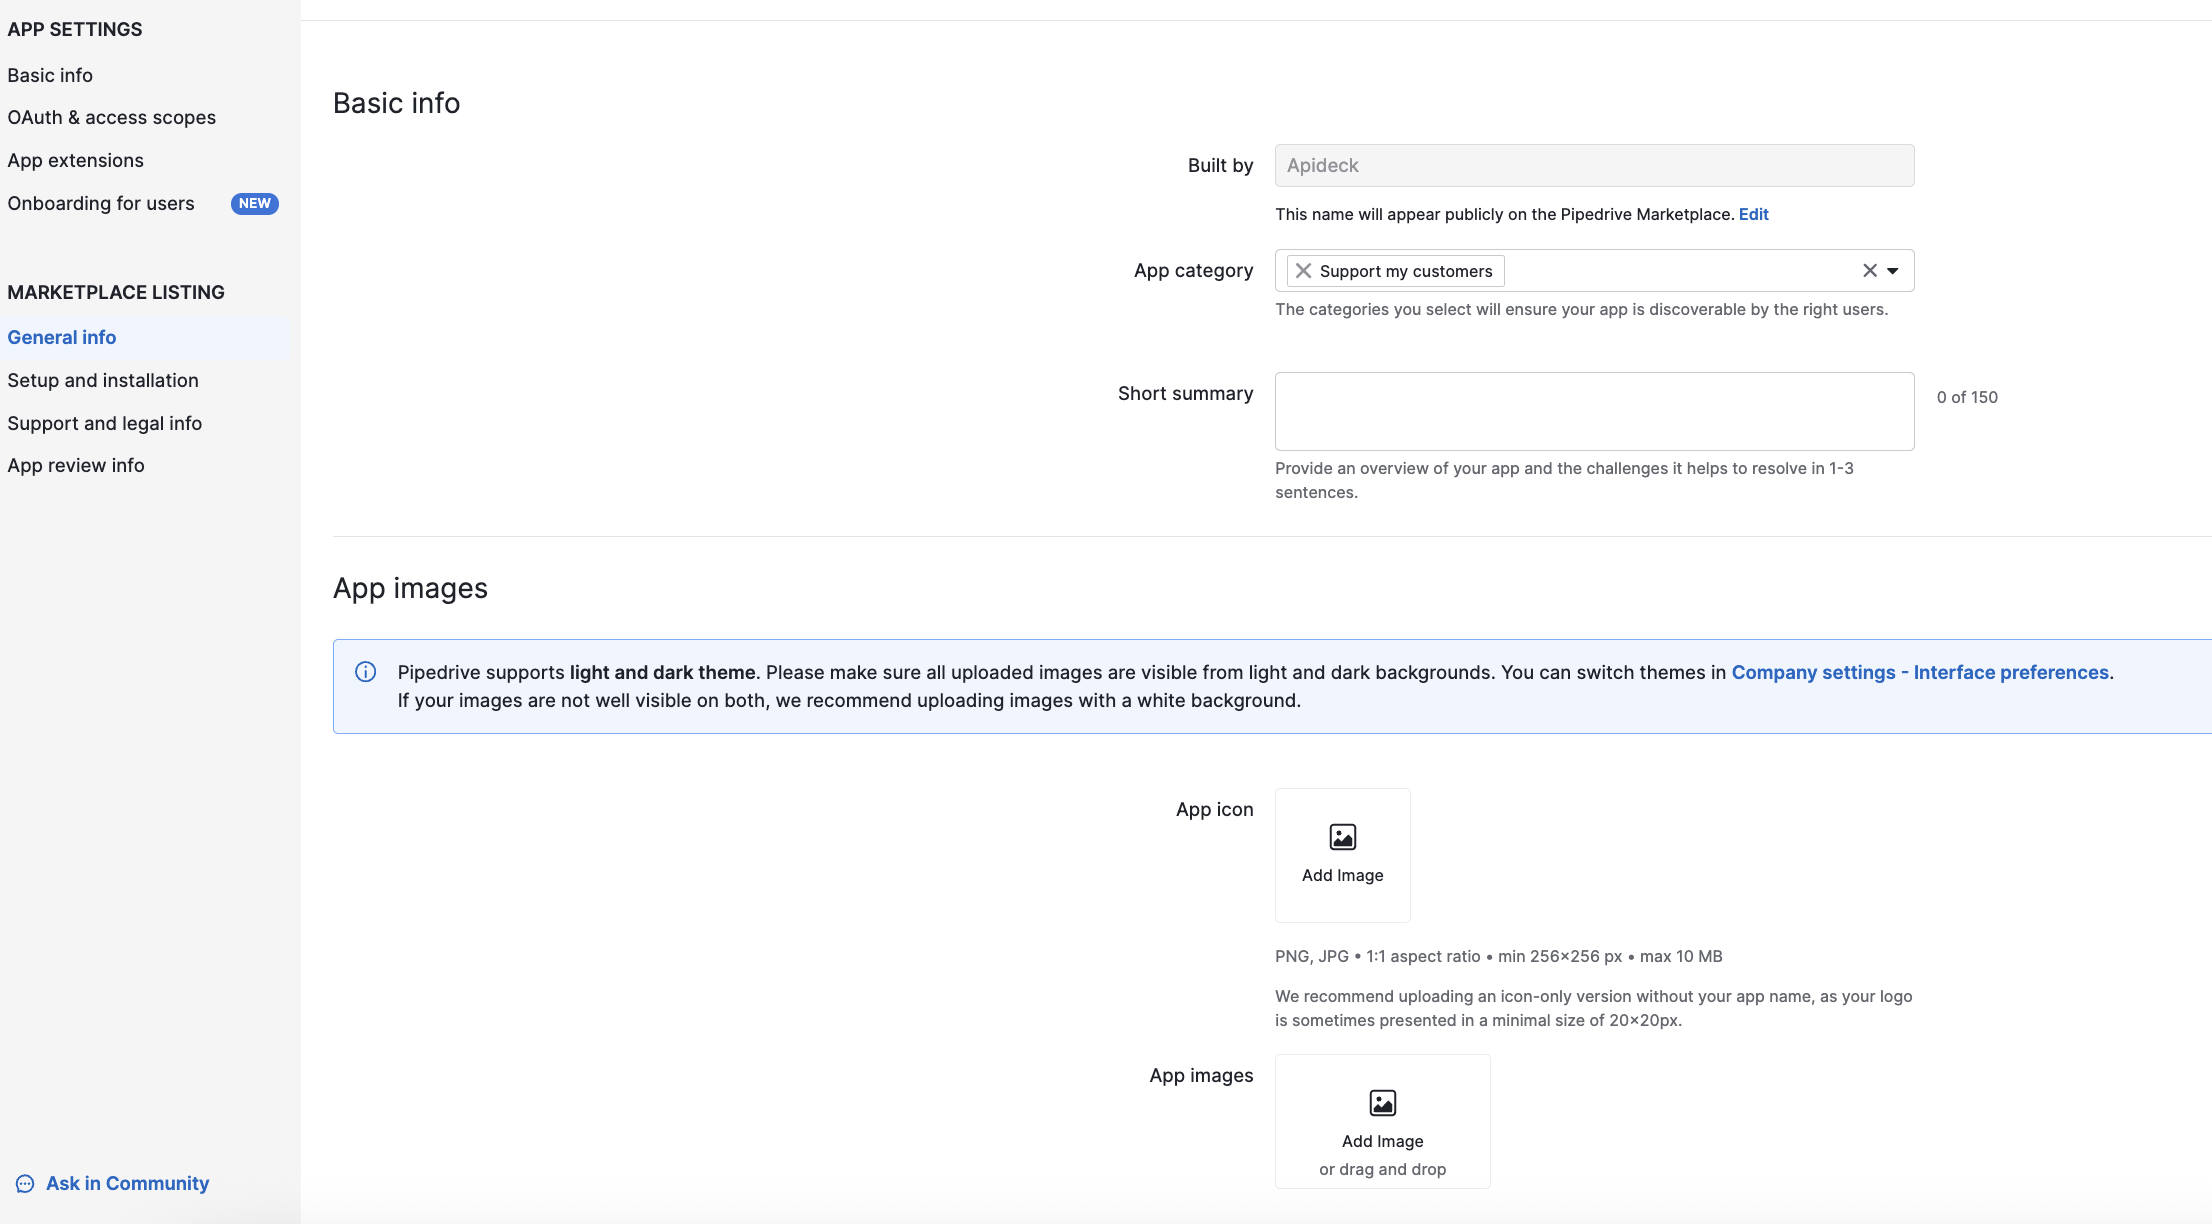
If you want to list your app in the Pipedrive Marketplace, navigate to the Marketplace listing section and fill in information about your app listing.
General Info
In the General info section, provide:
- Description: Provide a brief description of your app
- Logo: Upload a logo for your app
- Support contact info: Add support contact information
Note: Marketplace listing is optional. You can skip this step if you only need to use the app for your own integrations and don't plan to publish it to the marketplace. However, if you're creating a Public App, you'll still need to complete the App review info form to set your app to Live status (see Make Your App Live section above).
More details on the configuration of an OAuth Pipedrive app can be found in the Pipedrive documentation.
Pipedrive Webhook Registration
Register a Pipedrive webhook in Unify
- Go to the Apideck dashboard > Configuration > CRM > Pipedrive
- On the Unify Pipedrive connector settings, at the bottom, you can find the Webhook Execute URL

💡 IMPORTANT: Copy the full "Webhook execute URL" since you need this URL to register it in Pipedrive
Create a webhook subscription in Pipedrive
- Sign in to your Pipedrive account
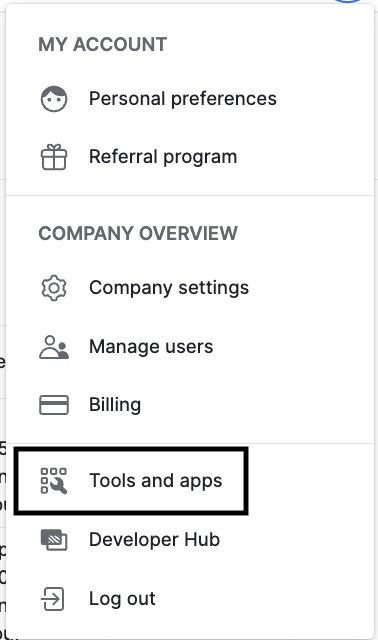
- Click your profile picture at the top right corner, then select Tools and Apps
- Click on Webhooks in the Tools and Apps menu
- Click on the "New Webhook" button
- In the "Create New Webhook" modal:
- Endpoint URL: Enter the Webhook Execute URL from Apideck (copied in the previous step)
- Events: Select the events that the webhook should be triggered for from the dropdown menu
- Click Save to register the webhook
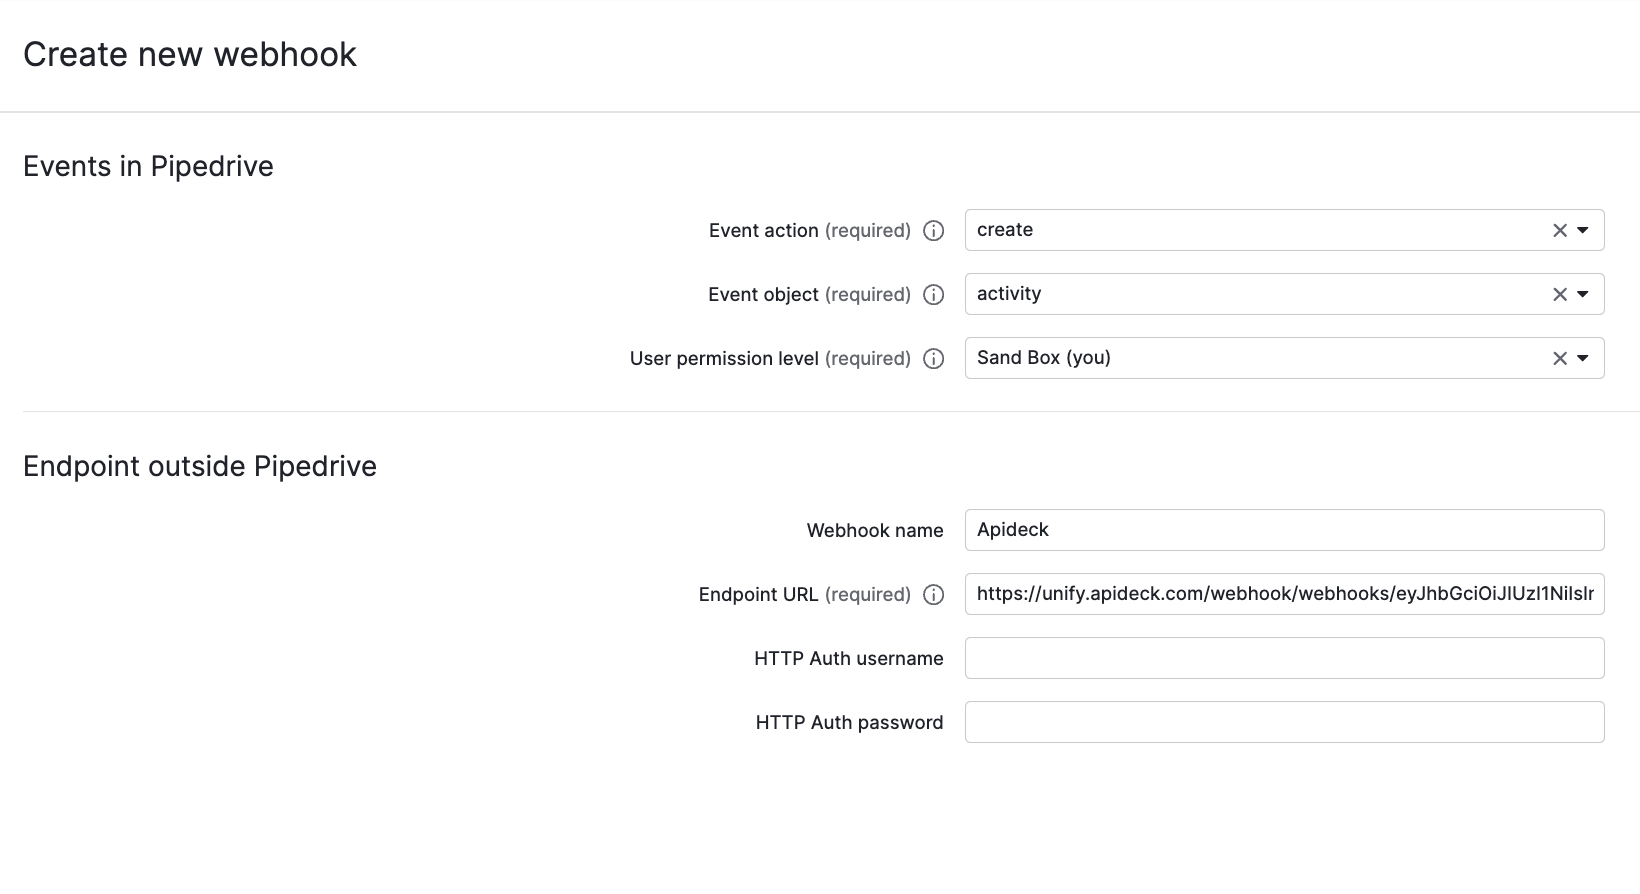
After the webhook has been registered, you can view and manage it from the "Webhooks" page in the Pipedrive settings.
Subscribe to Unify events
After you have completed the above steps, you can subscribe your application to Unify Events.
- Go to the Apideck dashboard > Webhooks
- Click on Add webhook
- Add your Delivery Endpoint URL
- Select the Unified API (CRM, Accounting etc.)
- Select the events
- Add a description and click on Create
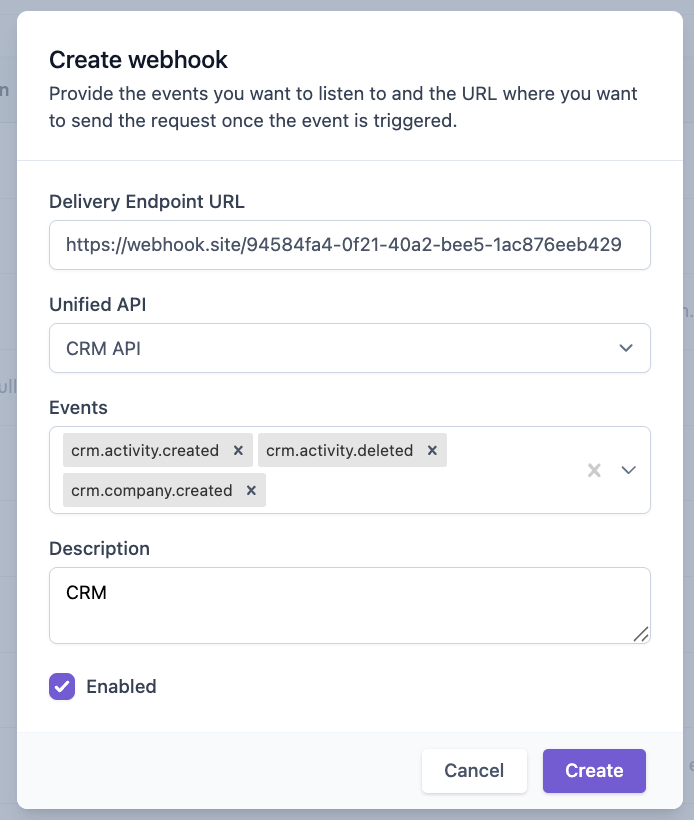
Now your app and webhooks are configured! 🎉