How to create an OAuth app in HubSpot
Before you get started, make sure you have a HubSpot developer account.
If you clicked "Create a developer account" on the HubSpotDeveloper Portal. You need to select "An app" and click on "Create App Developer account".
1. Create your OAuth app
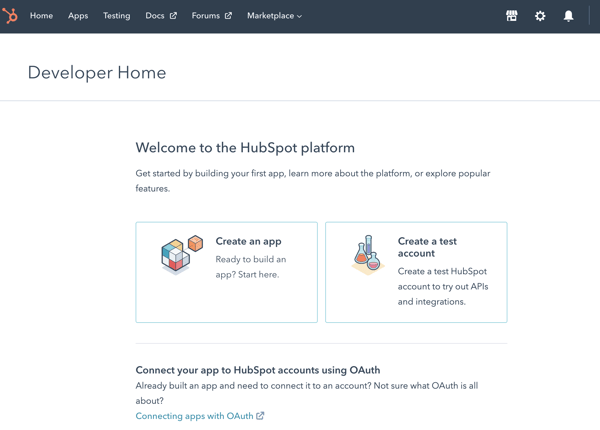
Open the HubSpot developer dashboard. From the dashboard you can click the Create an app button to create your OAuth app.
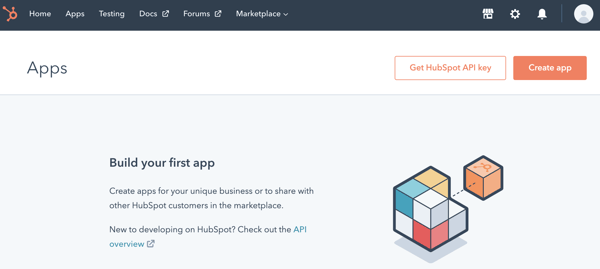
You can also start from the Apps dashboard using the Create app button.
2. Basic information
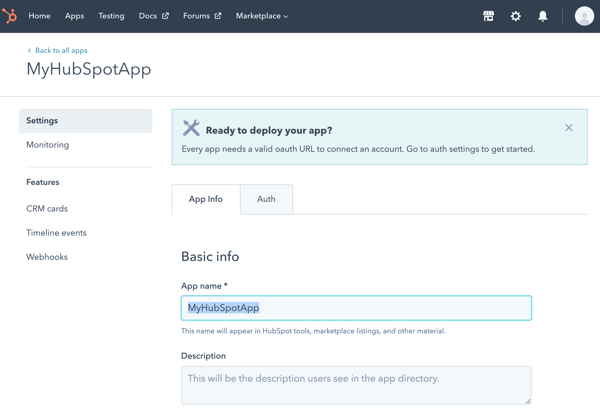
Fill out basic information about your OAuth app. When users authenticate your app with their HubSpot account, they’ll see the name, description, logo, and any support contact info you provide on this page.
3. Auth settings
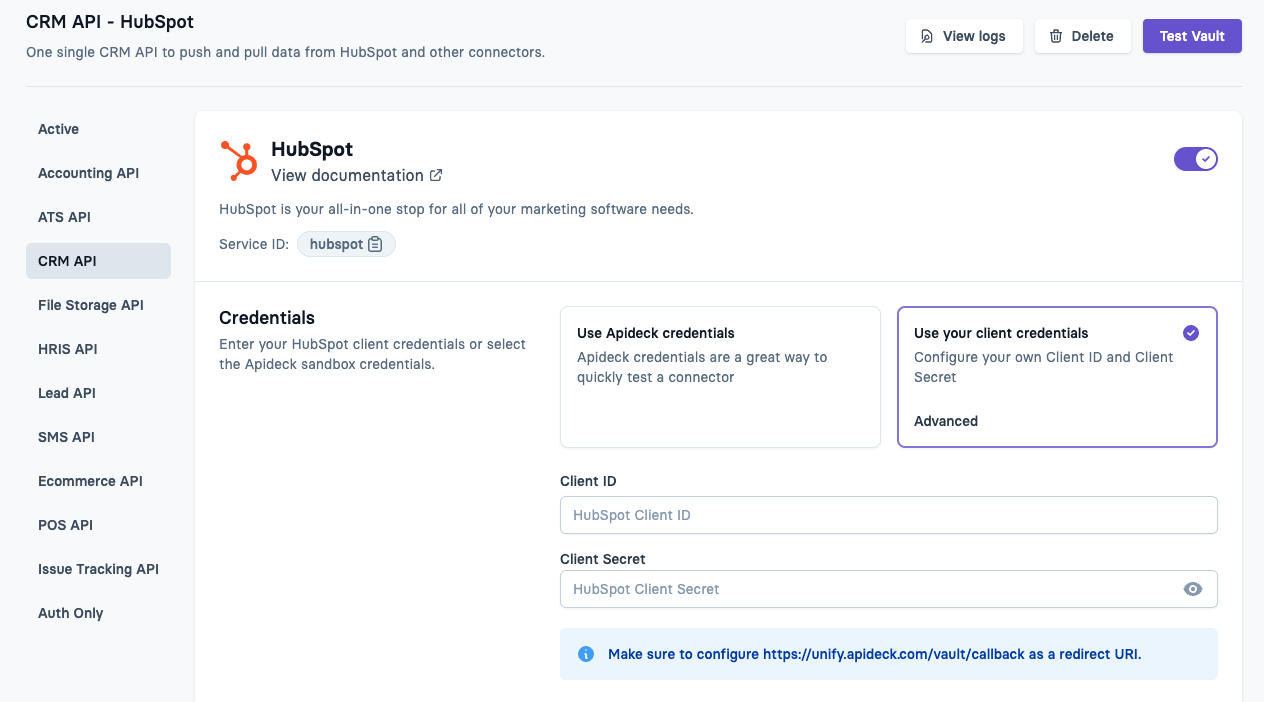
In the Auth tab, you'll find your Client ID and Secret.
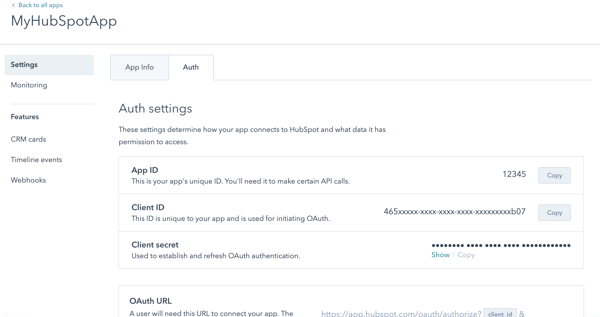
Copy these 2 fields and paste them in the Apideck HubSpot connector settings under Use your HubSpot client credentials.
4. Scopes
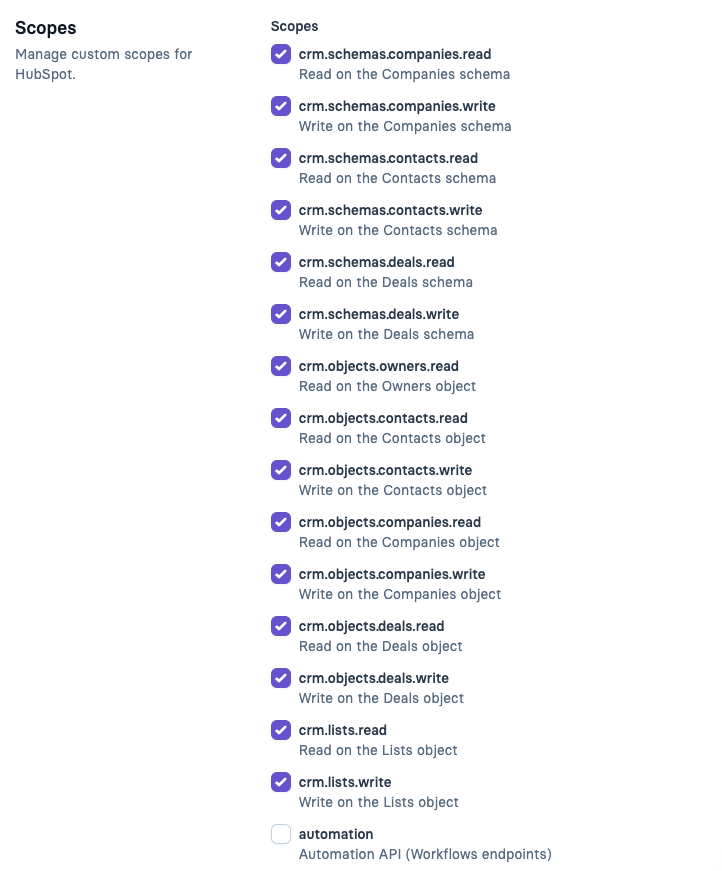
Go back to the Auth tab of your app in the HubSpot developer dashboard. Click on the dropdown at the bottom of the page to configure your app's scopes.

💡 IMPORTANT: The required scopes must match exactly with the following: crm.objects.owners.read, crm.objects.contacts.read, crm.objects.contacts.write, crm.objects.companies.read, crm.objects.companies.write, crm.objects.deals.read, crm.objects.deals.write
Additional scopes may be necessary if you intend to use proxy calls with HubSpot.
5. Redirect URL
This is where users will be sent after granting your app access to their HubSpot account. This should be https://unify.apideck.com/vault/callback.

You have now successfully created your HubSpot app and linked it to the HubSpot connector in Apideck using Client ID/Secret.
For more information on HubSpot OAuth apps, refer to HubSpot's documentation.
Hubspot Webhook Registration
Register a Hubspot webhook in Unify
Goto the Apideck > Configuration > CRM > Hubspot On the Unify Hubspot connector settings, at the bottom, you can find the “Webhook Execute URL” (1).
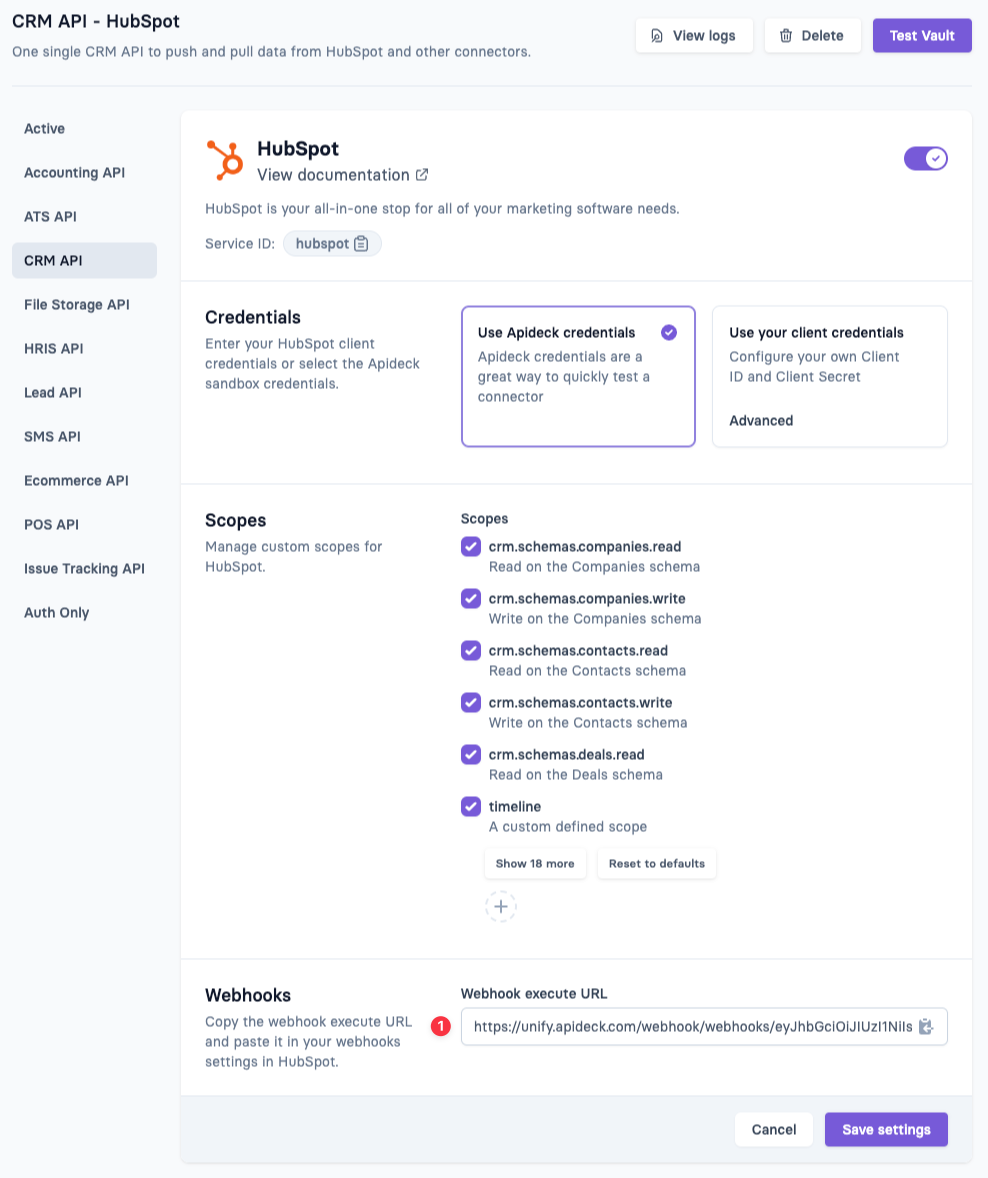
💡 IMPORTANT: Copy the full “Webhook execute URL” since you need this URL to register it in Hubspot.
Create a webhook subscription in Hubspot
To register a webhook using the Hubspot Developer Portal, follow these steps:
-
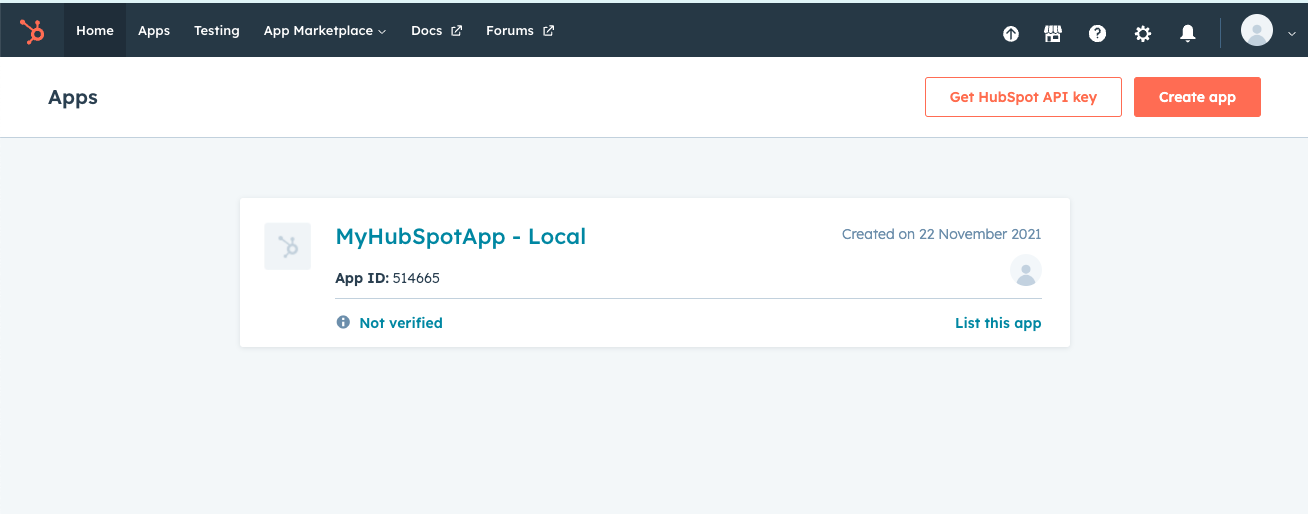
Log in with your Hubspot Developer account and go to the "Apps" page from the top navigation.
-
Select the Hubspot app that you want to register the webhook for.
- In the side menu of the Hubspot, click on the "Webhooks" submenu.
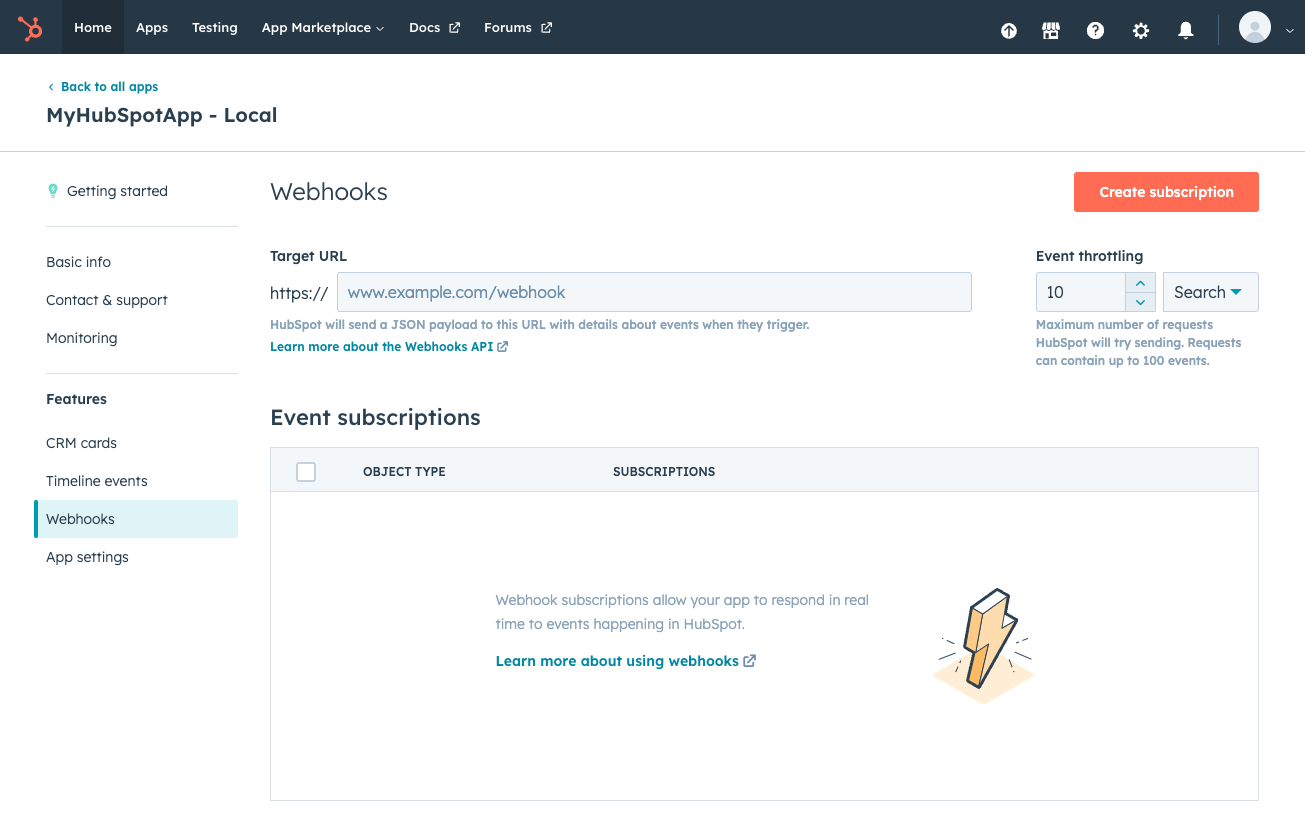
- Create a Hubspot webhook
To create a Hubspot webhook, you have to enter the Apidek "Webhook execute URL" as the "Target URL" and press "Save" at the bottom.
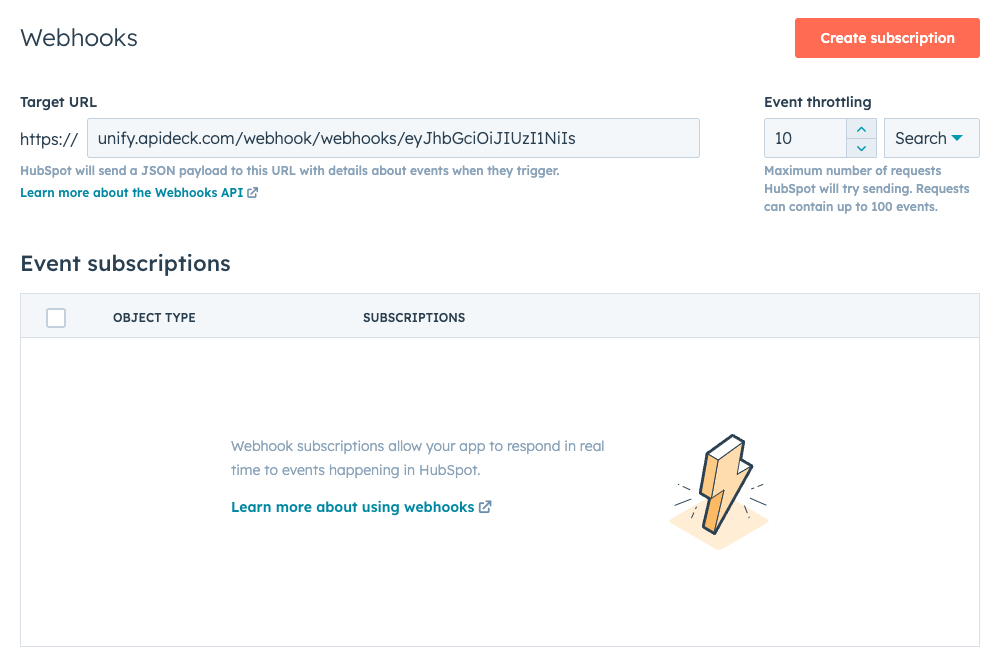
- Create a subscription
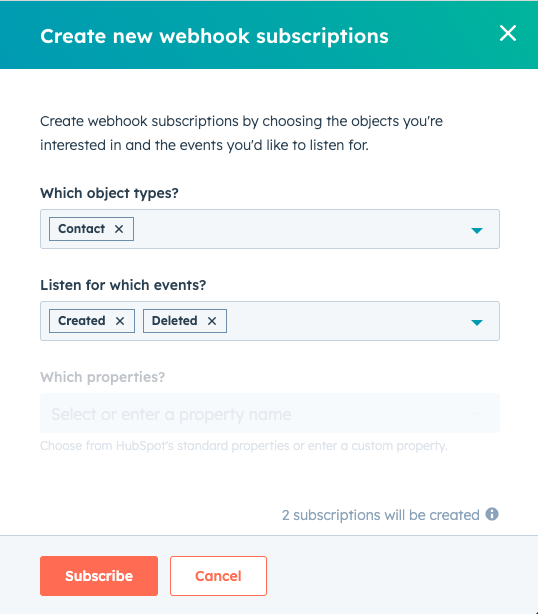
Press the "Create a subscription" button to create a subscription for the webhook and configure the events you want to subscribe to. Press the "Subscribe" button at the bottom to save your preferences.
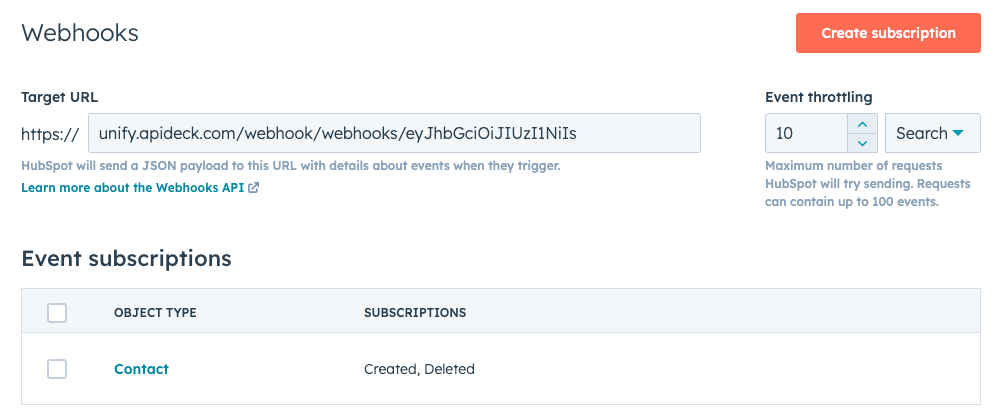
After the webhook has been registered, you can view and edit the webhook events or delete the webhook as needed.
Subscribe to Unify events
After you have completed the above steps, you can subscribe to your application to Unify Events.
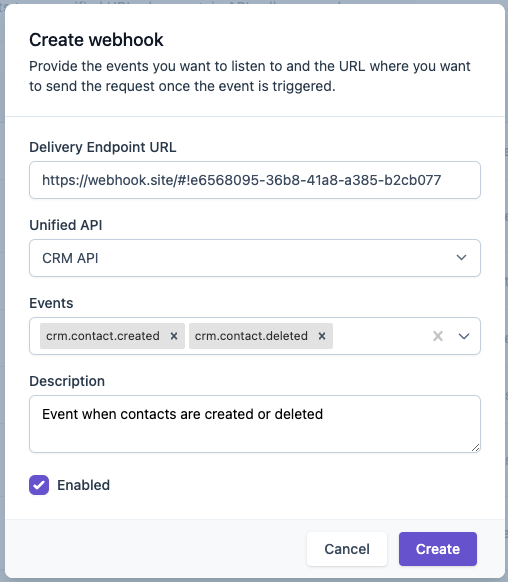
The following guide will explain all the steps to subscribe to Unify webhooks events: How to subscribe to webhook events
FAQ and troubleshooting
Error: HubSpot Insufficient Scopes Were Provided
What causes the HubSpot insufficient scopes error?
An insufficient scopes error happens when there is a mismatch of scopes in your application's HubSpot install URL (OAuth).
For example, let's say your HubSpot application only has the crm.objects.contacts.write scope selected.
If your scopes in Apideck have different/additional scopes, such as crm.objects.contacts.read or files, you will receive the "Insufficient scopes were provided. Please contact the app developer" error.
Common scenarios that cause this error:
- Missing CRM scopes: Your HubSpot app doesn't include all required CRM scopes
- Missing file scopes: You're using File Storage API but haven't added
files,files.ui_hidden.read, orforms-uploaded-filesscopes - Scope mismatch: The scopes configured in your HubSpot app don't exactly match what's being requested
To fix this error:
In your HubSpot developer account, go to your application → Basic info → Auth → Scopes. Ensure the scopes you selected for your HubSpot application match exactly with what you're using in Apideck:
- For CRM operations: Include all required CRM scopes
- For File Storage operations: Add the file scopes
For a list of all HubSpot scopes, check out the following docs.
Missing webhook support for Hubspot engagements/activities
Hubspot does not support webhooks for engagements (notes, activities, etc.).