How to connect to AFAS Software
To create a connection with AFAS Software, you have the following steps:
- Create test environment (optional)
- Create a user
- Authorize a connector user
- Create a user group
- Create an app connector
- Add needed GetConnectors and UpdateConnectors
- Create a user token
- Vault Connection Setup
Handy guides related to AFAS:
- Expose additional fields from AFAS
- How to expose the manager info for an employee?
- How to add a custom field in AFAS?
1. Create test environment
This step is optional but for testing purposes it's best to create a new test environment.
- First make sure that no other tasks are being performed on the system at the time when you want to add a new environment.
- Go to: General / Environment / Management / New
- Fill in a name, max 8 characters and first char should be a letter, and select the "Demo environment".
2. Create a user
It is best practice to create a new user for each external application that connects to AFAS Software.
- Go to: General / Management / Authorisation tool
- Next go to: User / New system user
- Fill in the needed fields and make sure your user as an email.
3. Authorise a connector user
We'll need to give this user access to GetConnectors, reports etc.
- Go to: General / Management / Authorisation tool
- Go to the tab User maintenance
- Select the user and go to the tab Authorization
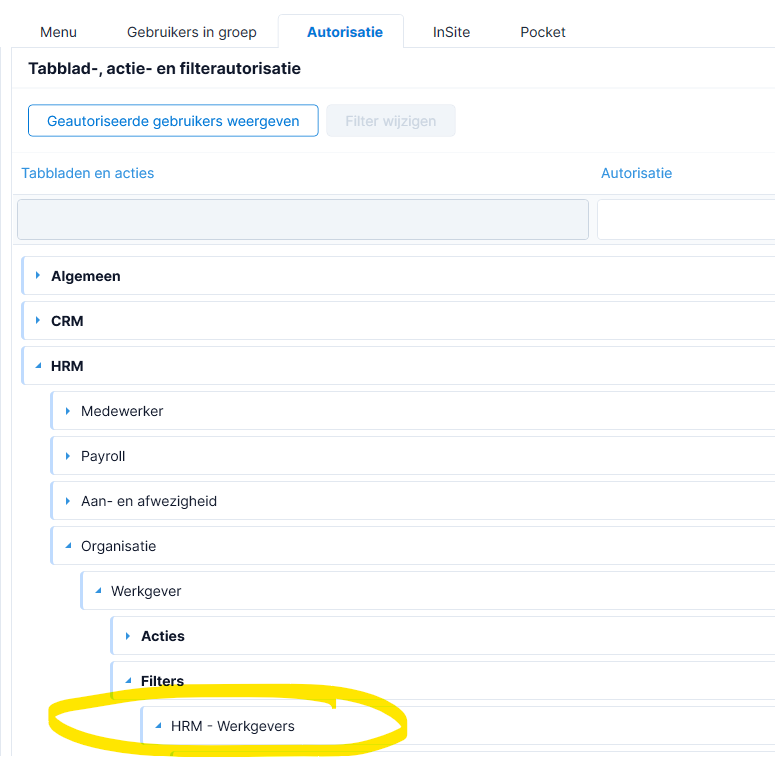
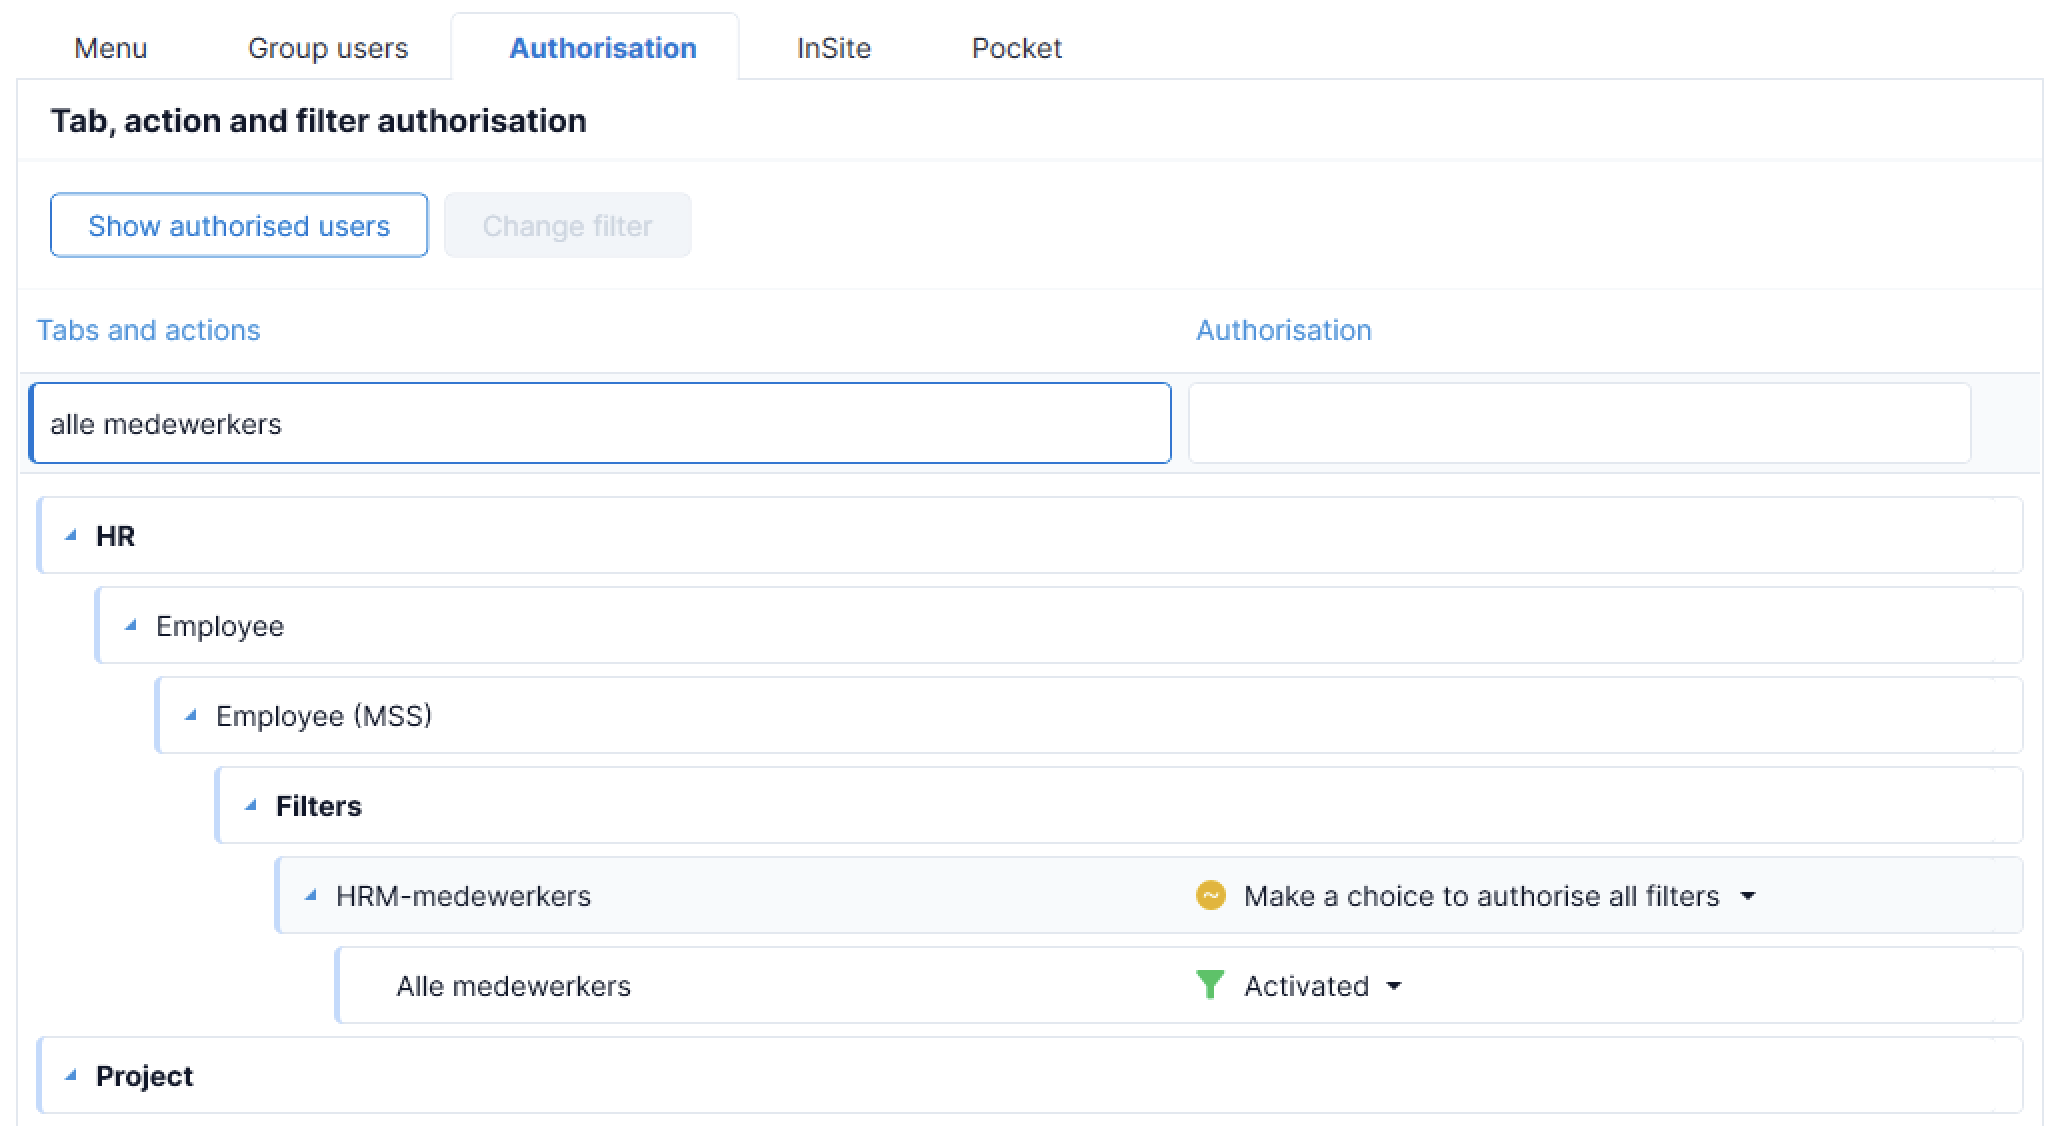
- Select the folder General / Management / Definition / Filters
- Check the radio button Filter active on the bottom of the window
4. Create a user group
In the next step we will be creating an App Connector. As we can only give user groups access, we will need to create new user group (or use an existing one)
- Go to: General / Management / Authorisation tool
- Go to: Group / New or click on the New user group icon
- Complete the fields
- Go to the tab: Group maintenance
- Select the new user group
- Go to the tab: Users in group
- Deselect the Show selected items only check box
- Select the users that you want to put in the group. These are users that are going to use the app and will therefore receive rights to certain connectors
5. Create an App Connector
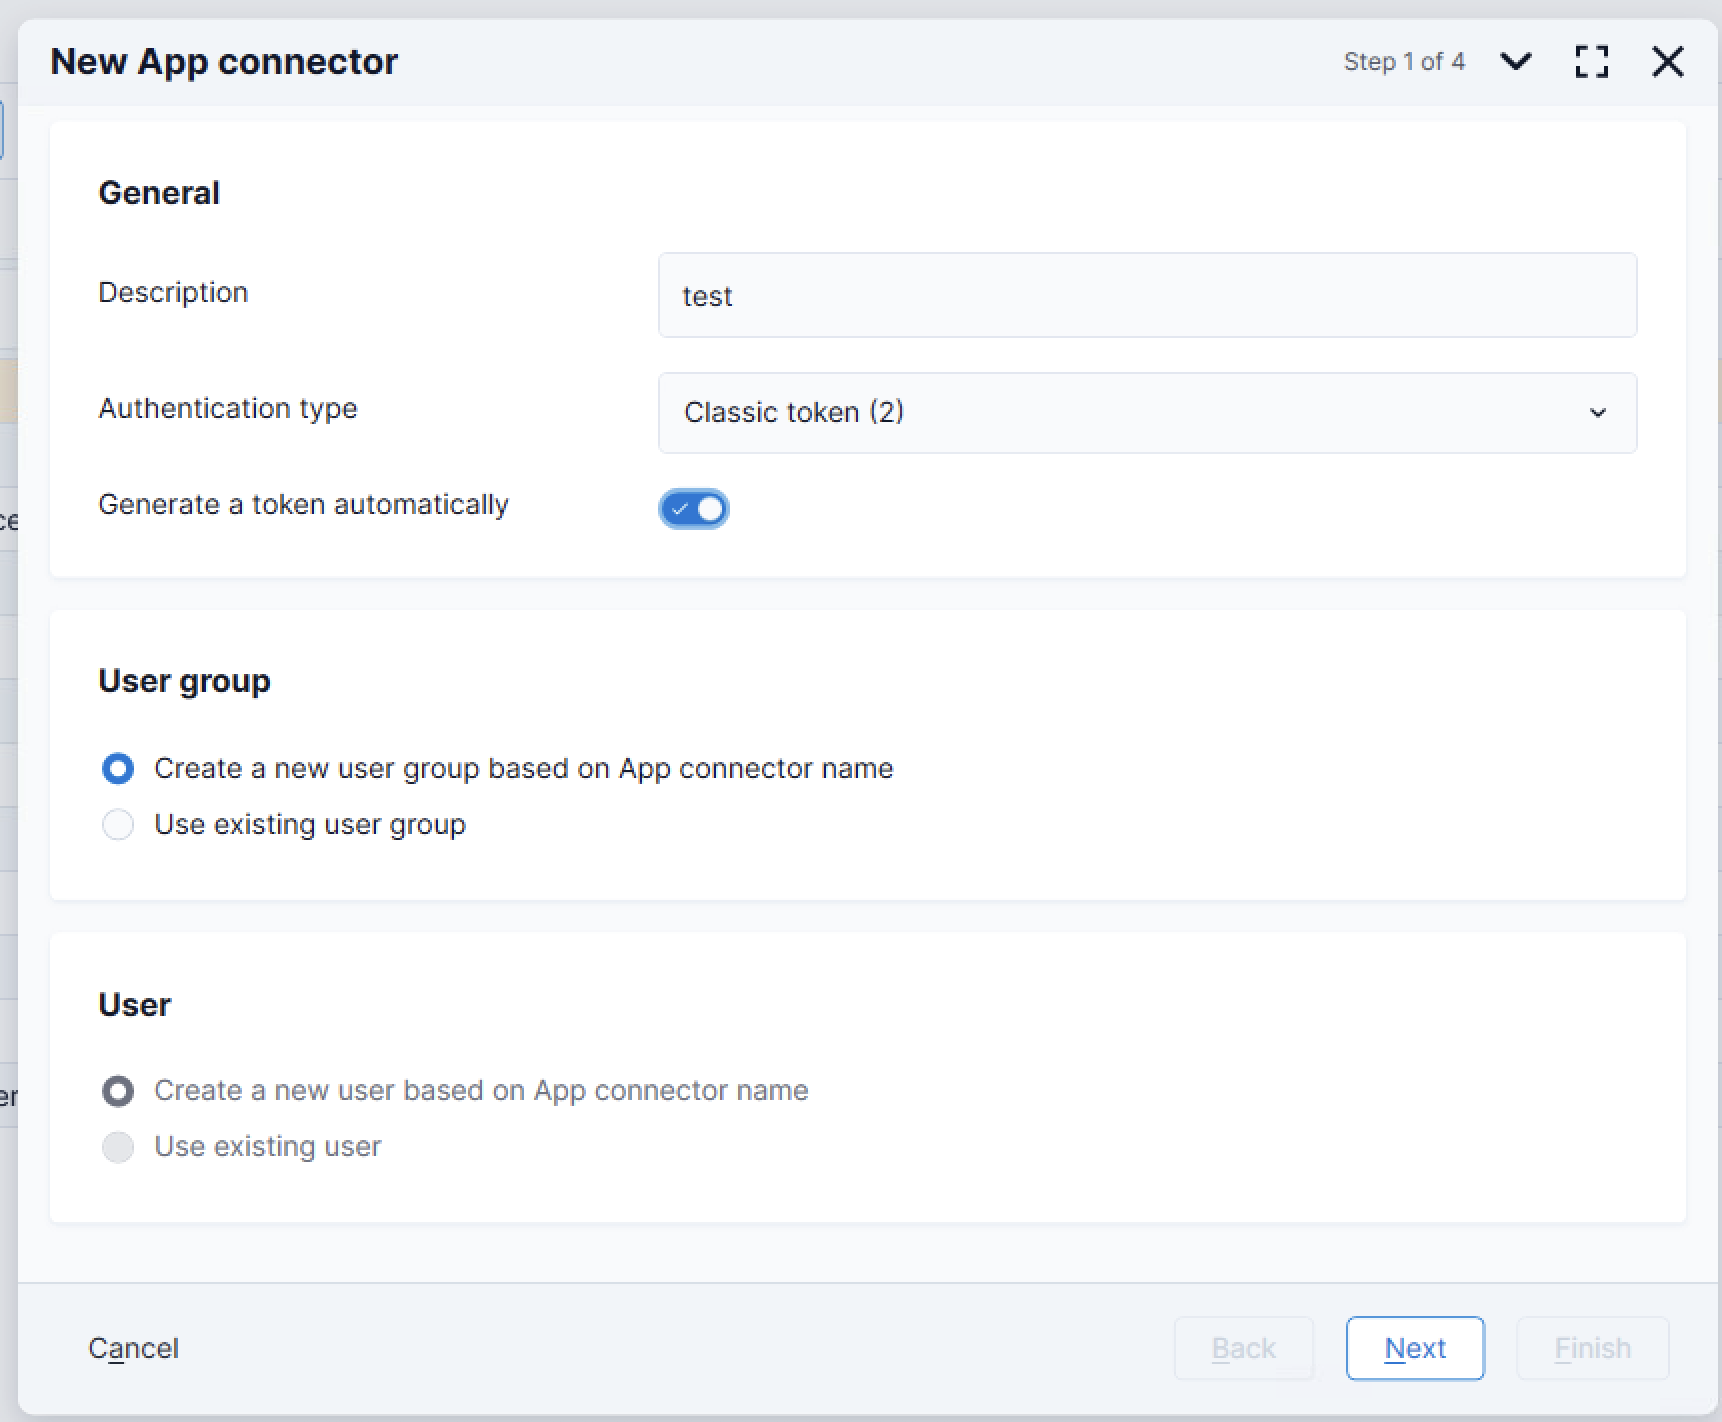
- Go to: General / Management / App connector
- Click on: New
- Enter the description
- Select the user group in User group
If you go to the general properties of your newly created app connector, you should copy the
API Keyand
Environment Key. We will need this in a later step.
6. Add needed GetConnectors and UpdateConnectors
- Still on the app connector properties screen
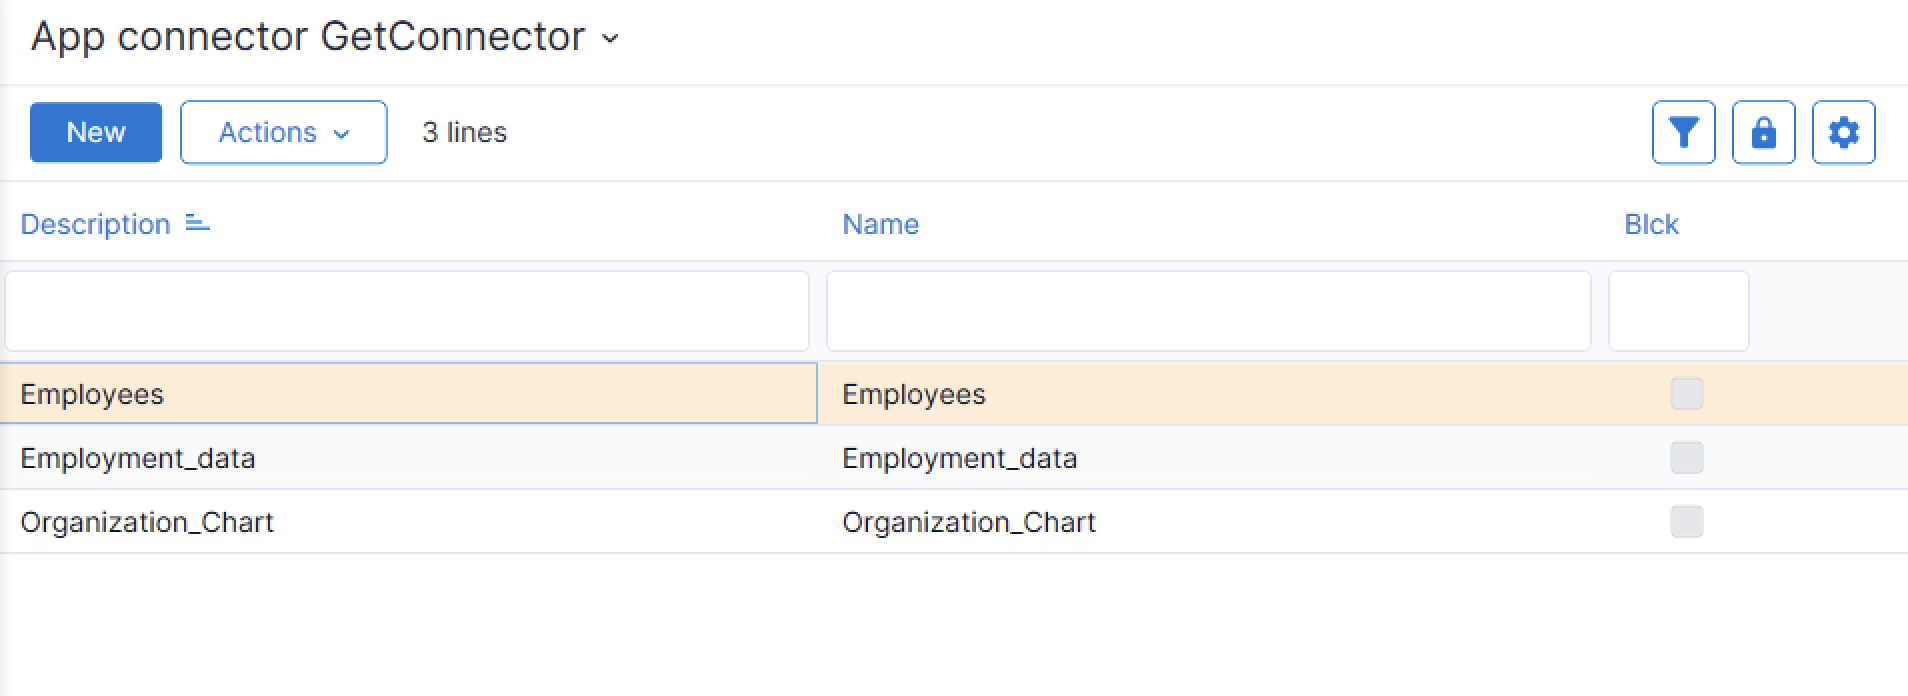
- Go to: GetConnectors and allow all Profit GetConnectors
- Do the same for UpdateConnectors
7. Create a user token
- Still on the app connector properties screen
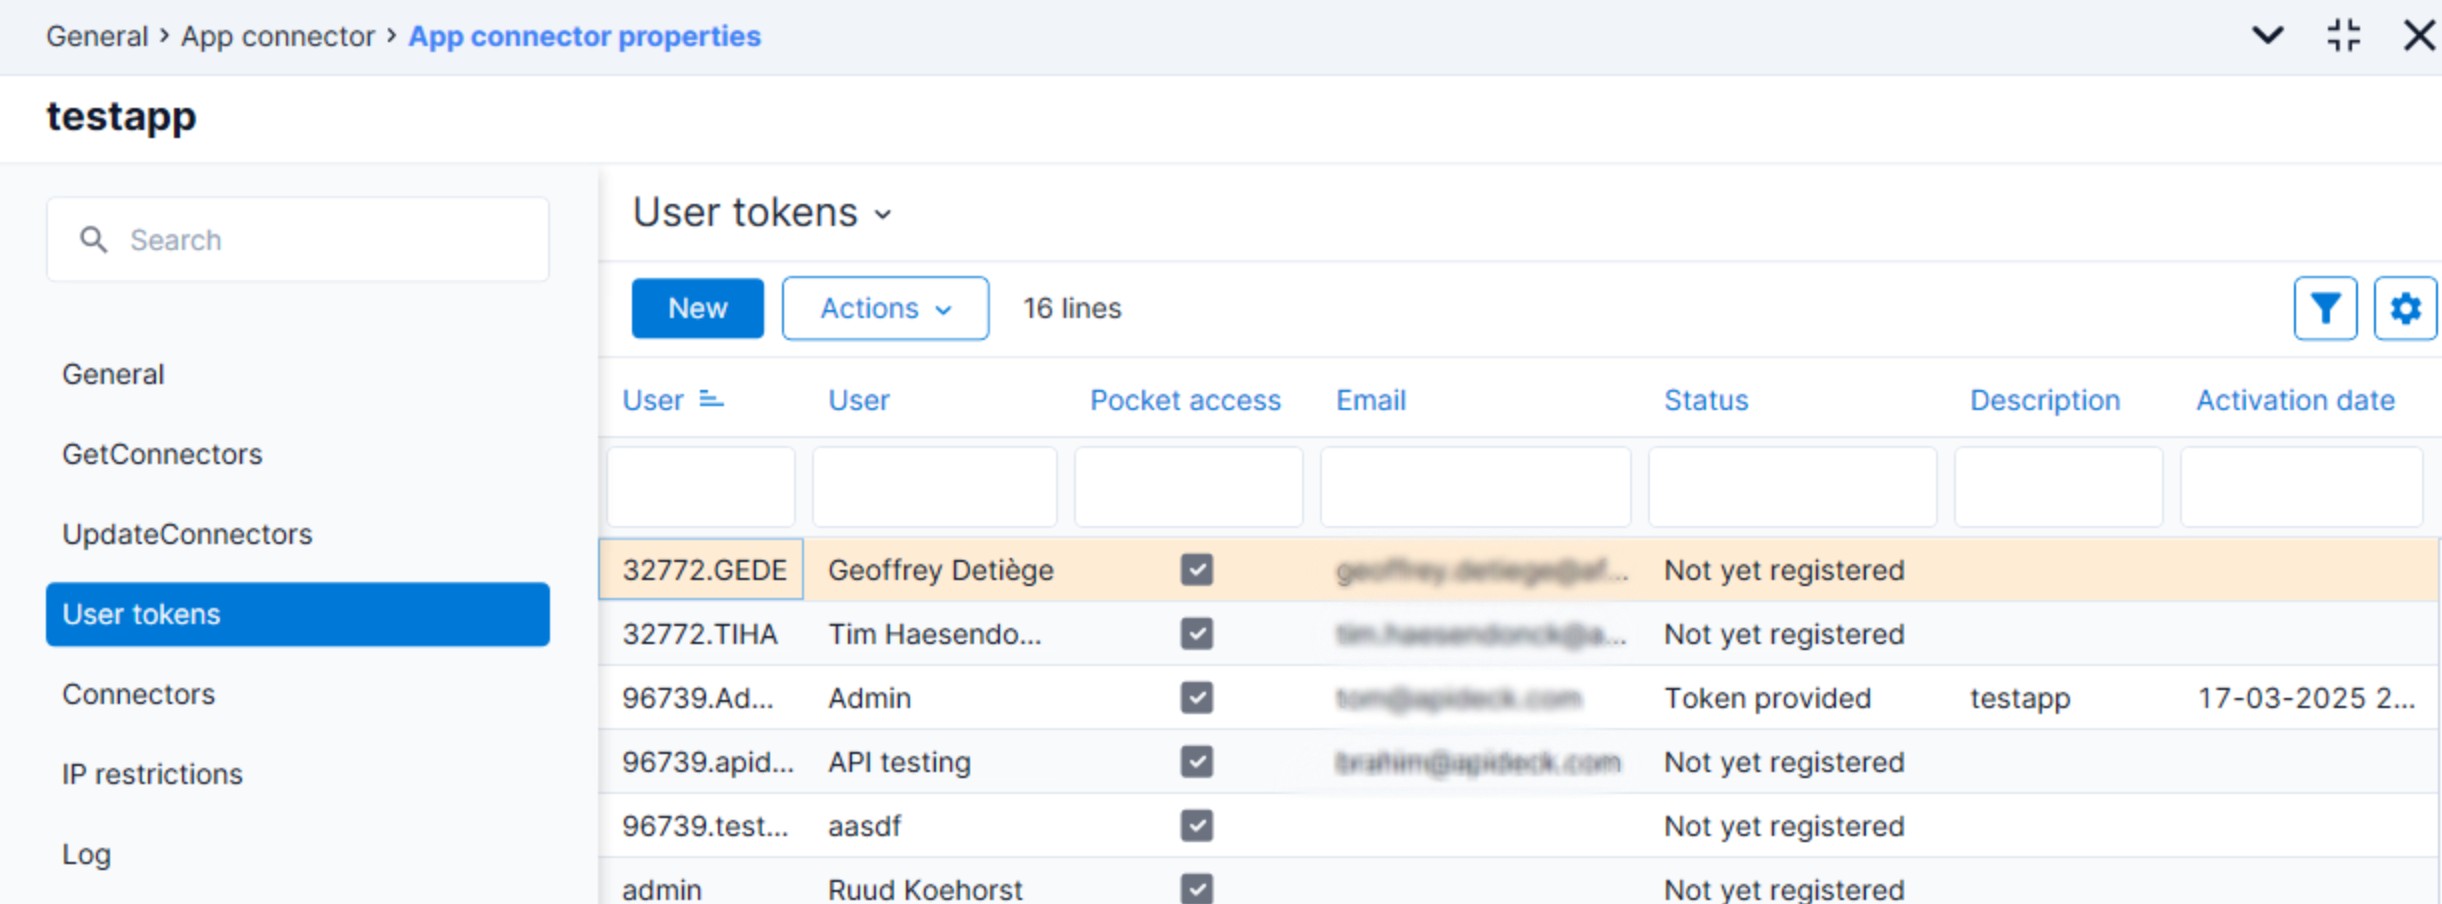
- Go to: User tokens
- Click on New to create a token
Caution: You can only see and copy the token during creation, so make sure to store it somewhere. We'll need this in the next step.
8. Vault Connection Setup
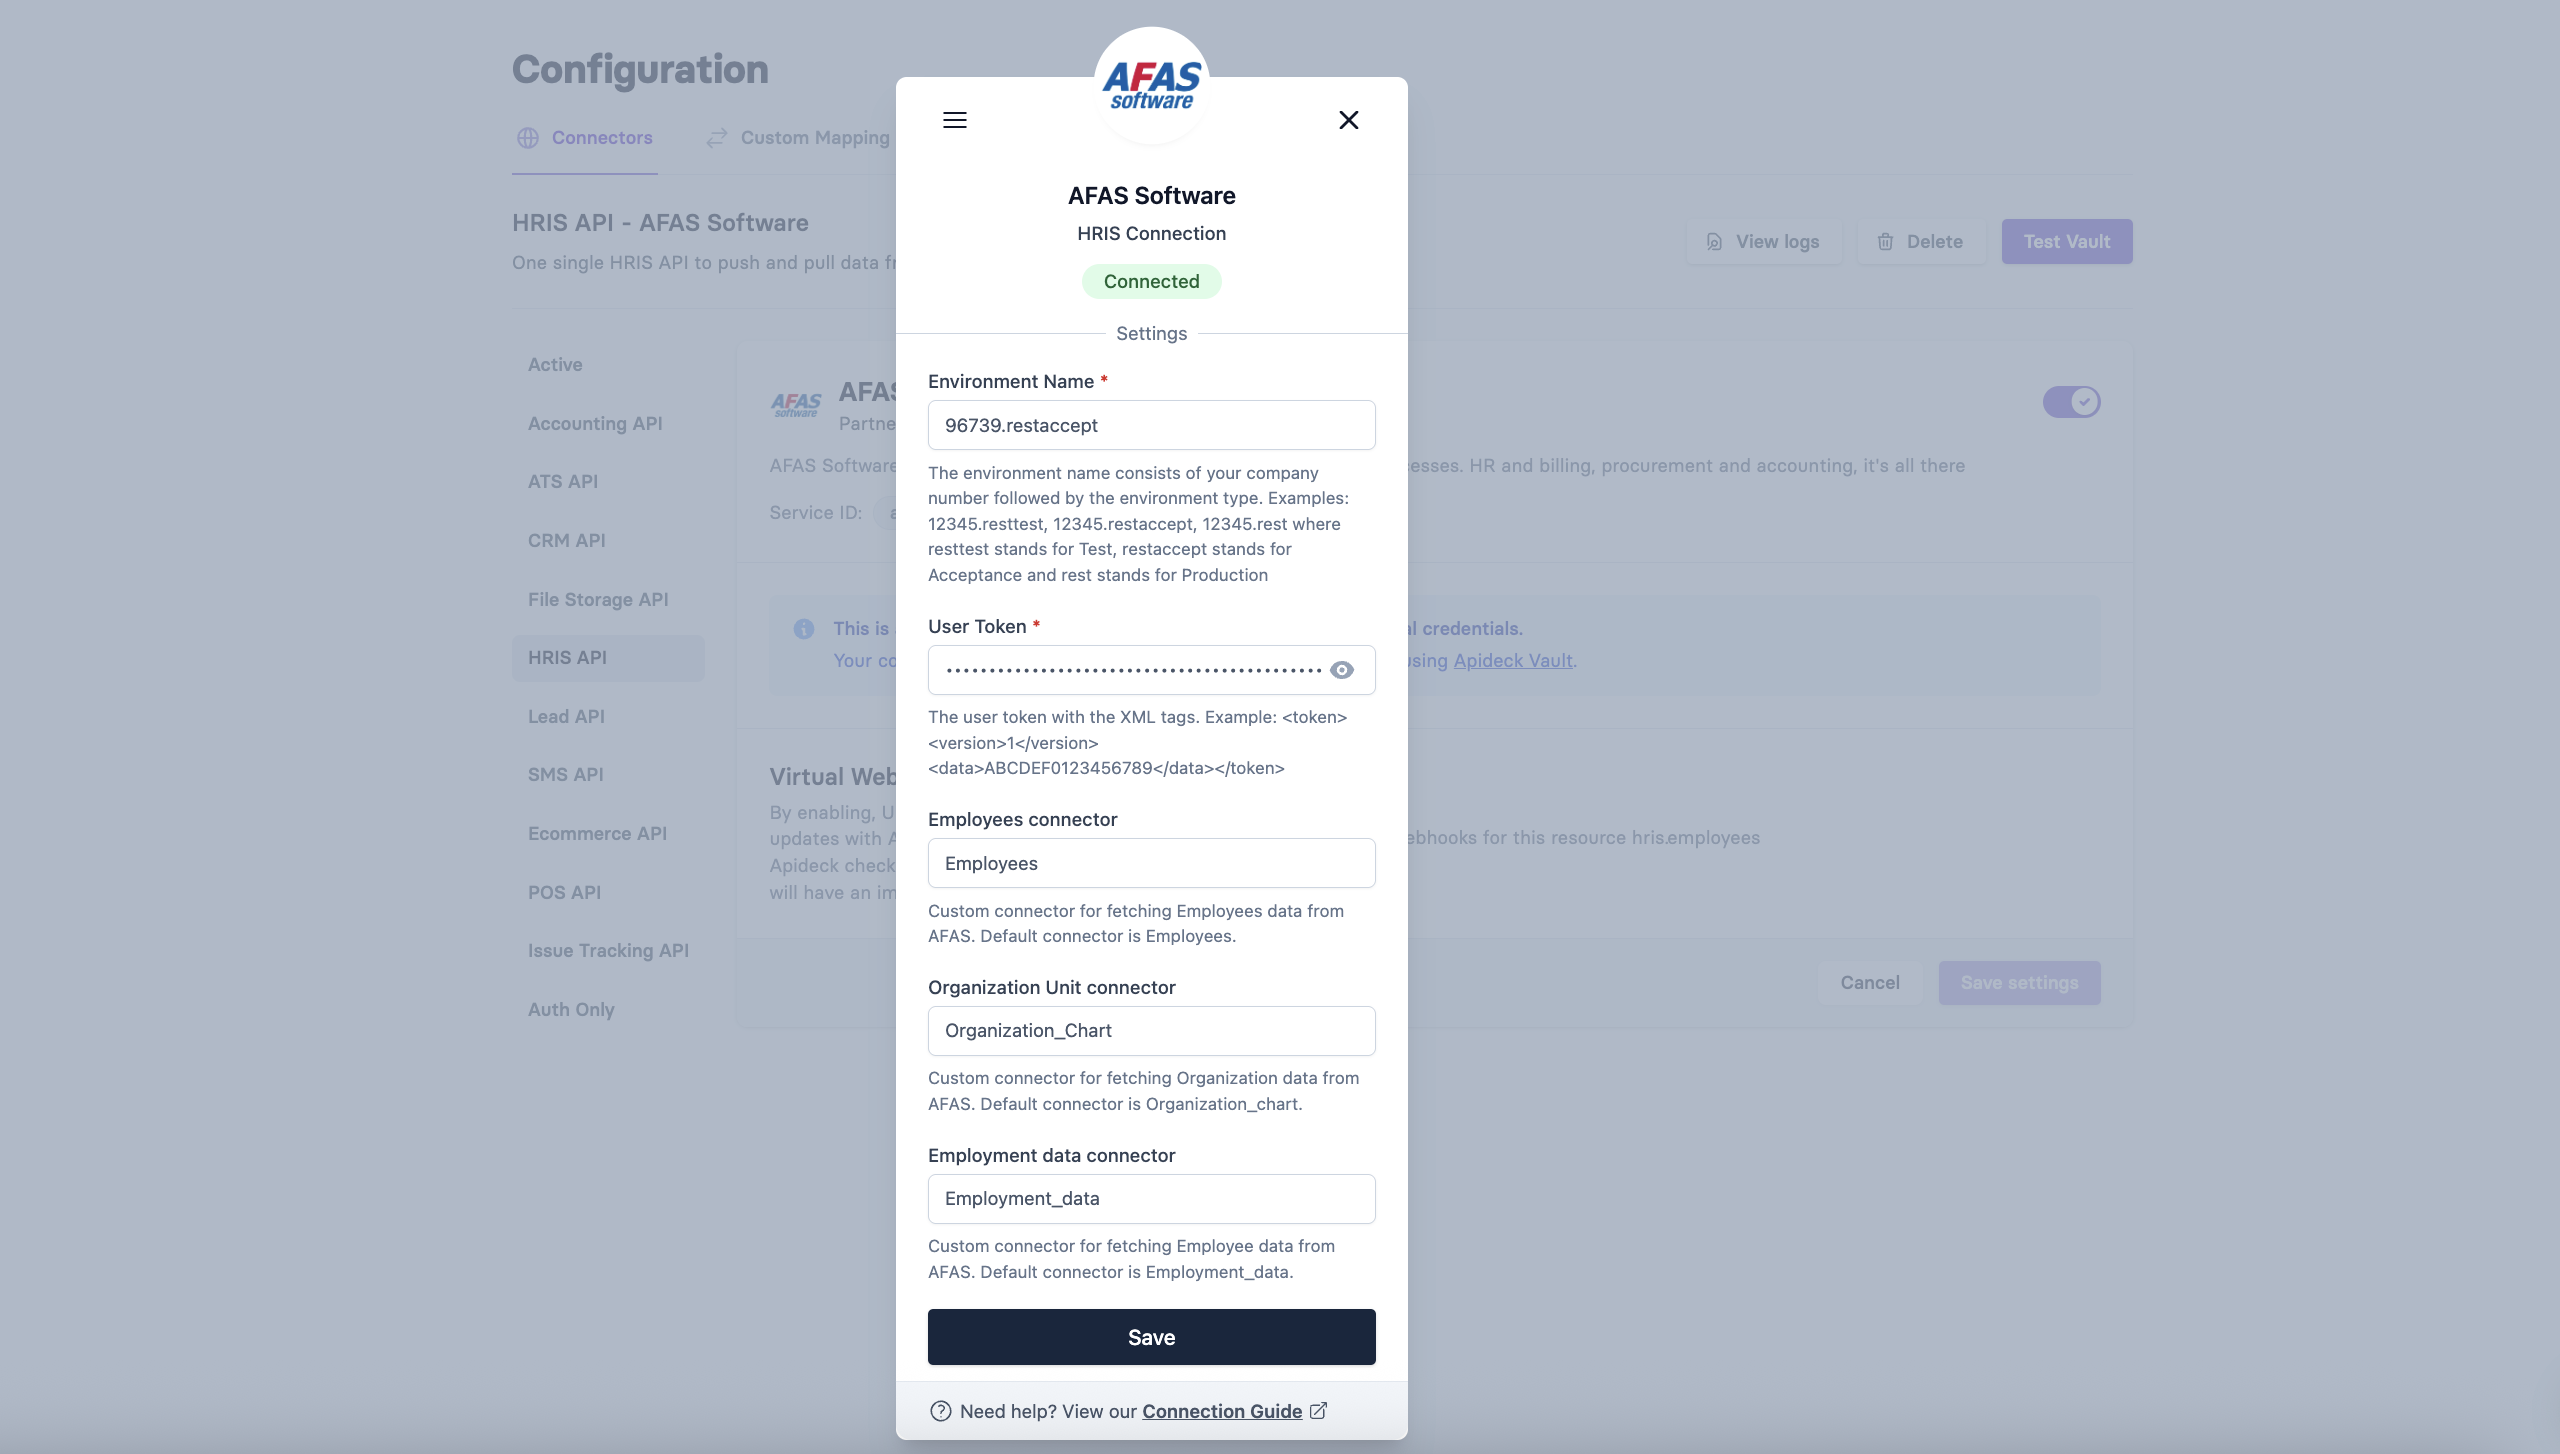
Now that you've created an app connector with the needed permissions, you're ready to fill out your credentials in Vault.
Expose additional fields from AFAS
AFAS uses "Connectors" to define which fields will be exposed on their API.
The following steps will guide you with:
- Create a custom connector with additional fields
- Add the custom connector to the App Connector
- Configure the custom connector in Vault
- Map the additional fields via Vault
AFAS allows to create "custom fields", more info can be found in the AFAS Help Center.
1. Create a custom connector with additional fields
AFAS does not allow to add additional fields to the default connectors, so you have to create new connector. You can start from an existing connector which will, by default, copy all the existing fields and allow you to add additional fields.
- Go to "General" > "Output" > "Management" > "GetConnector"
- Click on "New" to add your custom connector
- Search for the connector "Profit_Employees"
- Select "Existing GetConnector" on the "Based on" field
- Select the "Profit_Employees" connector and click "Next"
- Give it a clear name (example: "Profit_Employees_Extra"). This name will be needed for configuring the connection in Vault and adding it the App Connector in AFAS.
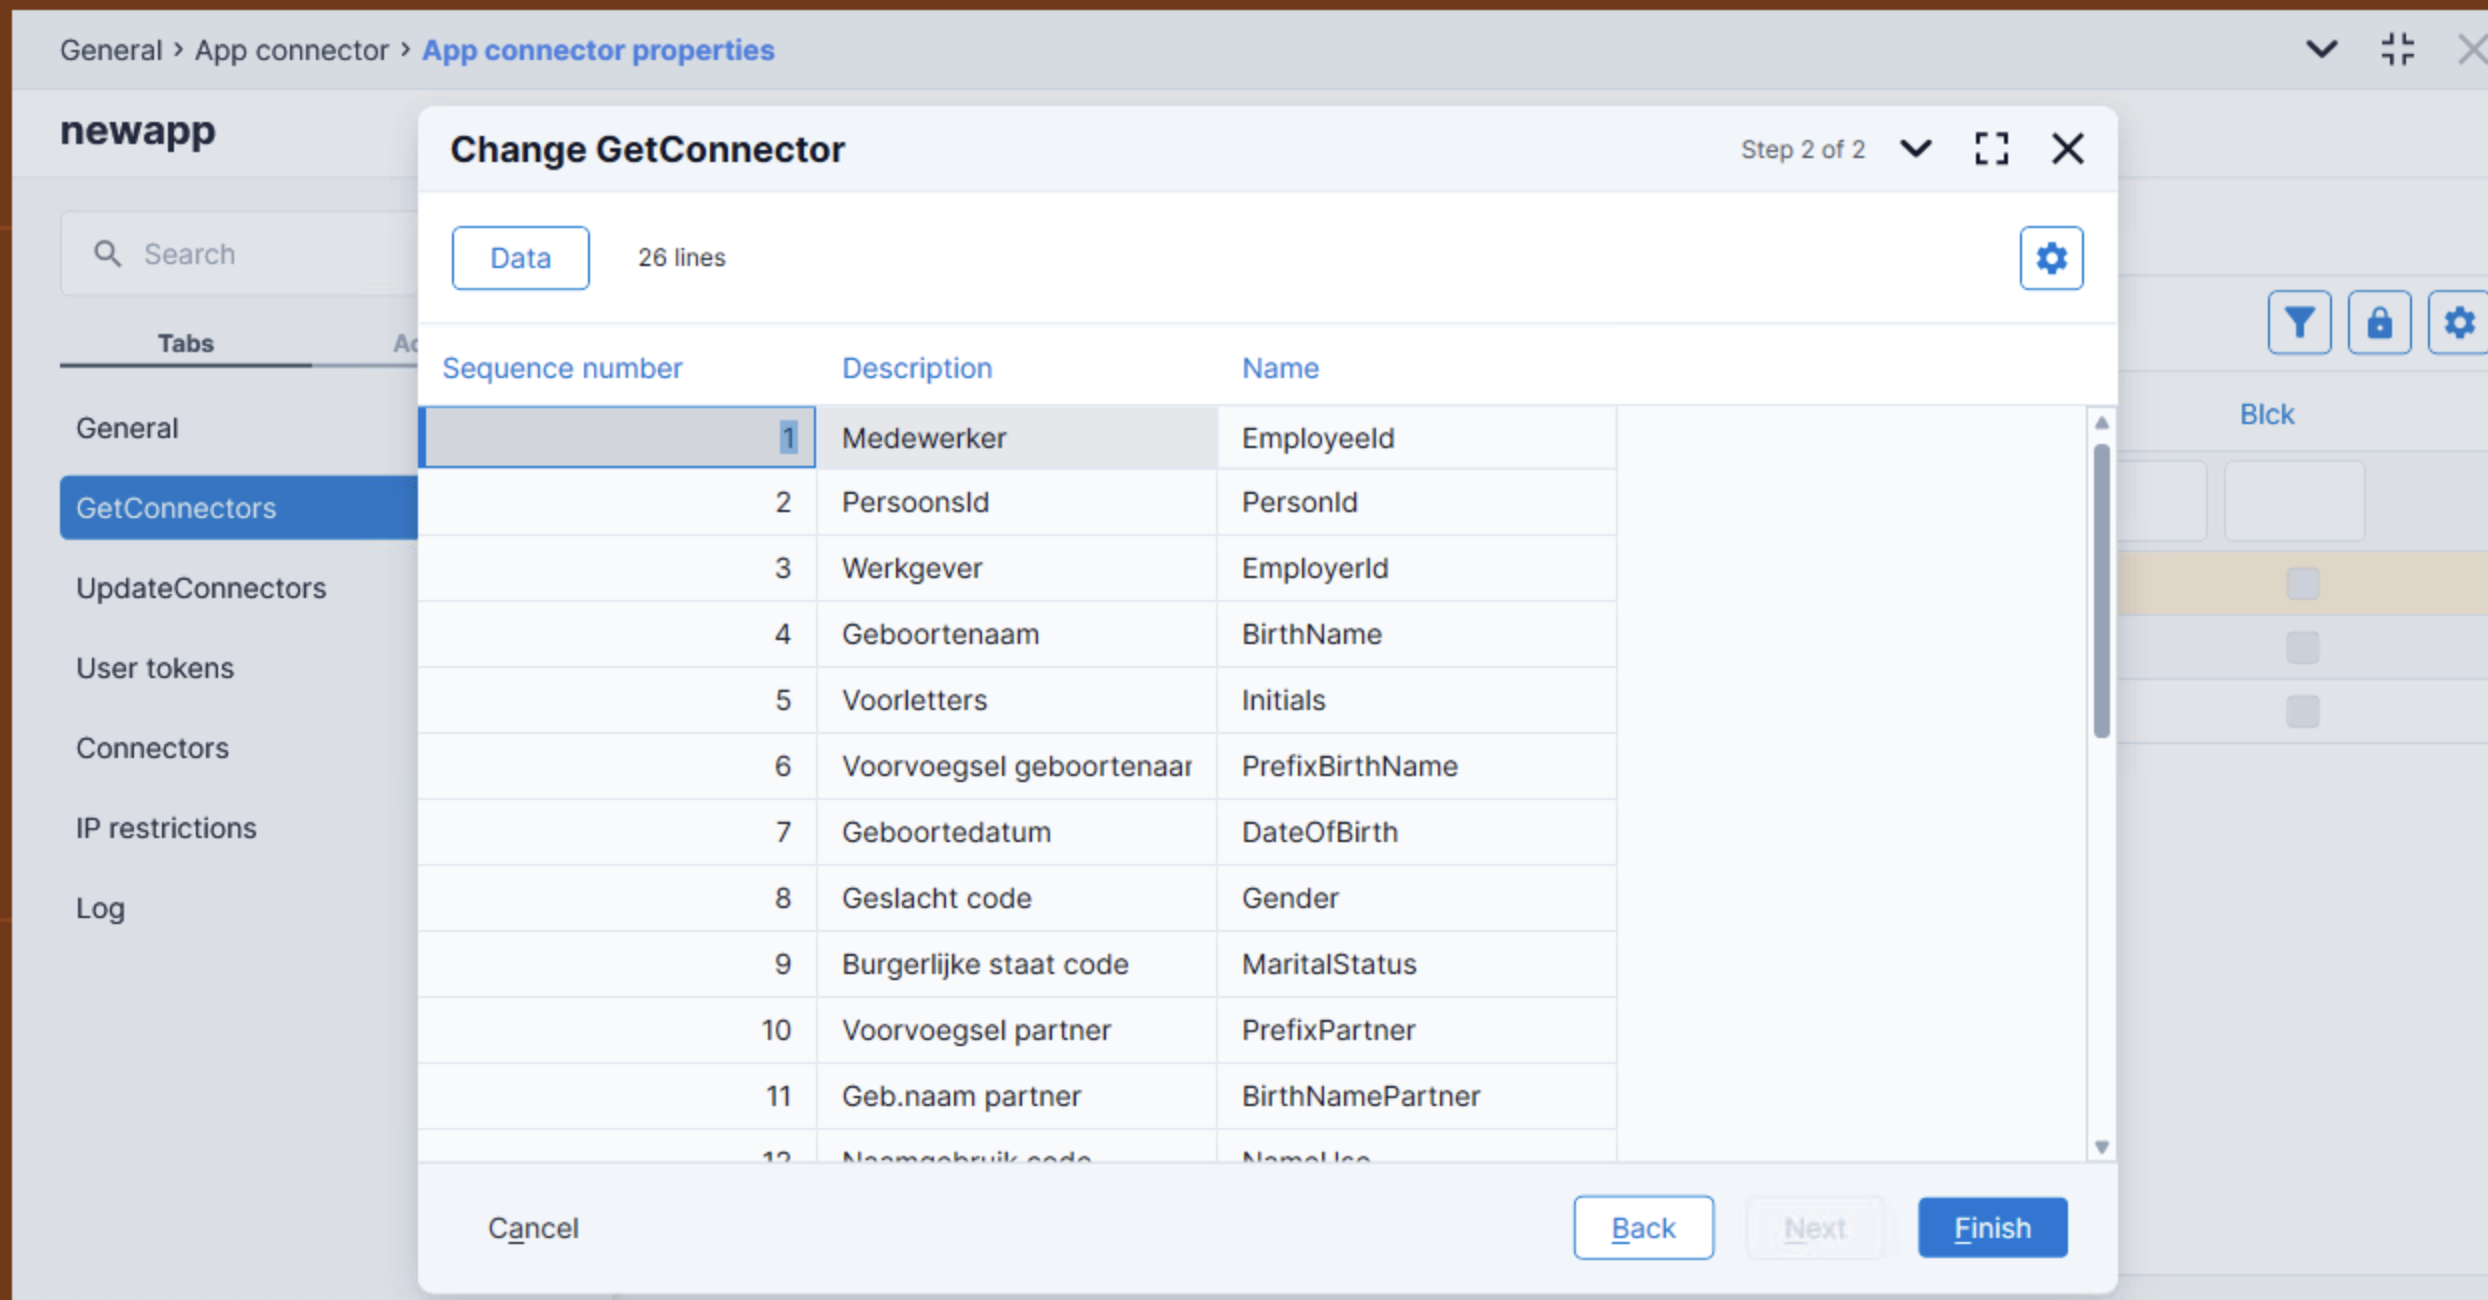
- Click on the top "Data" button to add additional fields.
- Navigate through the field groups and drag & drop the fields (example: "T-Shirt") you want to add it to "Fields in collection of data".
- Click "Finish" after you have added all the additional fields.
- All the fields are added, Click "Finish" to save the custom connector.
2. Add the custom connector to the App Connector
Your custom GetConnector is configured with the additional fields, but it is not available to be used.
- Go to "General" > "Output" > "Management" > "App Connector"
- Edit the "App Connector" that was created in step "5. Create an app connector".
- Go to the "GetConnectors" menu
- Click on "New" to add your custom connector
- Search for the custom connector, which is "Profit_Employees_Extra" in our example.
- Select the "Profit_Employees_Extra" connector and click "Finish".
- This will add your custom connector the App Connector.
- Don't forget to press "Save and Close" at the bottom of the page
3. Configure the custom connector in Vault
Since we want to use the custom connector with the additional fields, we need change the connector in Vault.
- Open Vault and goto the AFAS integration
- Enter the name of the custom connector, which is "Profit_Employees_Extra" in our example, and press "Save".
4. Map the additional fields via Vault
The AFAS API will now be using your custom connector with the additional fields. In Vault, you can configure the additional fields, if these are requested by the integration. In our example, a field "T-shirt Size" is requested.
- In Vault, you can start mapping the "T-shirt Size" field by pressing the "Map field" button.
- Click "Edit" to start mapping the field.
- From the list of fields, search for the desired field and select it.
- Press "Save Mapping" to store your field mapping.
- The field mapping is finished and can be used by the integration.
Extra guides for AFAS
How to expose the manager info for an employee?
The manager info for an employee is not shown by AFAS by default.
To expose te manager data to an integration, you can complete the following steps.
Follow the guide as described here: Expose additional fields from AFAS with the following differences:
- In step 1. Create a custom connector with additional fields, start from the existing connector "Profit_OrganizationChart".
- Give it a clear name (example: "Profit_OrganizationChart_Extra"). This name will be needed for configuring the connection in Vault and adding it the App Connector in AFAS.
- Click on the top "Data" button to add additional fields.
- Add the manager ID to you custom connector, by drag & dropping the field:
- Organisational unit > Manager > Employee
- Be sure to use "ManagerId" as "Column Title" & "Field"
-
Click "Finish" to save the configuration
-
Next add the new custom connector to your App Connector in AFAS, by following step 2. Add the custom connector to the App Connector.
-
Follow all the steps until you arrive at the part about adding a "New" connector to your App Connector
- Search for the custom connector, which is "Profit_OrganizationChart_Extra" in our example.
- Select the "Profit_OrganizationChart_Extra" connector and click "Finish".
-
This will add your custom connector the App Connector.
-
Don't forget to press "Save and Close" at the bottom of the page
-
Enter the name of the custom connector for "Organization Unit connector", which is "Profit_OrganizationChart_Extra" in our example, and press "Save".
You are done and have allowed the integration to access the Manager info.
How to add a custom field in AFAS?
AFAS allows to create "custom fields", more info can be found in the AFAS Help Center.
Let's take the example of adding a custom field in AFAS to store the "T-shirt" for an employee.
- Go to "General" › "Management tool" >
- Search for the function group "Medewerker" and double-click it to open the definition.
- At the bottom, there is the definition for "Employee"
- Click "New" field
- Create a new field
- Select the field type
- Enter a Label name
- The Column text will be automatically filled, but can be changed
- Field length
- After you have finished all the field settings, press "Finish"
- Add the new field to a "Tab"
- Double-click on "Meer ..." or create a "New" tab
- Move the new field to the tab
- Press "Finish"
REMARK: You have now added a field to the Employee model, but it is not yet added to your GET connector. If you want to display this field to the outside, you need to add the field in your custom GET connector, like we did here Expose additional fields from AFAS.