ADP Workforce Now – Connection Guide
The all-in-one platform for payroll and HR software, provides expert support and analytics for data-driven insights.

How to connect to ADP Workforce Now
This guide explains how to connect your ADP Workforce Now account through Vault.
Note: ADP Workforce Now is ADP's US and Canada product. ADP publishes ADP API Central, the add-on these steps use, on its US storefront only, so if your ADP account is Canadian, ask your ADP representative how to get API access before following this guide. If you are outside the US and Canada, your ADP product is most likely ADP iHCM, which Apideck supports through a separate connector.
Prerequisites
To connect, you need ADP API credentials. These are obtained through ADP API Central, a paid add-on available on the ADP Marketplace.
If your ADP product is Workforce Now Next Generation, you are in the right place: it is covered by the same ADP API Central add-on and the same connector, with no separate setup.
Step 1: Purchase ADP API Central
- Go to the ADP Marketplace and purchase ADP API Central for ADP Workforce Now.
- Once purchased, ADP API Central will be activated in your ADP account within minutes.
Step 2: Create a project and generate credentials
- Log in to the ADP API Central portal.
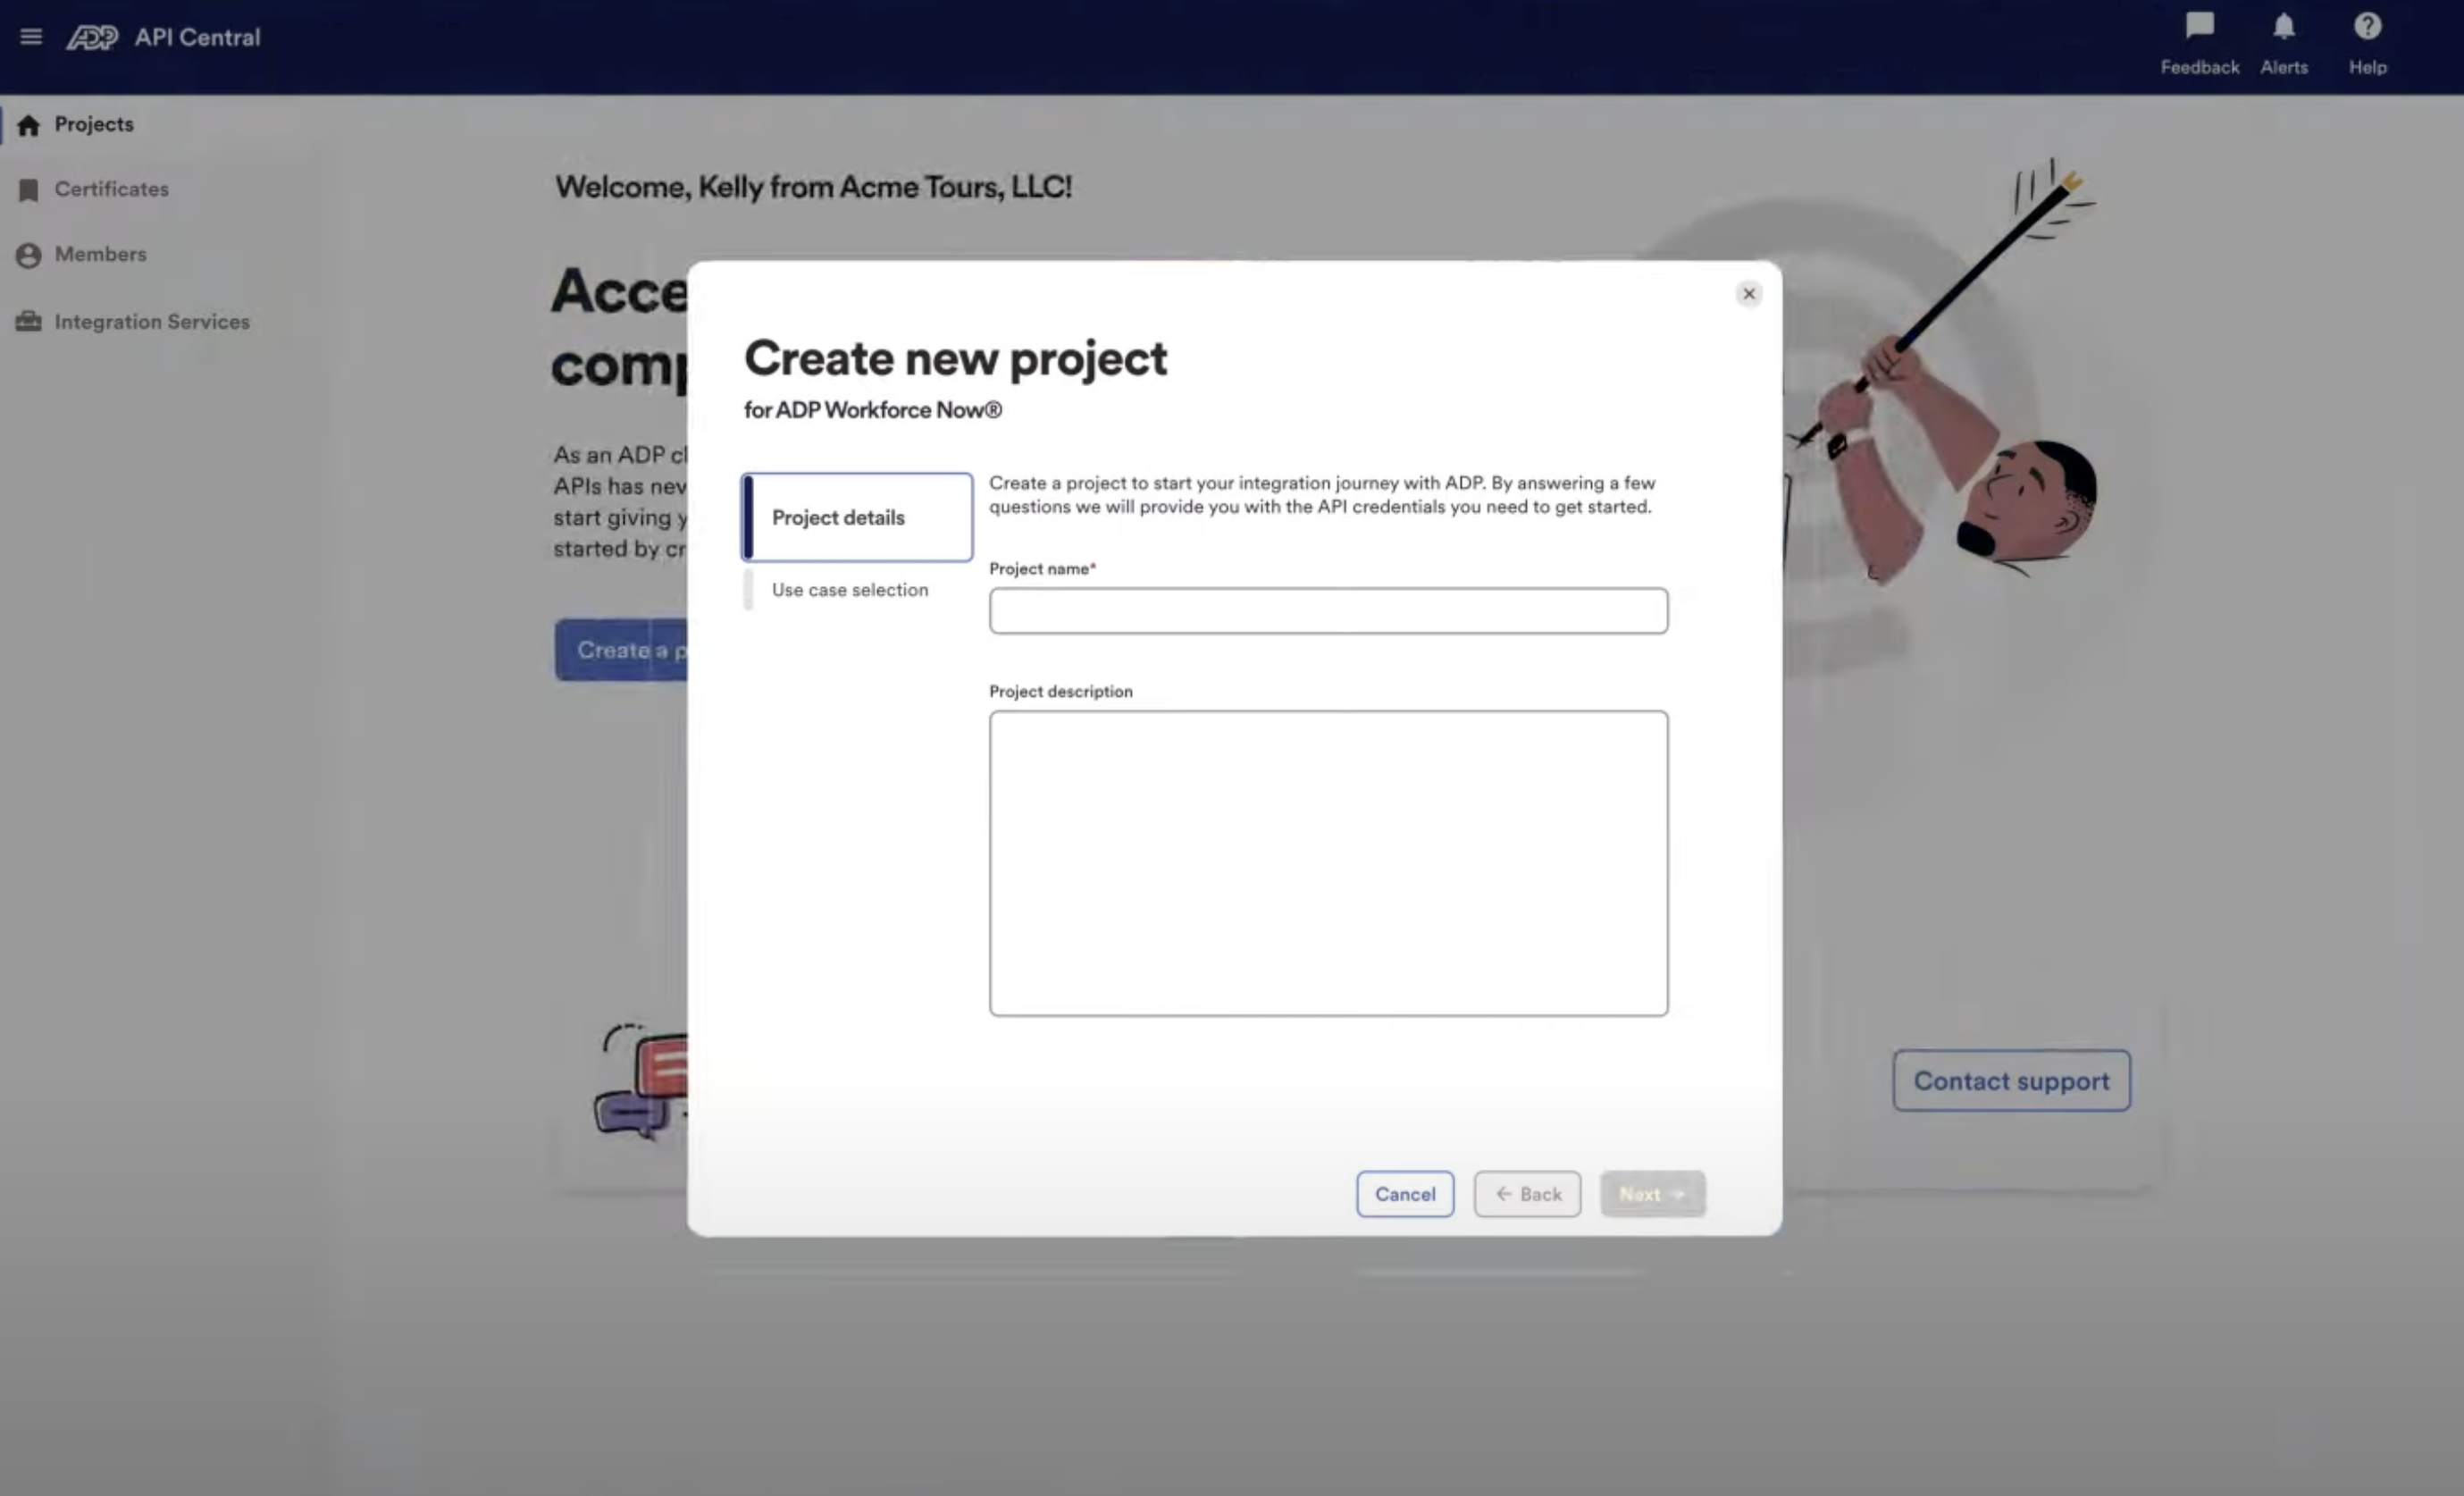
- Click Projects in the left menu, then Create Project to open the create-project wizard.
- Enter a project name and description.
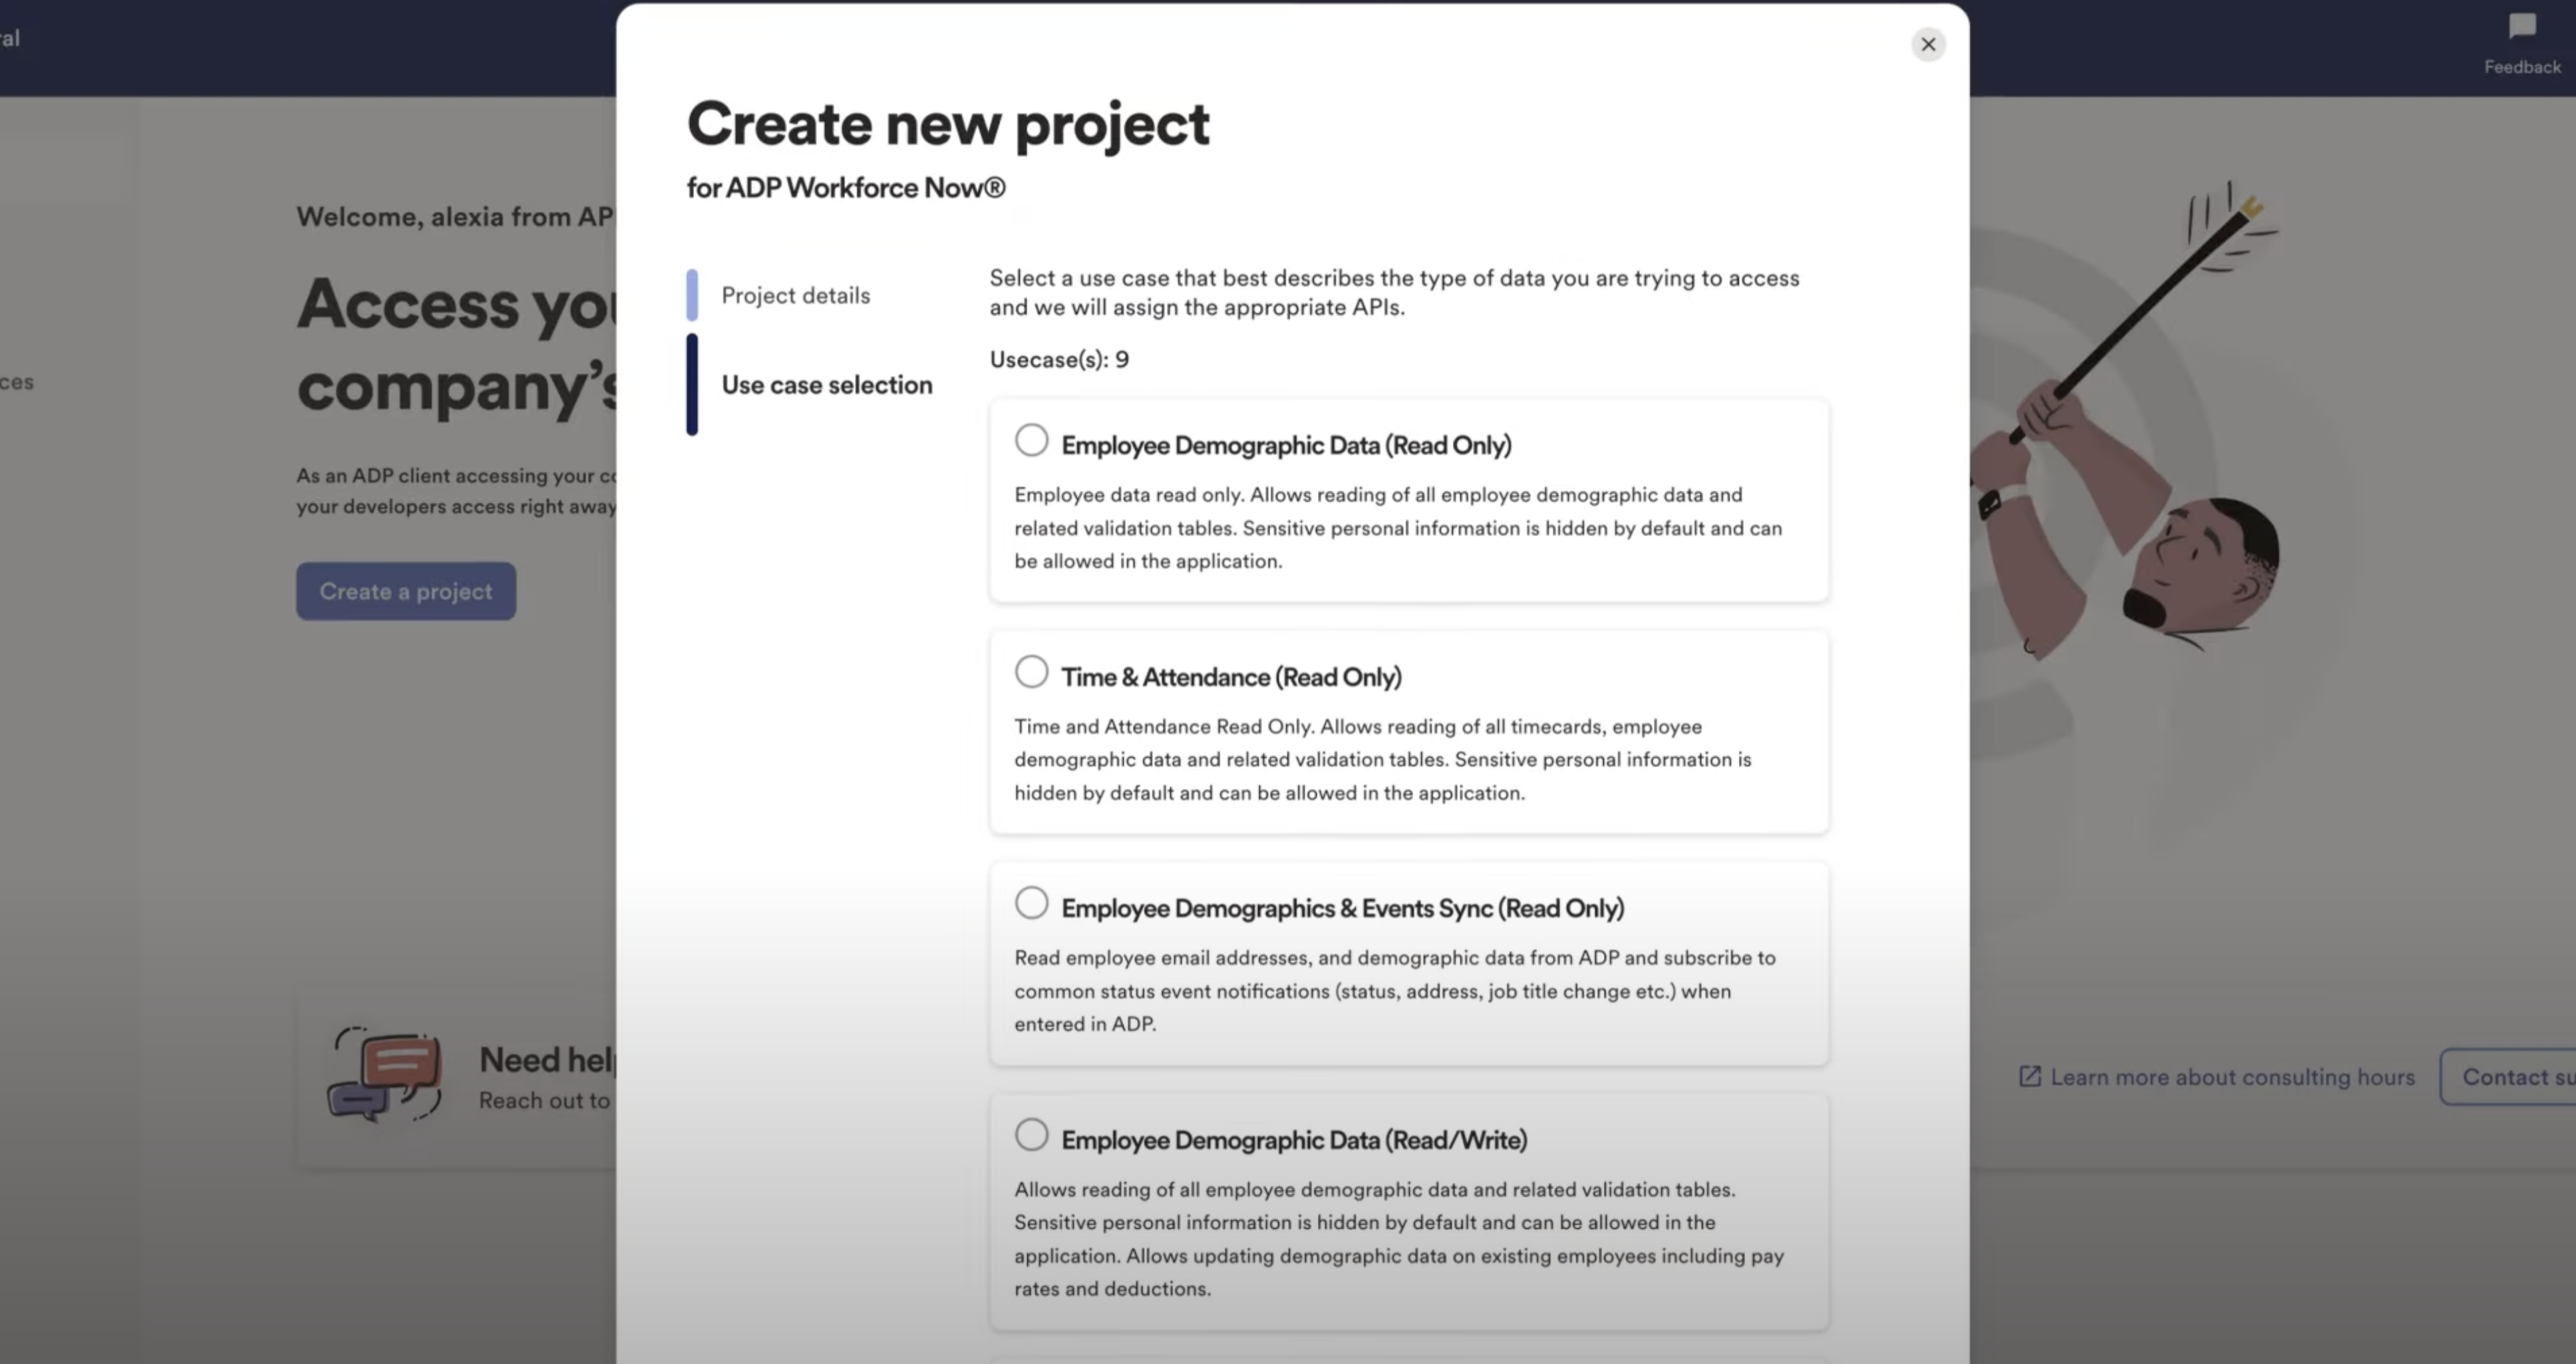
- Select the appropriate use case (e.g., Employee Demographic Data).
- Click Create Project.
- With the project created, add the Workers API to it. This is required, not optional: a project created with the Employee Demographic Data use case alone is scoped to worker demographics only, and employee reads then fail with
403 Invalid Scope. The connector reads employees, individual employees and time-off requests from ADP's worker endpoints, so the project must include the Workers API for any of them to work. If the Workers API is not offered to your project as something you can add, ask your ADP representative whether it is included in your subscription. - Check that the project's scope also covers the other resources you intend to read. Pay distributions, for example, are served by a payroll endpoint rather than the worker endpoints.
For ADP's own walkthrough of project creation, certificates and Workforce Now permissions, see the ADP API Central Quick Start Guide.
Step 3: Set the Workforce Now permissions for the project
The project's Workforce Now permissions must be set so that it can read the employee data you intend to expose, otherwise the project cannot return that data even with the Workers API added. ADP walks through this in chapter 5, "How to set Workforce Now Permission", of the ADP API Central Quick Start Guide — follow the screens there.
Step 4: Generate a TLS certificate
- In your project, click Manage Certificate.
- Follow the steps to generate a certificate. ADP issues it against a certificate signing request.
- Download and save both the certificate file (.crt/.pem) and private key file (.key).
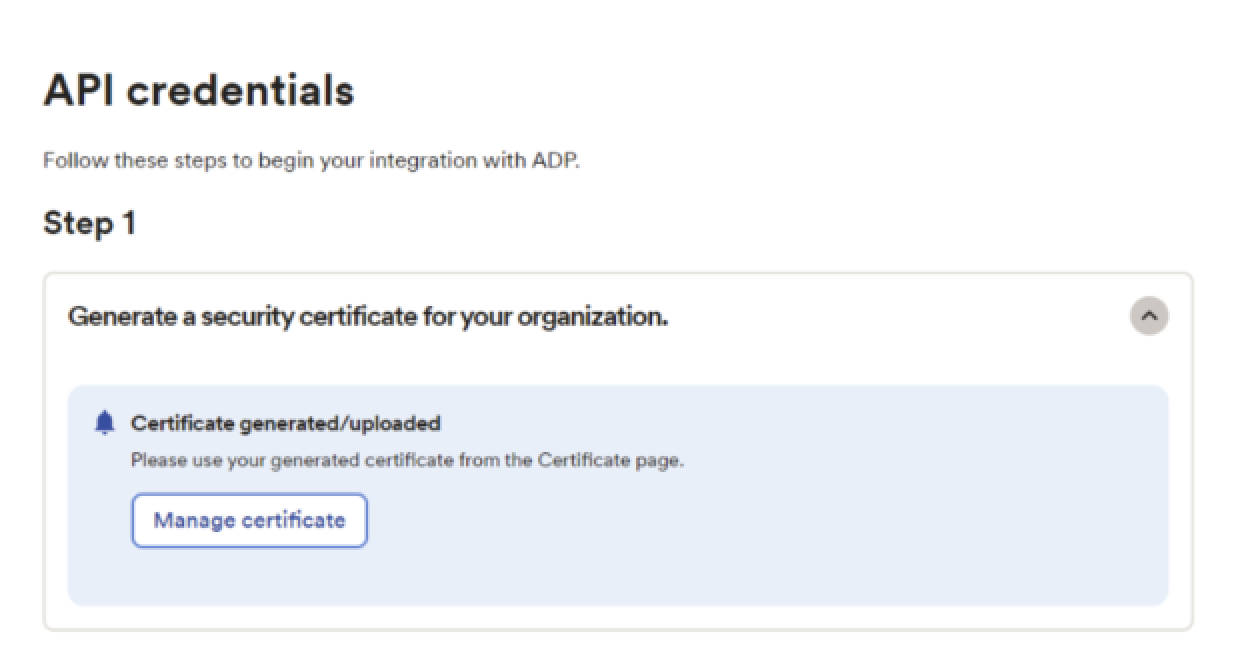
TIP: Copy the full content of each file, including the -----BEGIN ...----- and -----END ...----- headers.
Certificate expiry: the certificate is valid for two years from issuance. Replace it before it lapses by submitting a new certificate signing request in ADP API Central, then updating the Client Certificate and Client Key fields in Vault (Step 6). The connection stops working once the certificate expires. ADP emails the person who created the certificate, along with the project's users, as the expiry date approaches, so make sure those addresses are monitored.
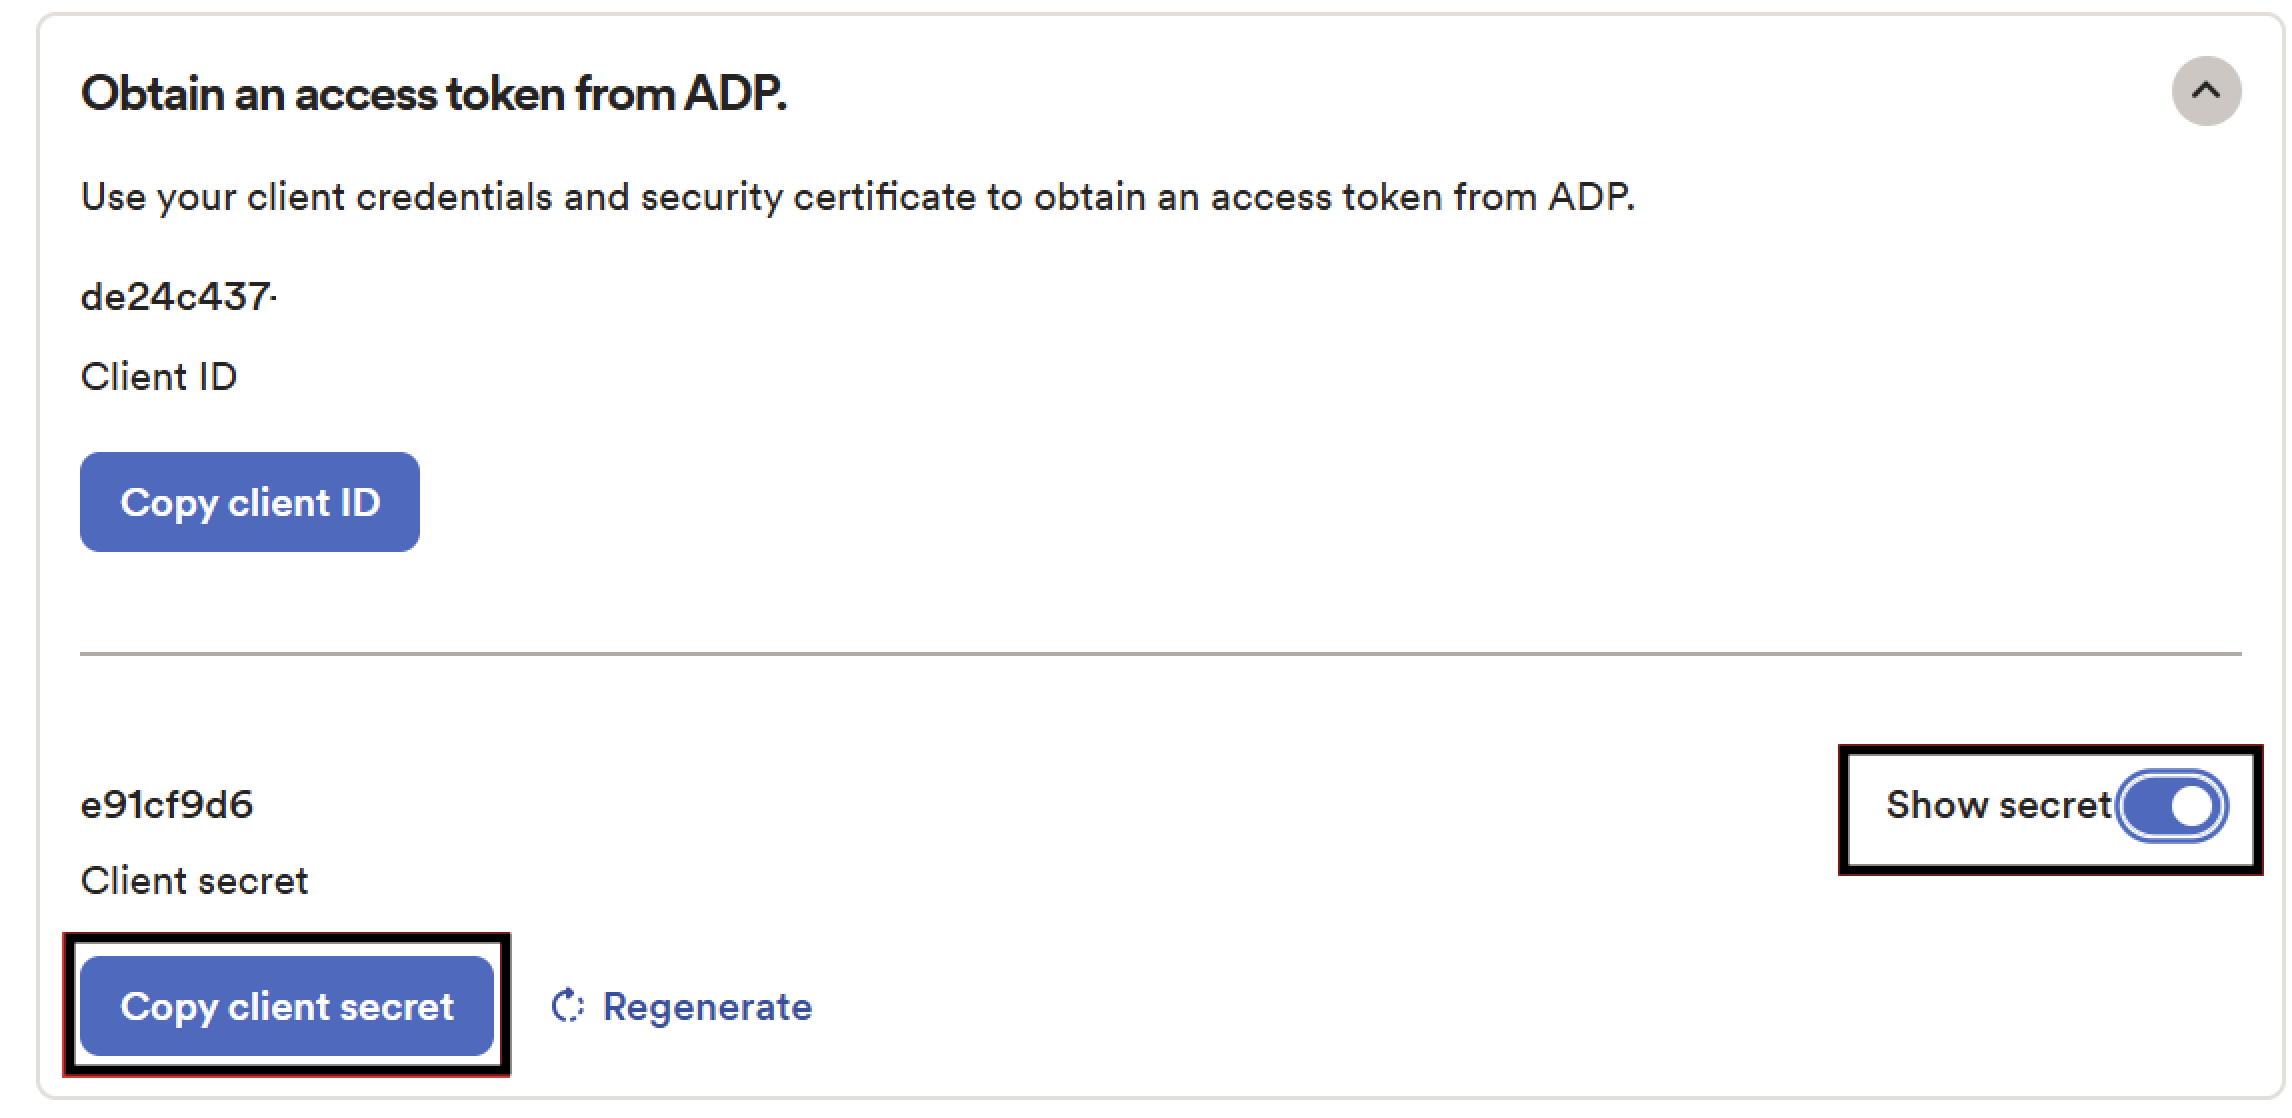
Step 5: Copy your Client ID and Client Secret
In your project's settings, you will find your Client ID and Client Secret. Copy both — you will need them in the next step.
Step 6: Enter credentials in Vault
- You will receive a Vault connection link from the application you are connecting to.
- Open the link and select ADP Workforce Now.
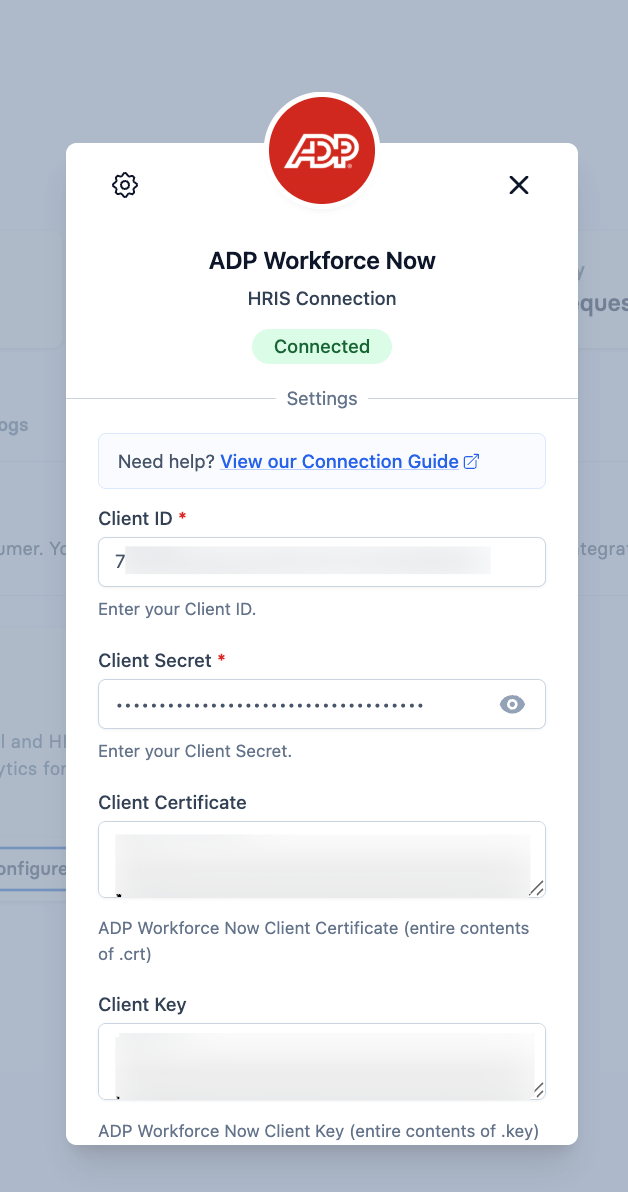
- Enter the following:
- Client ID: from Step 5
- Client Secret: from Step 5
- Client Certificate: paste the full content of the certificate file from Step 4
- Client Key: paste the full content of the private key file from Step 4
- Click Save. The connection status should change to Connected.
Trouble Authenticating
If you are having trouble connecting:
- Verify that your Client ID and Client Secret are correct.
- Ensure the certificate and key content includes the full PEM headers (
-----BEGIN ...-----and-----END ...-----). - Check that the use case selected in your ADP API Central project includes the required permissions.
- Try regenerating your certificate in ADP API Central if the existing one has expired. Certificates are valid for two years, so a connection that worked for a long time and then stopped is often an expired certificate.
403 Invalid Scopeon employee, single employee or time-off requests: the connection itself is fine, but the ADP API Central project is missing the Workers API. Add it to the project (see Step 2) and retry. This is the most common cause of reads failing straight after a successful connection.- Contact ADP support for further assistance with your project, permissions or certificate.
- If the credentials are accepted by ADP but the connection still will not save, contact Apideck Support.