Magento – Connection Guide
Magento is the premier open source e-commerce app used by millions of customers each and every day.

How to connect to Magento
To create a connection with Magento, you need to create an 'Integration' by completing the following steps.
Note: This looks like a lot of steps, but they are all quite simple and we're providing screenshots of each to make it as clear as possible.
Creating a new Magento Integration
- After you've signed in as an Admin, from the left menu, select System > Extensions > Integrations.

- Select Add New Integration.

- Enter a Name and Email for the integration and enter your admin password. Note: The callback and identity URL should be left blank.

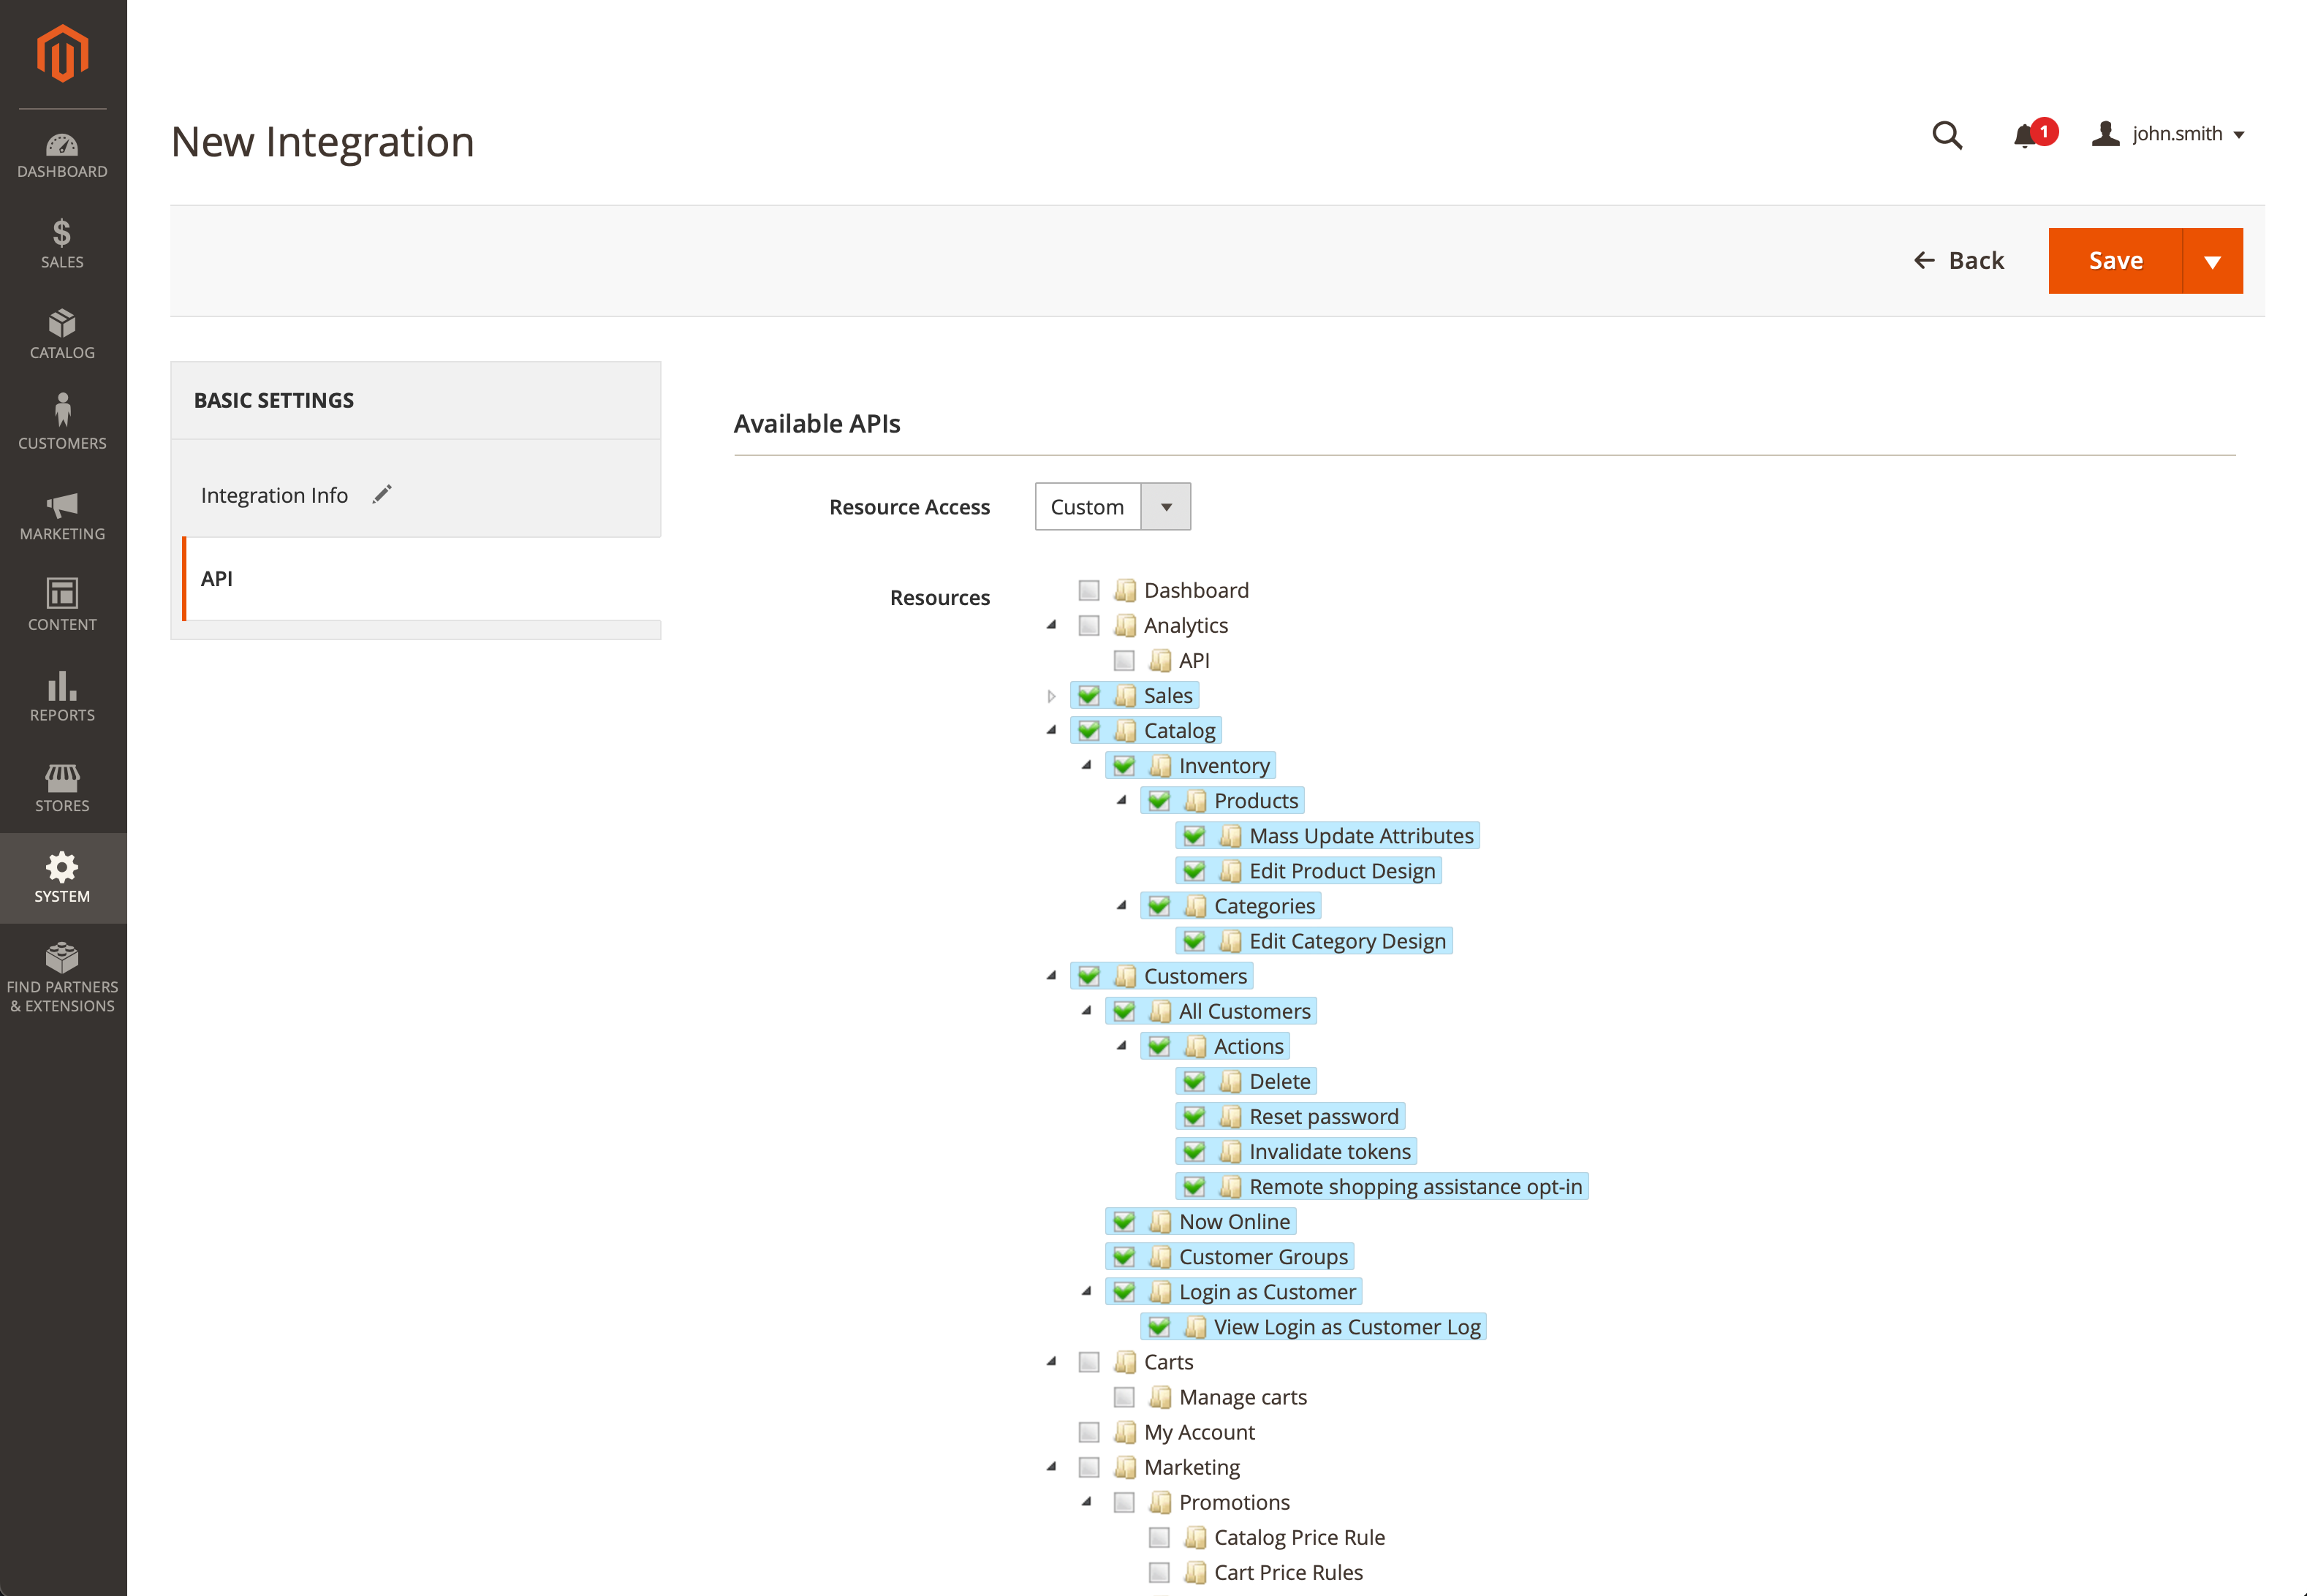
- Before clicking Save, you'll need to select Basic Settings > API to configure the integration permissions. From this view you'll need to ensure that the following permissions are selected:
- Sales
- Catalog
- Customers
These permissions are required to pull Order and Customer data from Magento.
- Now that your integration has been created, it needs to be Activated by clicking the
Activatelink in the table.

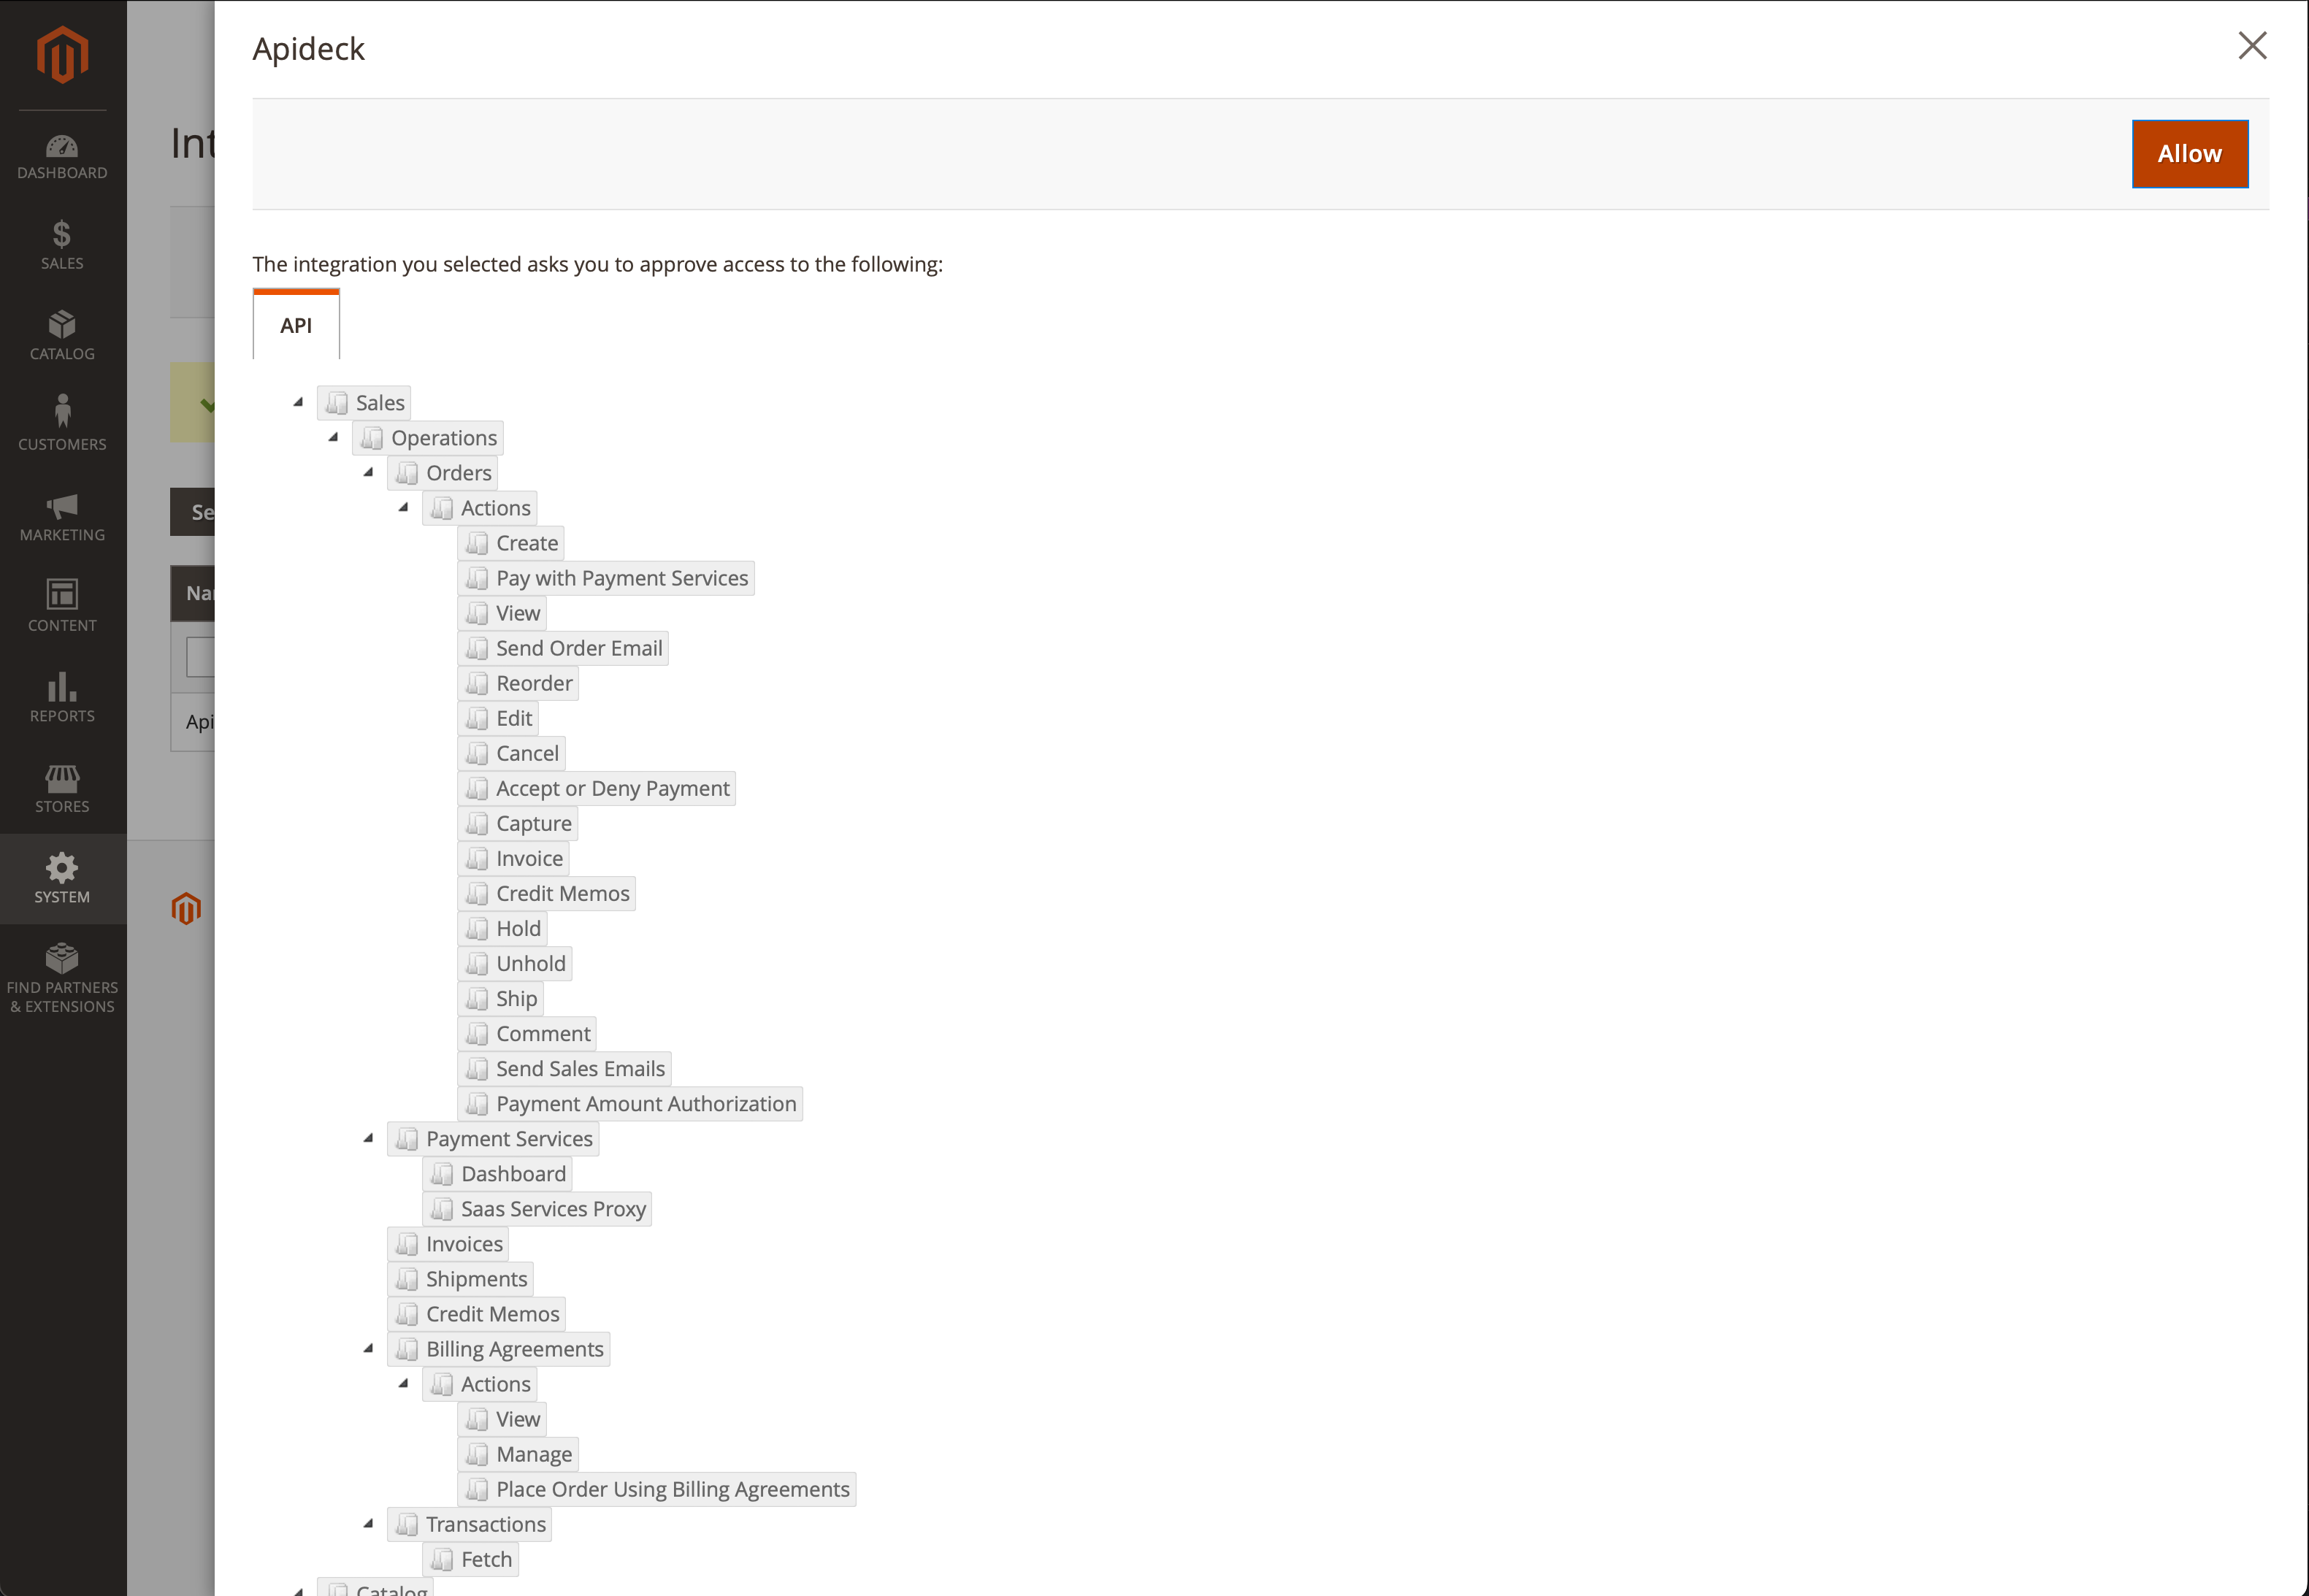
- Enable permissions by review the permissions you've assigned and click Allow.
- Now that your integration has been Activated, you'll be presented with the Consumer Key, Consumer Secret, Access Token, and Access Token Secret. These are the credentials you'll use to connect to Magento.

Vault Connection Setup
Now that you've created the Integration setup with access to your Magento data, you can fill out your credentials in Vault.
Add a Shop Name and the domain that hosts your Rest API. Please note, the domain should not include the /rest/V1/ suffix as this is added automatically.
Then add each of the tokens provided by Magento to their respective fields.

Click Save after completing the form. If the all fields are correctly entered, it will validate the connection credentials and indicate it is now connected.

Your Magento Integration is now connected 🎉.
Troubleshooting: no data returned
If your Magento connection shows as connected in Vault but list calls (e.g. products, orders) return no data — or fail intermittently with 403, 401, or 400 — the request is most likely being blocked by a security layer in front of your store, before it reaches Magento's REST API. This is not an Apideck or credentials problem.
How to recognize an edge block
- The error body is HTML or plain text, not Magento's usual JSON error envelope. An HTML page means the request never reached Magento's API.
- The response headers name an edge layer:
server: cloudflarewith acf-rayid (blocked at Cloudflare), sometimes with awww-authenticate: BASICchallenge (an HTTP Basic-auth gate in front of the API) or CDN/commerce-platform session cookies. - A direct call from your own machine to the same URL (e.g.
https://yourstore.com/rest/V1/products?...) returns the same block — confirming it happens at your store's edge, independent of Apideck. - Note: a
504or Cloudflare520is different — those point at your origin/host being slow or unreachable (share the Cloudflare Ray ID with your hosting provider to pull the server logs).
How to fix it
-
Allowlist Apideck's static egress IPs on your firewall / Cloudflare, or add a "skip / allow" rule scoped to the Magento REST paths
/rest/V1/*(and/rest/*). Apideck's EU (eu-central-1) egress IPs are:18.197.244.24718.156.9.33.65.139.215
These are Apideck's current EU (
eu-central-1) egress IPs; support for other regions is upcoming. If you need to confirm the latest list for your region, contact Apideck Support. -
Check which rule fired. In Cloudflare, open Security → Events and search for the
cf-rayvalue from the error — it names the exact rule that blocked the request.
Important: allowlisting IPs is not always enough
On Cloudflare, several protections still block an allowlisted IP. If requests are still blocked after allowlisting, check these:
- Bot Fight Mode — cannot be bypassed by IP rules or a WAF skip; turn it off or scope it away from
/rest/*. - Browser Integrity Check — blocks non-browser clients by User-Agent; disable it for
/rest/*via Configuration Rules. - Managed / custom WAF rules on
/rest/*. - JA3/JA4 TLS fingerprinting and rate limiting.
Why the connection still shows "connected"
Apideck relays your store's error exactly as received. A 403 is not retried automatically and does not mark the connection as disconnected — so the connection stays healthy while individual data calls fail. Because these edge blocks are often transient, retrying a little later frequently succeeds. To stop them recurring, apply the allowlist / rule changes above.