Microsoft Dynamics 365 Business Central – Configuration Guide
Microsoft Dynamics 365 Business Central is an enterprise resource planning (ERP) system focused on mid & large scale businesses.
How to Create OAuth Credentials for Microsoft Dynamics 365 Business Central
This guide will help you set up your Microsoft Dynamics 365 Business Central OAuth app to connect with Apideck and start using the Accounting API.
Prerequisites
Before you begin, make sure you have:
- A Microsoft developer account - Sign up at Microsoft Developer
- Access to the Microsoft Entra admin center with at least Cloud Application Administrator permissions
- An Apideck account
1. Enable the Microsoft Dynamics 365 Business Central connector in Apideck
- Navigate to the Apideck Dashboard
- Go to Configuration > Accounting > Microsoft Dynamics 365 Business Central
- The connector will be available for configuration
2. Create OAuth App in Microsoft Entra
Access Microsoft Entra Admin Center
- Log in to the Microsoft Entra admin center as at least a Cloud Application Administrator
- If you have access to multiple tenants, use the Settings icon in the top menu to switch to the tenant in which you want to register the application from the Directories + subscriptions menu
- Navigate to Home > App registrations and select New registration

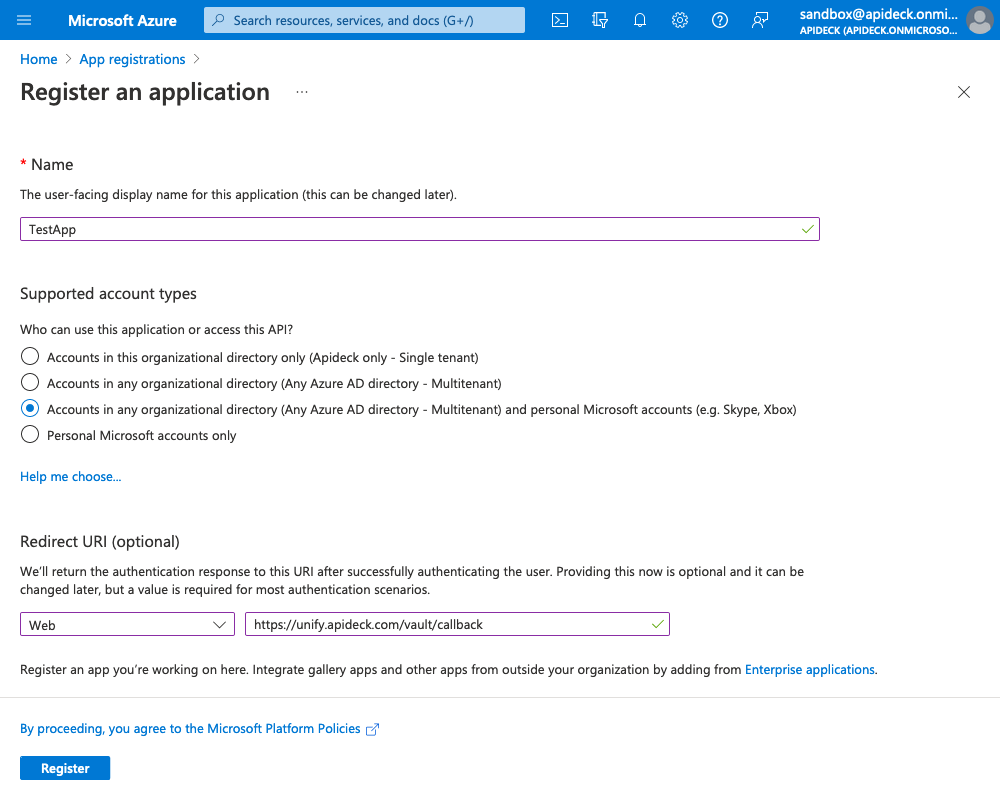
Configure Basic Information
On the Register an application page, enter your application's registration information:
-
Name - Enter a meaningful application name that will be displayed to users of the app
-
Supported account types - Select Accounts in any organizational directory and personal Microsoft accounts
-
Redirect URI - Enter exactly
https://unify.apideck.com/vault/callback -
When finished, select Register
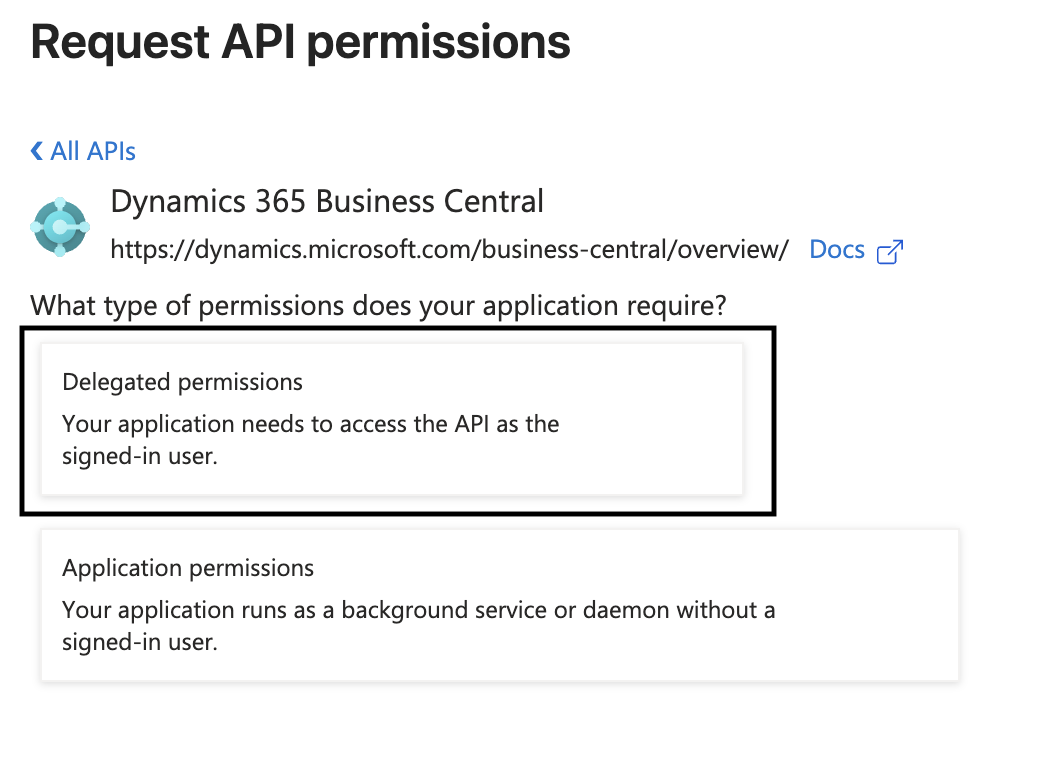
Add API Permissions
After your app is created, select API permissions in the sidebar.
-
Select Add a permission > Dynamics 365 Business Central > Delegated Permissions and choose:
user_impersonationFinancials.ReadWrite.All
-
Select Add a permission > Dynamics 365 Business Central > Application Permissions and choose:
app_accessAdminCenter.ReadWrite.AllAPI.ReadWrite.AllAutomation.ReadWrite.All
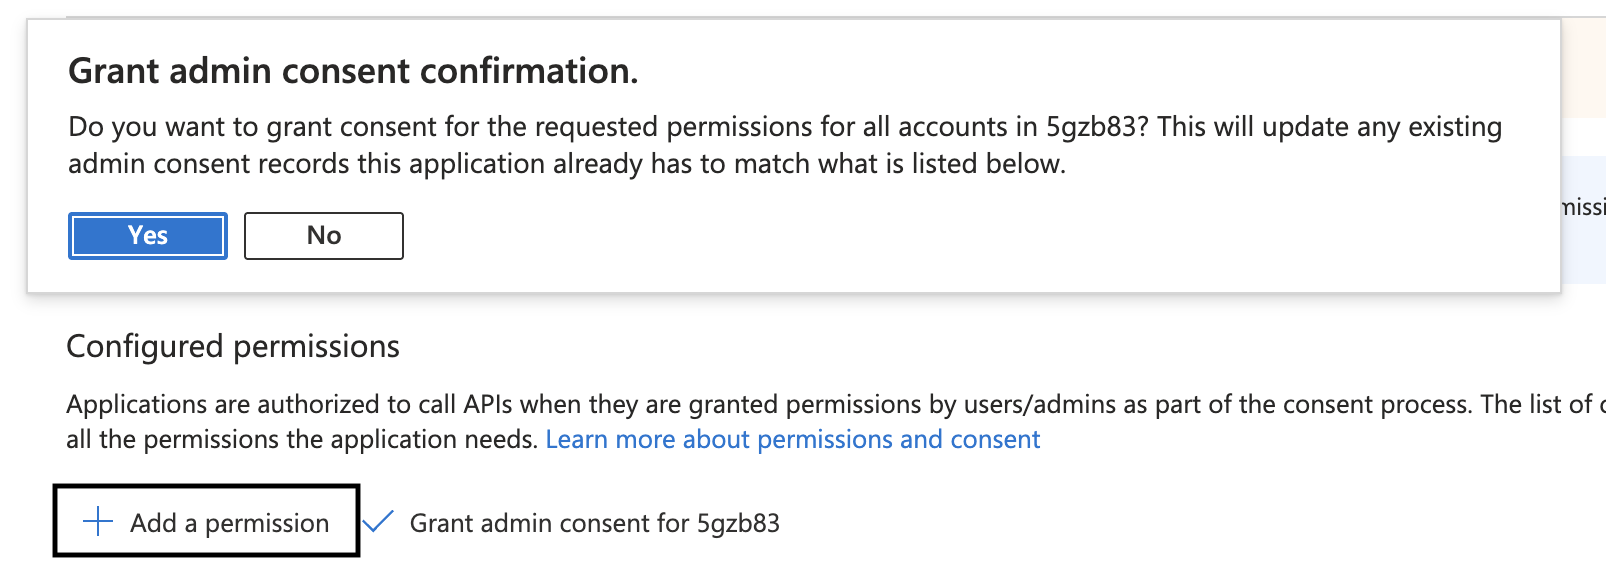
- Grant admin consent for the permissions by clicking Grant admin consent for [Your Organization]
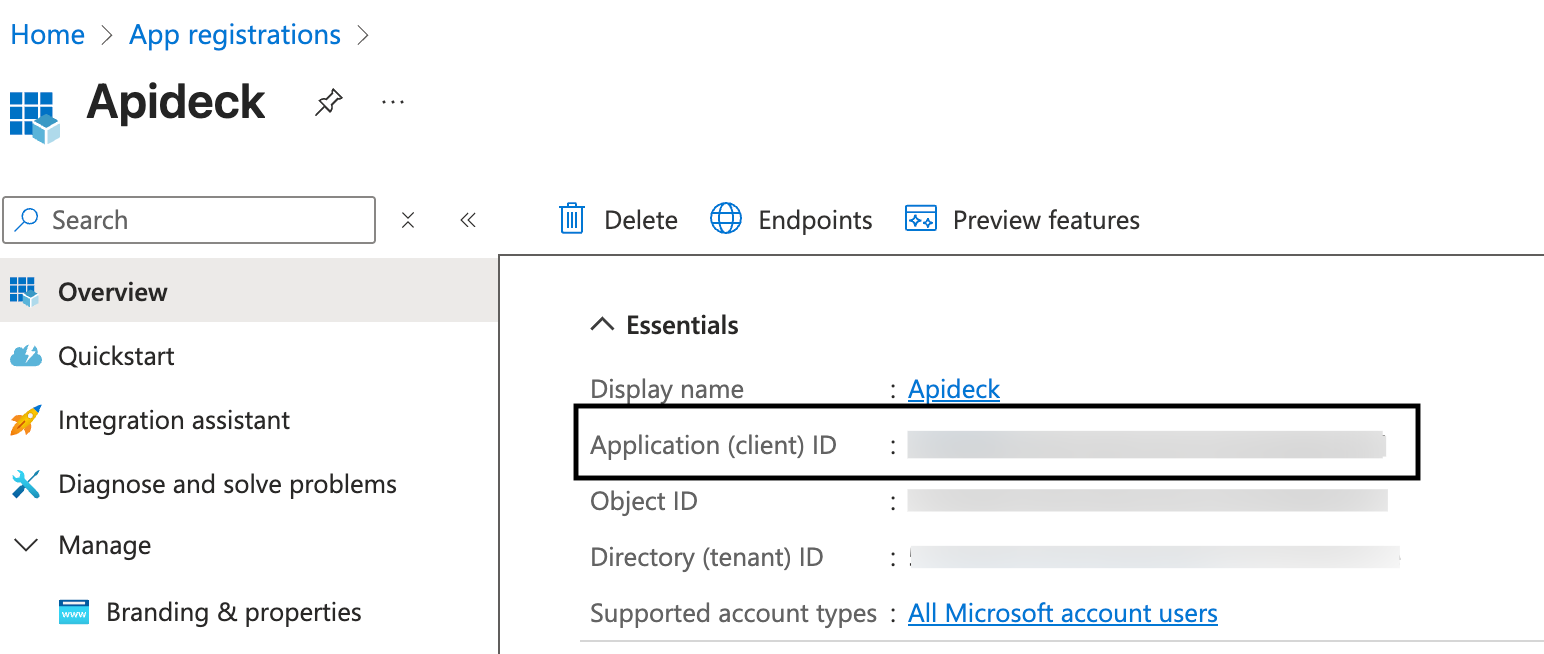
Get Your Credentials
Get Client ID
- On the Overview page of your app, locate the Application (client) ID
- Copy the Client ID - you'll need this for Apideck configuration
Create Client Secret
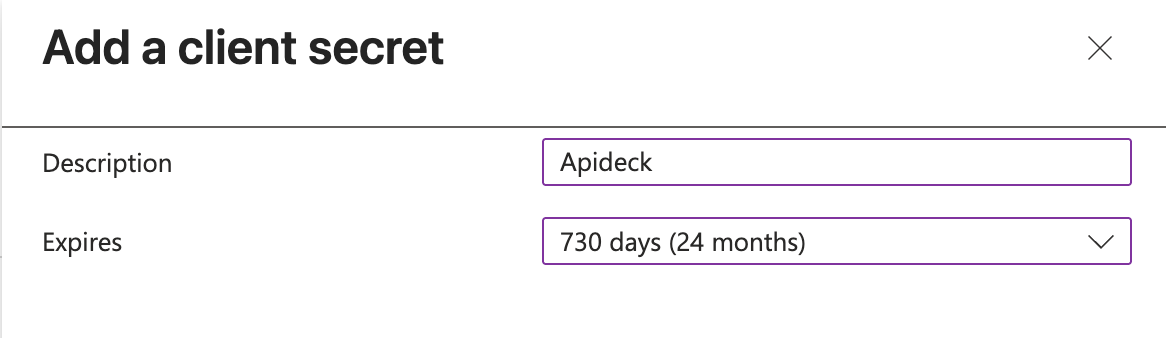
- Go to Certificates & secrets > Client secrets and select New client secret
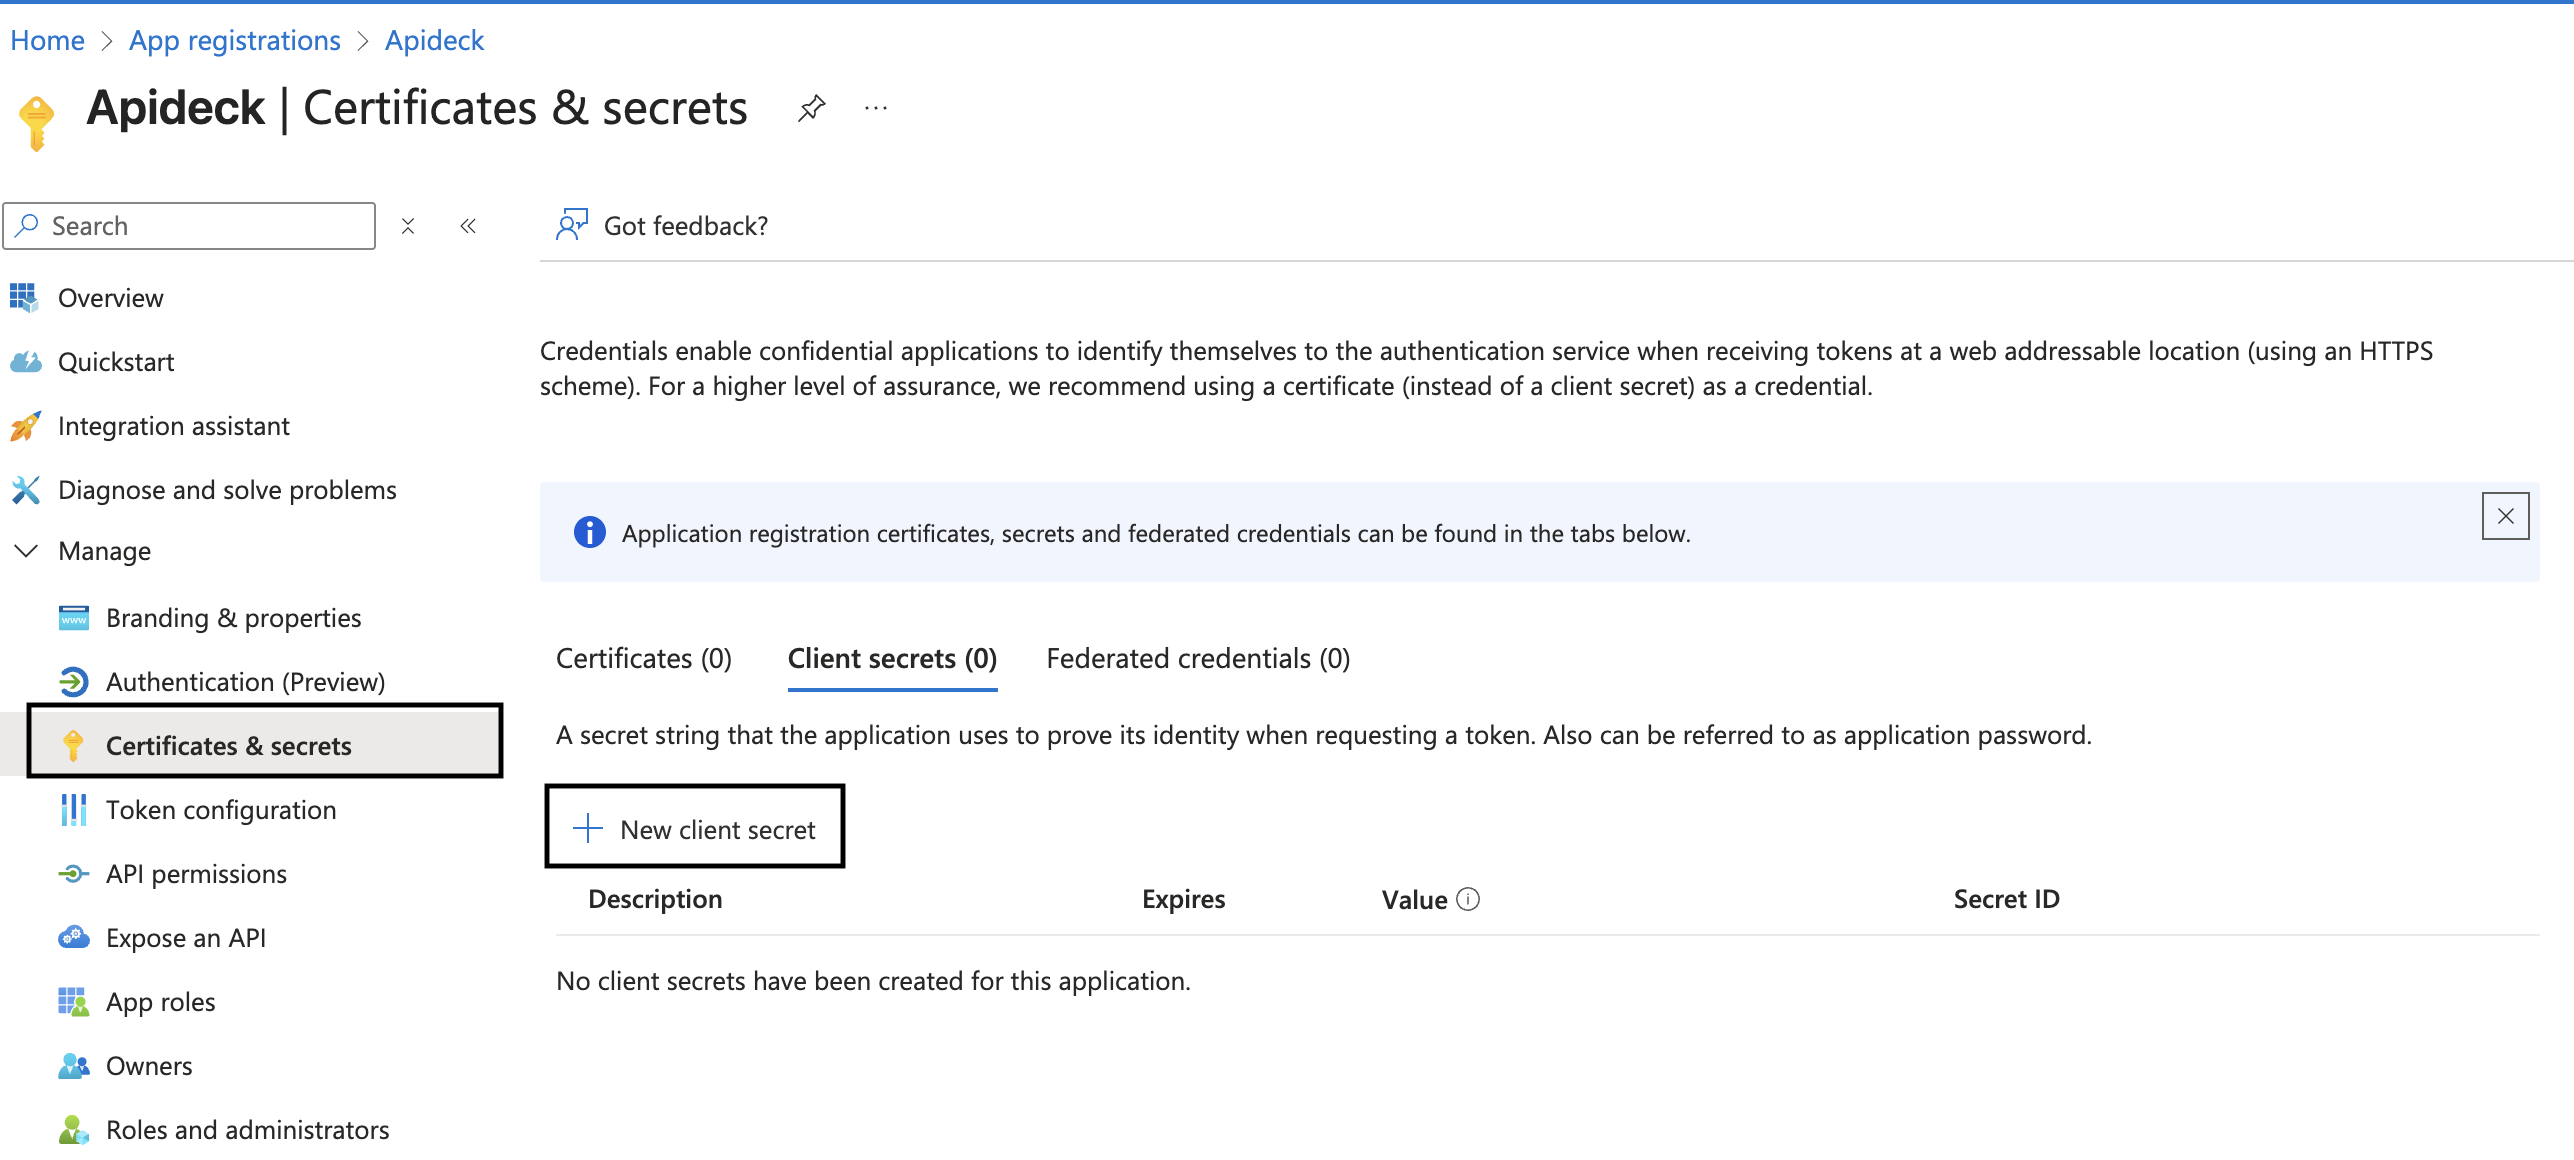
- Enter a description and select an expiry time. Client secret lifetime is limited to two years (24 months) or less. You can't specify a custom lifetime longer than 24 months
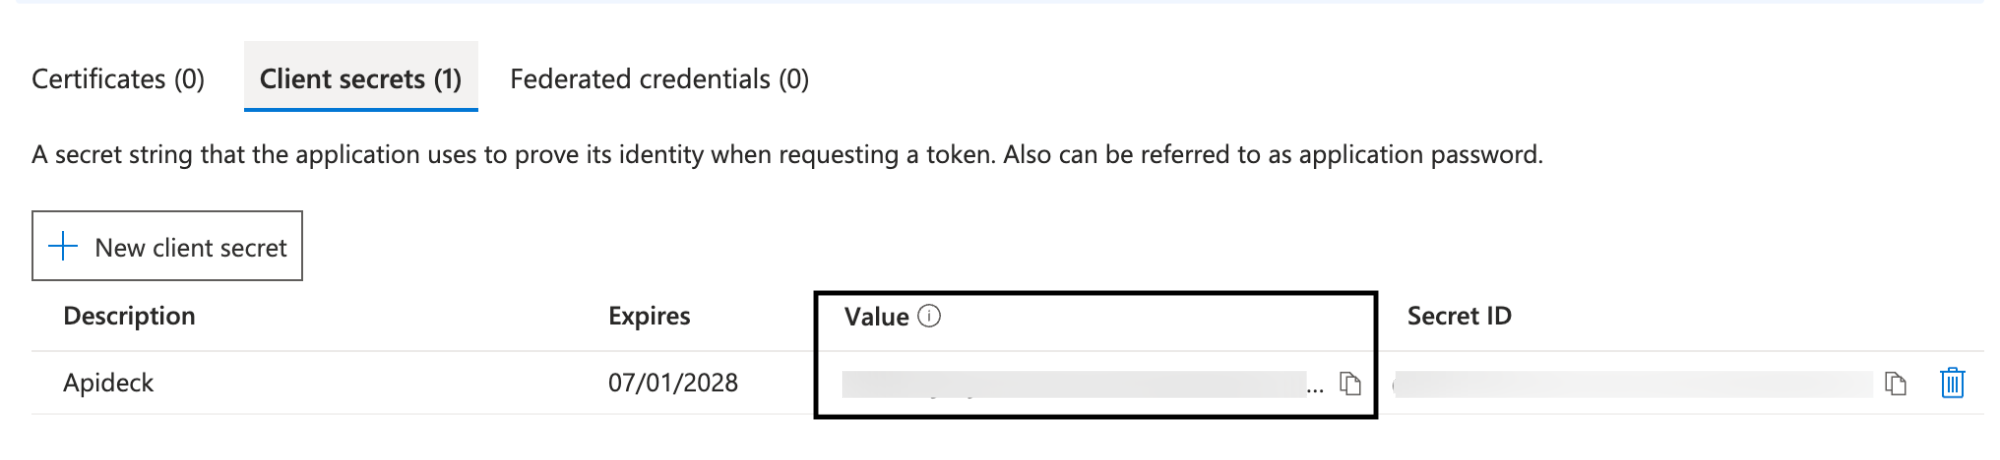
IMPORTANT: After the secret is generated, you'll see both a Secret ID and a Value.
- Copy the VALUE only - this is what you'll use as your Client Secret in Apideck
- The Value is shown once and cannot be retrieved after you leave this page
- Do not use the Secret ID - that's different from the Value you need
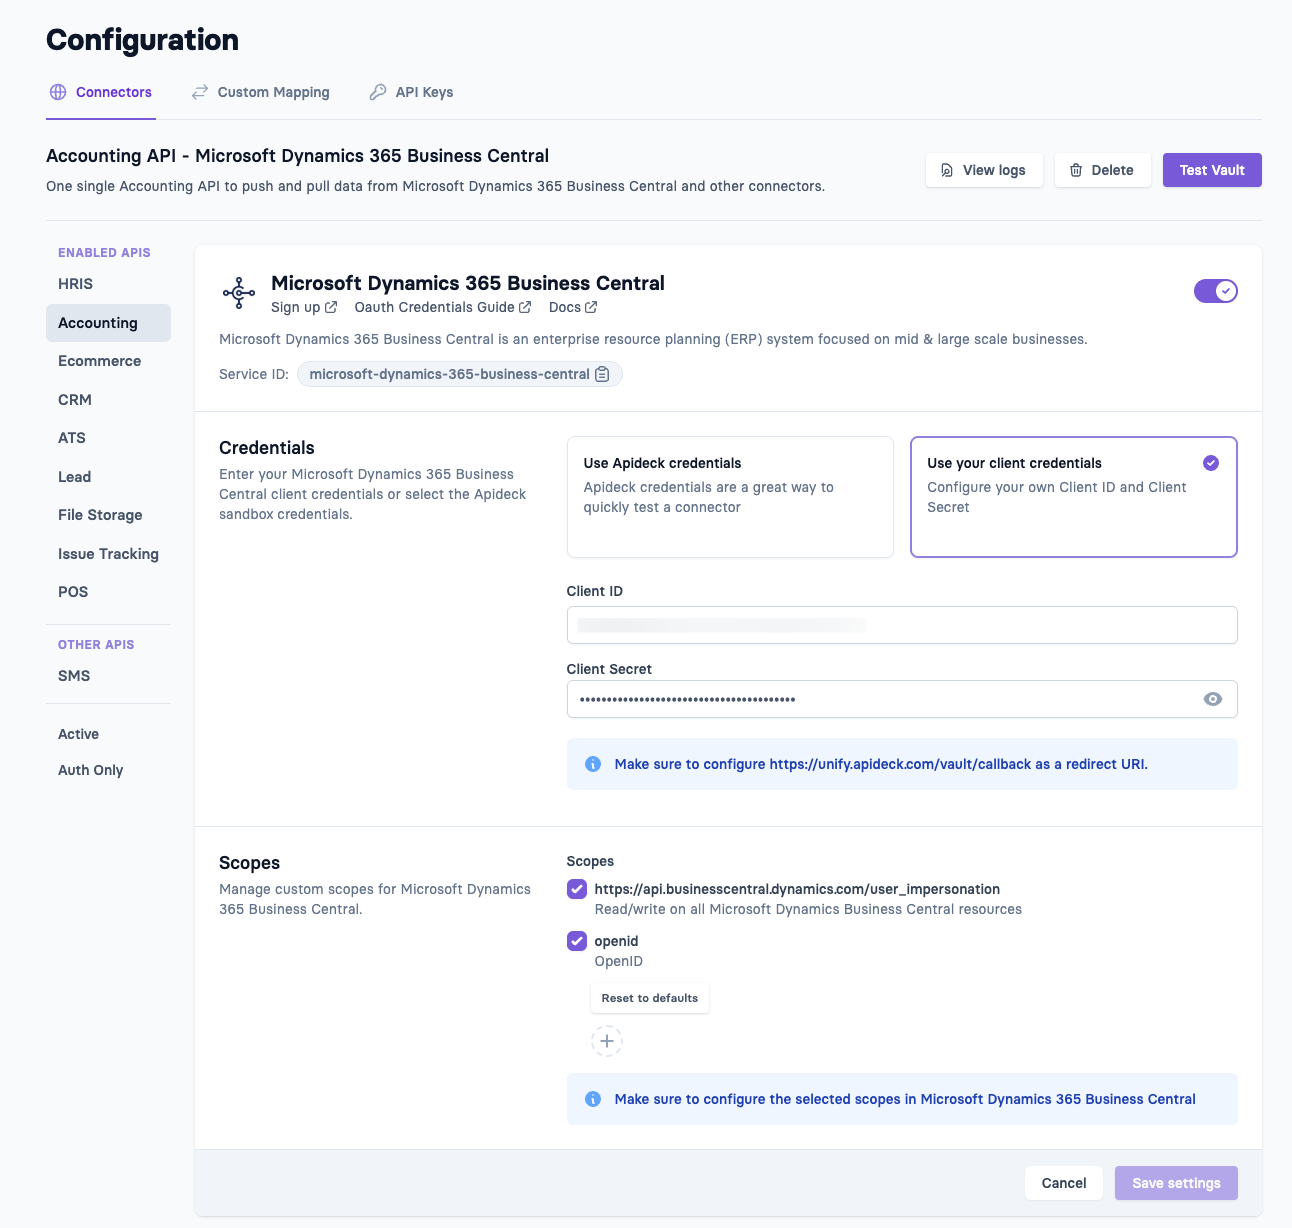
3. Configure the Microsoft Dynamics 365 Business Central connector in Apideck
- Navigate to the Microsoft Dynamics 365 Business Central connector configuration in the Apideck Dashboard
- Select the Use your client credentials option
- Enter your OAuth credentials:
- Client ID - Paste the Client ID from your Microsoft Entra app (from the Overview page)
- Client Secret - Paste the Value of the client secret from your Microsoft Entra app
- Review that the scopes granted in Microsoft Dynamics 365 Business Central match with the scopes you are requesting in Apideck
- Click Save settings to save your credentials
4. Test Your Connection
You can test your Microsoft Dynamics 365 Business Central connector by clicking Test Vault in the Apideck dashboard.
- Click Authorize to start the OAuth flow
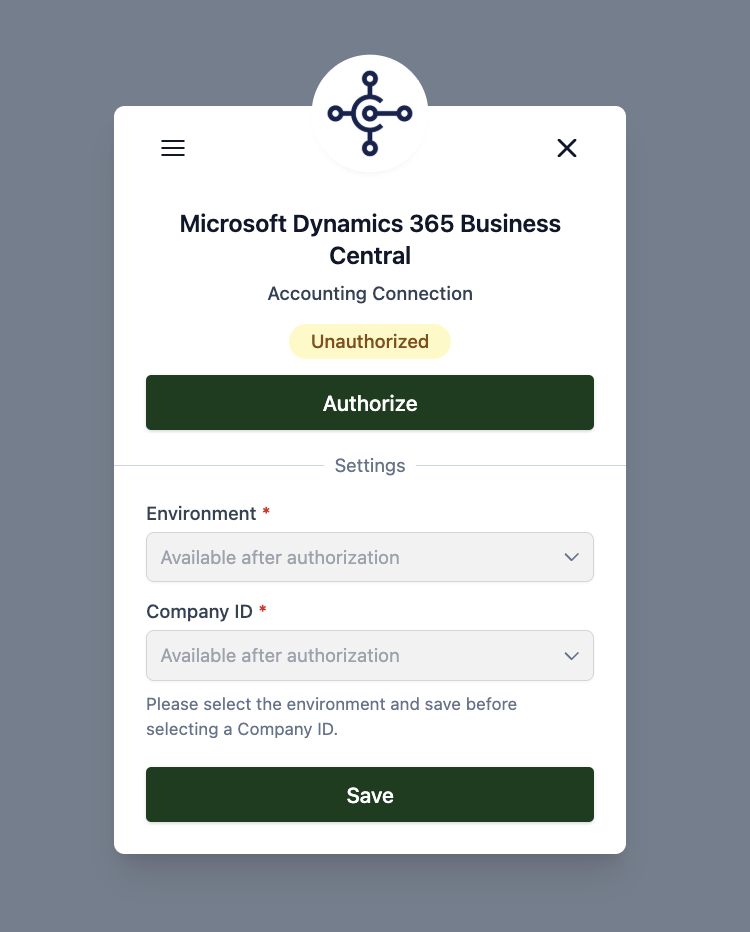
- You'll be redirected to Microsoft to grant permissions
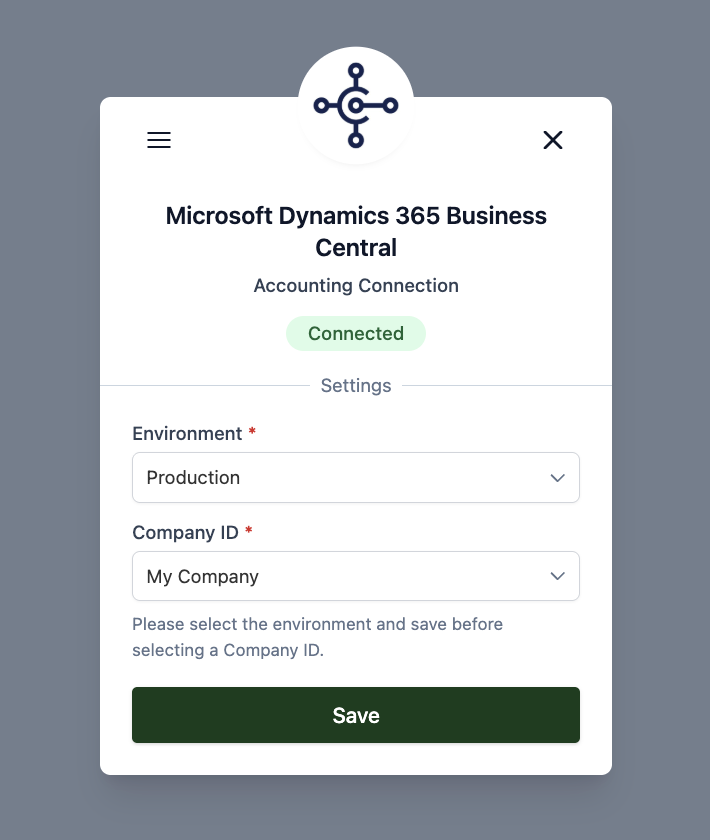
- After successful authorization, select the Environment and Company ID from the dropdown and Save the changes
- The connection will show as Connected
5. Do your first API call to the Accounting API
- Connect through Vault
- Test with this call:
Now your app and Microsoft Dynamics 365 Business Central integration are configured! 🎉
FAQ and troubleshooting
Vendor Posting Group Error When Creating Bills
When creating a bill in Business Central with a supplier created through the API, you may encounter this error:
This happens because Vendor Posting Group is a required field for vendors in Business Central, but it cannot be set through the API. Without it, the vendor cannot be used in bills.
To resolve this, you have two options:
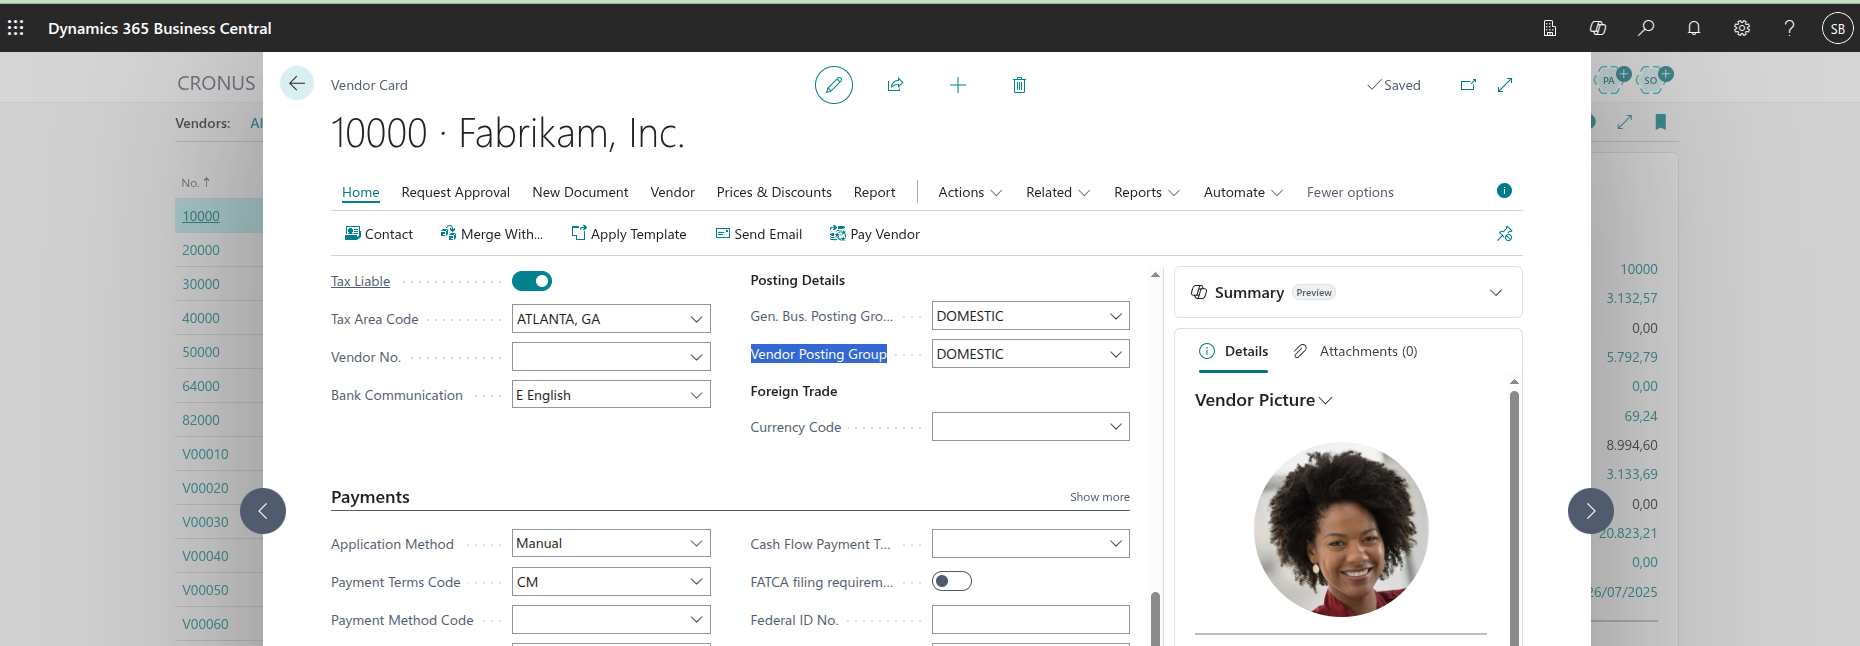
Option 1: Set the Vendor Posting Group manually via the UI
- Open Business Central and navigate to Vendors.
- Select the vendor created via the API.
- On the Vendor Card, locate the Vendor Posting Group field.
- Assign the correct posting group and save.
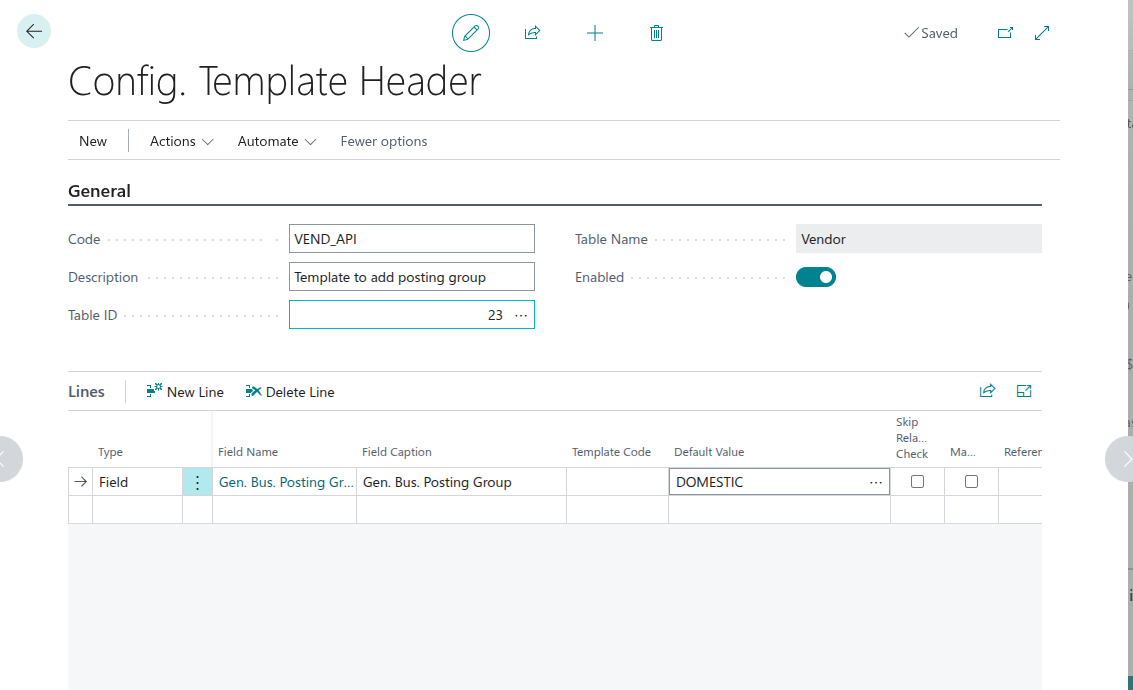
Option 2: Use a Vendor Template with a predefined Posting Group
- In Business Central, search for Templates and create a new template.
- Fill in the following key fields:
- Code: Give the template a code, e.g.
VEND_API. - Description: Add a meaningful description, e.g. Template to add posting group.
- Table ID: Select the vendor table.
- Enabled: Make sure the toggle is switched on.
- Code: Give the template a code, e.g.
- In the API Setup page, link this template so that vendors created via the API automatically inherit the posting group.
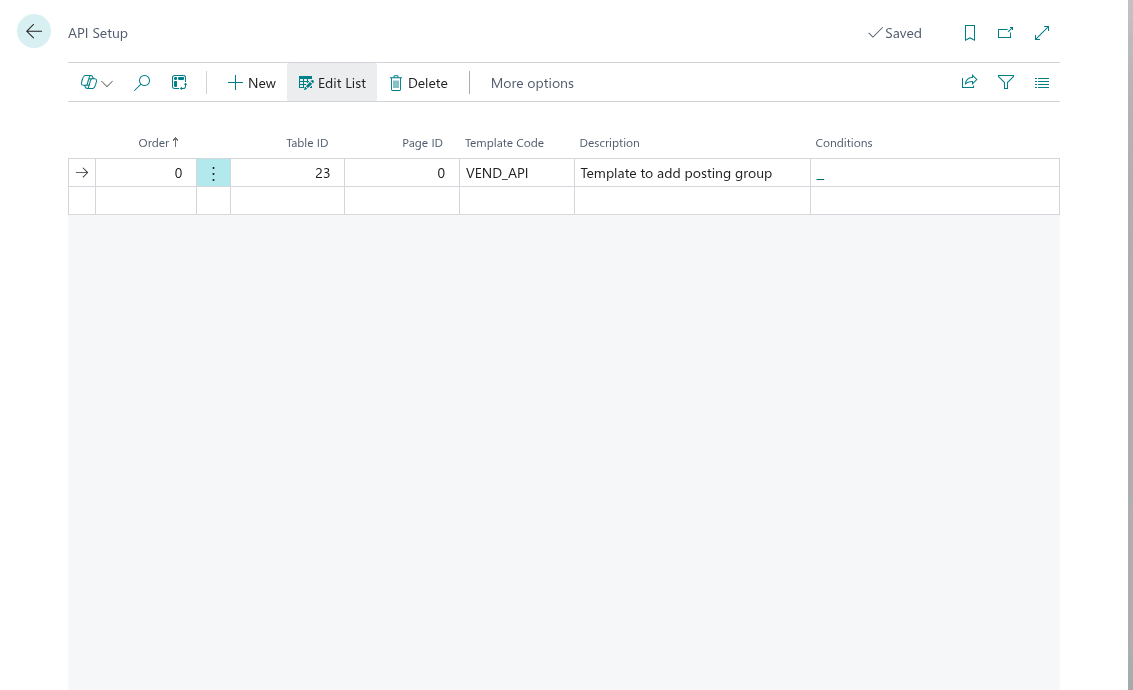
- Test by creating a new vendor through the API; the posting group should now be set automatically.
✅ By applying either of these methods, every supplier created through the API will have a valid posting group, allowing you to use them in bills without errors.
G/L Account Posting Group Errors When Creating Bills, Invoices, or Expenses
When creating a bill, invoice, or expense with a G/L Account line item, you may encounter one or more of these errors:
These errors occur because Business Central requires posting group fields to be configured directly on the G/L Account card used for the line item. These fields cannot be set through the API.
The exact fields required depend on your Business Central localization:
| Field | Required in | Controls |
|---|---|---|
| Gen. Posting Type | EU/UK tenants (VAT) | Classifies the account as Purchase or Sale for VAT purposes |
| Gen. Prod. Posting Group | All tenants | Revenue/cost account routing (General Posting Setup) |
| VAT Prod. Posting Group | EU/UK tenants (VAT) | VAT calculation (VAT Posting Setup) |
| Tax Group Code | US/Canada tenants (Sales Tax) | Sales tax calculation |
How to configure posting groups on a G/L Account
- In Business Central, open the Chart of Accounts.
- Find and open the G/L Account used for bill, invoice, or expense line items.
- Go to the Posting tab (or expand the Posting FastTab).
- Set the Gen. Prod. Posting Group field to an appropriate group (e.g.,
MISC,SERVICES). - Set the tax field for your localization:
- EU/UK tenants: set Gen. Posting Type to
Purchase, then set VAT Prod. Posting Group (e.g.,STANDARDfor the standard VAT rate). - US/Canada tenants: set Tax Group Code (e.g.,
SUPPLIES,NONTAXABLE).
- EU/UK tenants: set Gen. Posting Type to
- Save the account card.
For bills and invoices, Business Central automatically inherits these values onto purchase lines when the account is selected.
For expenses (journal-based), Business Central copies Gen. Posting Type from the account card when a journal line is created. If you configure posting groups on an account after expenses have already been created as drafts, those existing draft journal lines will not be updated — they will still have a blank Gen. Posting Type and will fail to post. In that case, delete the draft expense and recreate it so new journal lines are created with the correct values inherited from the account card.
Note: These are Business Central tenant configuration requirements. These fields on G/L Accounts are not exposed in the Business Central v2.0 API and cannot be set programmatically.
✅ After configuring the posting groups on the G/L Account, bills, invoices, and expenses using that account as a line item will post successfully.